The AutoCount Integrator Plugin is designed to facilitate seamless integration between AutoCount and external business systems, such as CRMs, inventory management software, and other enterprise applications. By syncing data in real-time, this plugin enhances workflow efficiency, reduces manual data entry, and ensures that all business systems are consistently updated.
The AutoCount Integrator Plugin allows businesses to automate the transfer of data between AutoCount and other third-party software. It supports bi-directional data syncing, real-time updates, and ensures consistency across systems, making it easier for businesses to manage their operations.
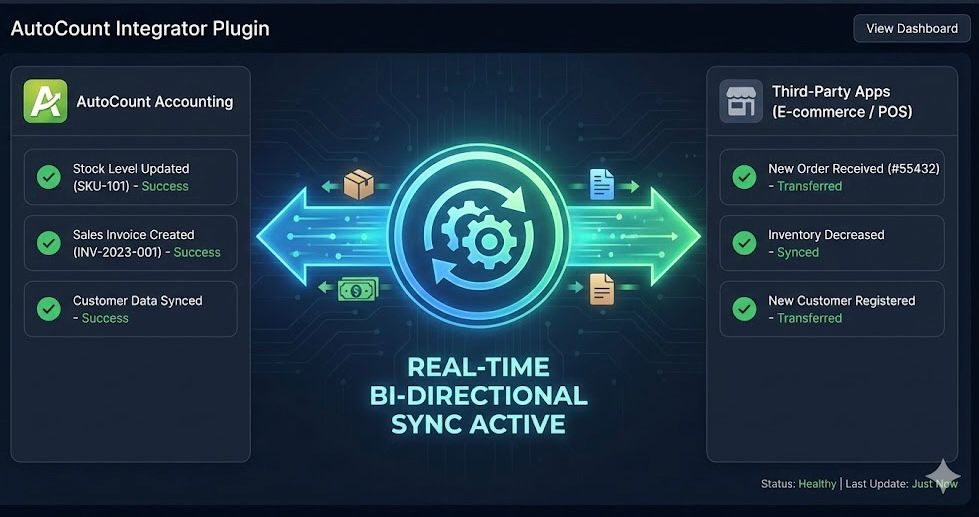
In businesses with multiple systems, it is crucial to maintain accurate, real-time data across all platforms. The AutoCount Integrator Plugin automates the syncing of data between AutoCount and external systems, which:
Sync data between AutoCount and external systems instantly. Supports bi-directional syncing for seamless data exchange.
Easily integrate AutoCount with various external applications like CRM, ERP, and eCommerce systems. User-friendly setup and configuration for flexible integrations.
Map data fields between AutoCount and external systems. Transform data formats to match the destination system’s requirements.
Automatically handles data sync errors and provides clear error messages for troubleshooting.
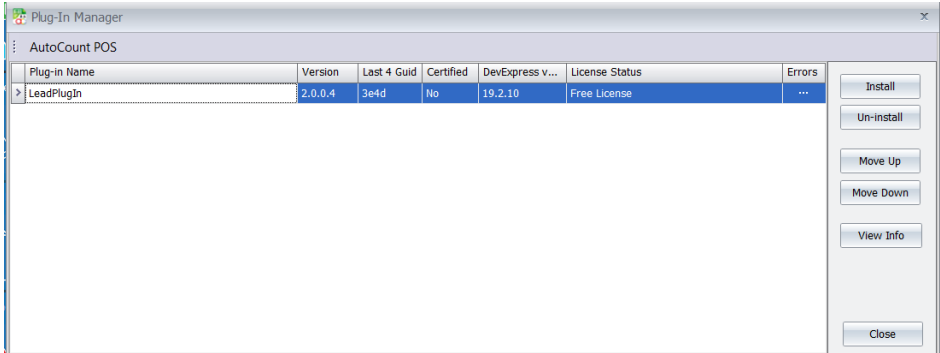
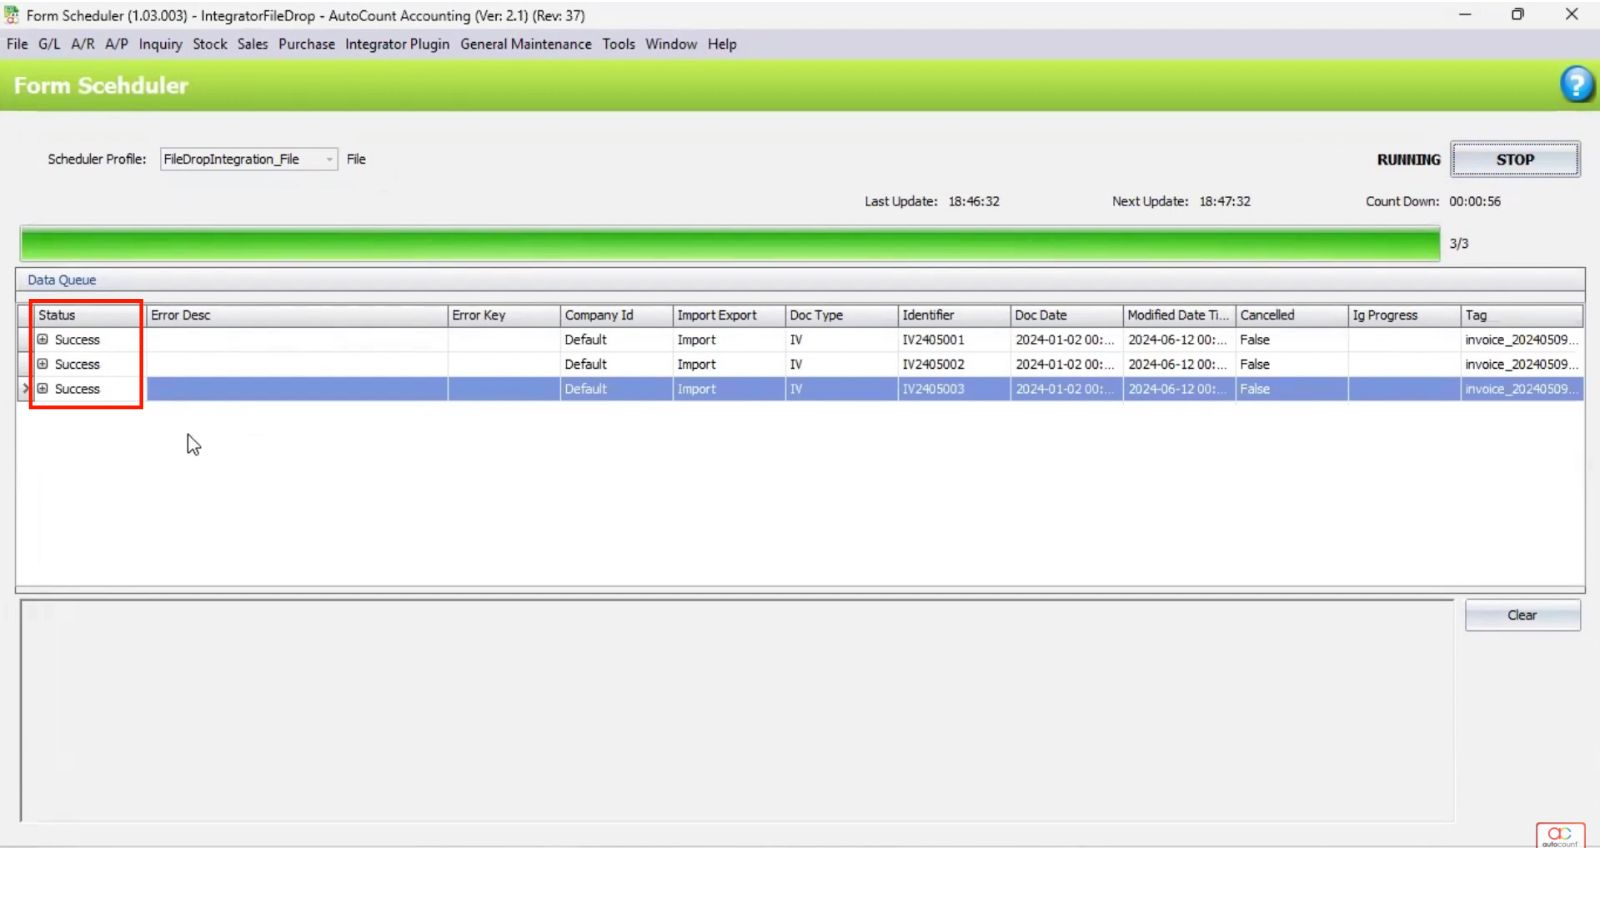
A success message will appear, confirming the plugin has been installed correctly.

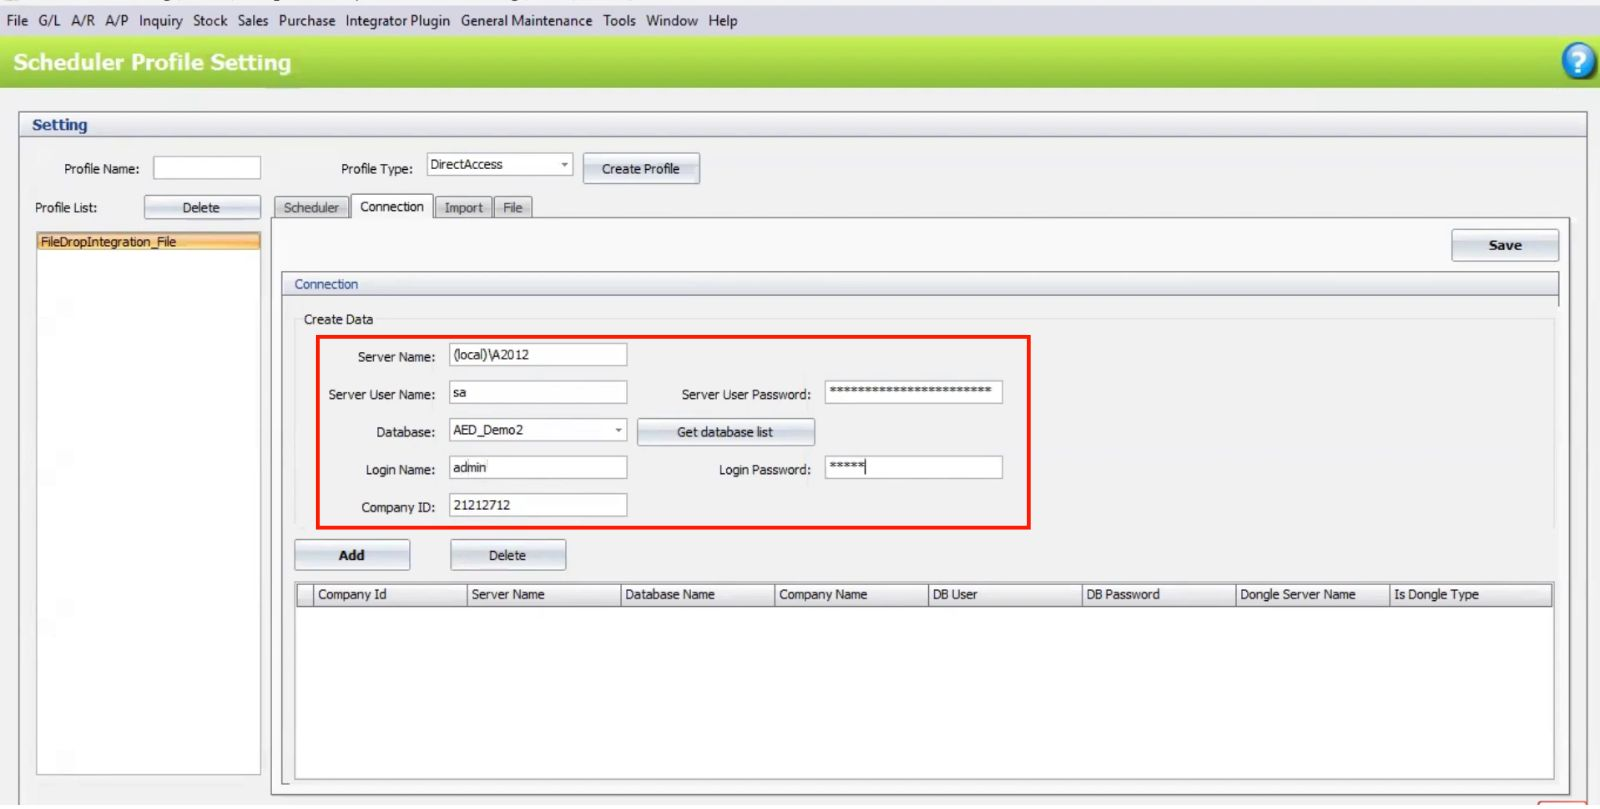
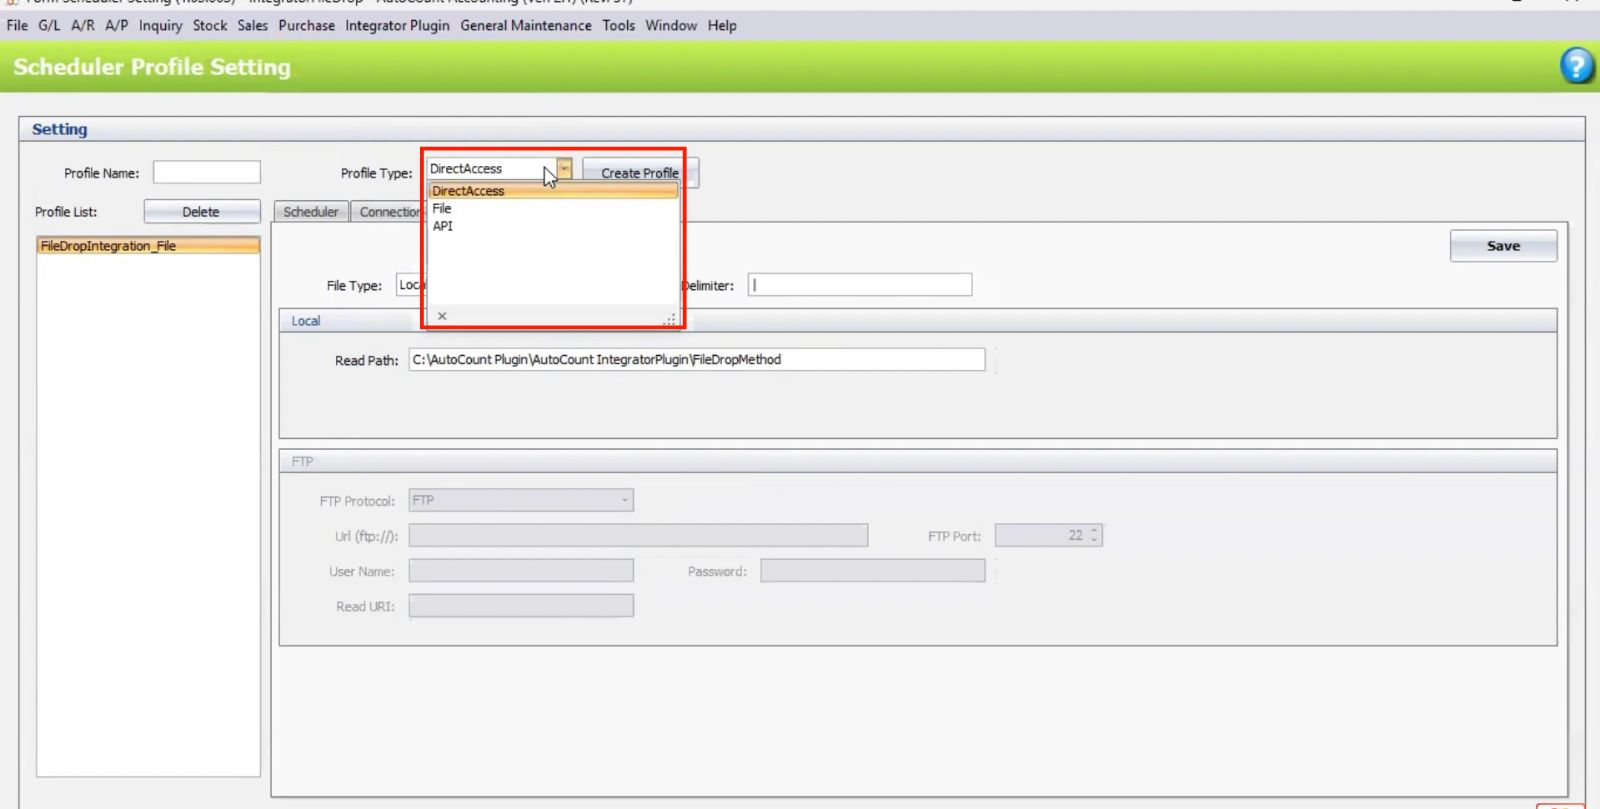
Choose between File Drop, API, or Direct Access depending on your integration setup.
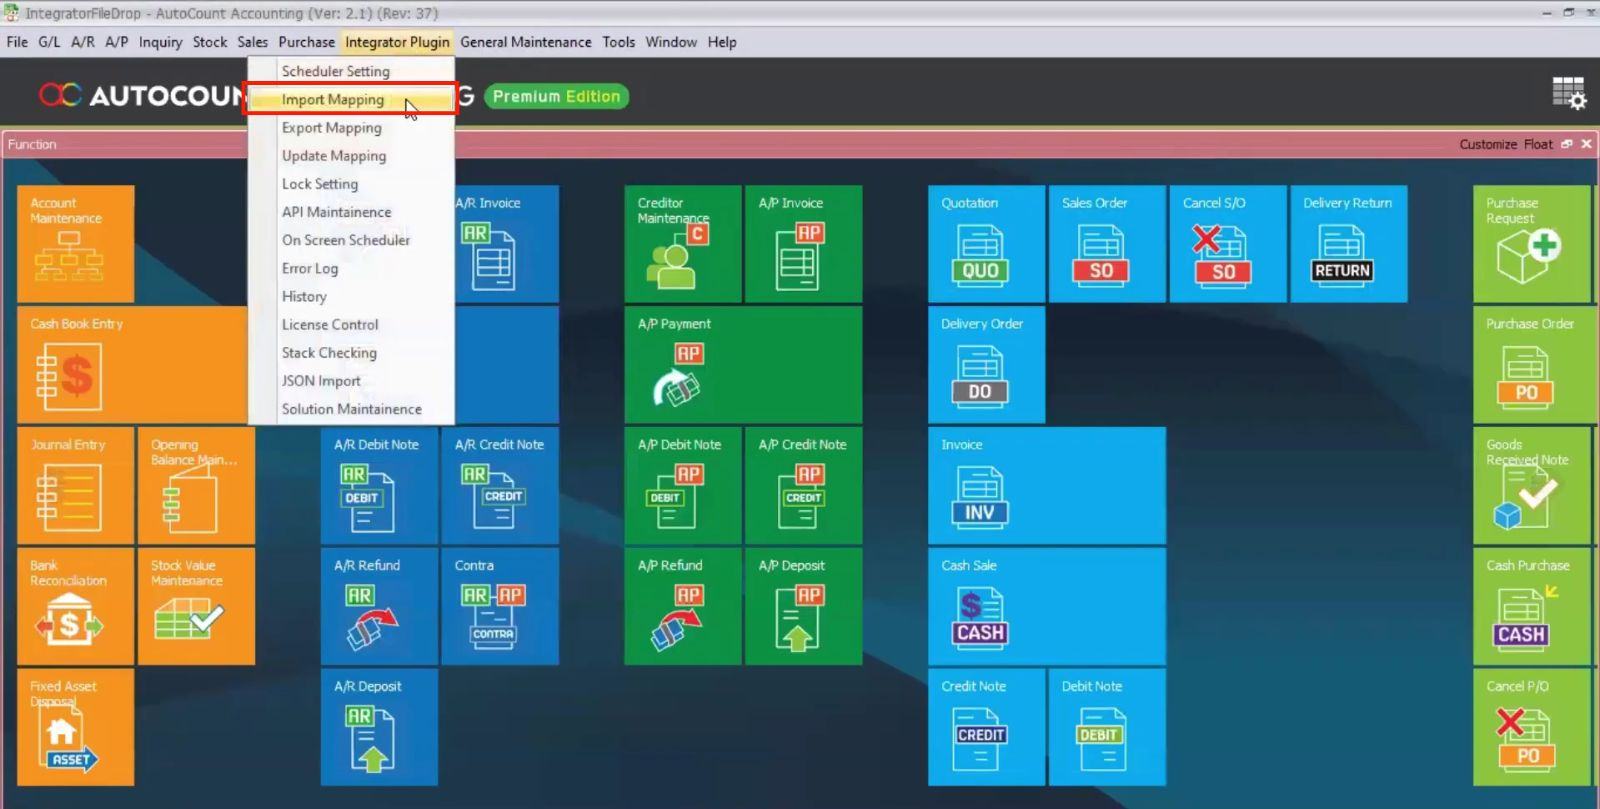
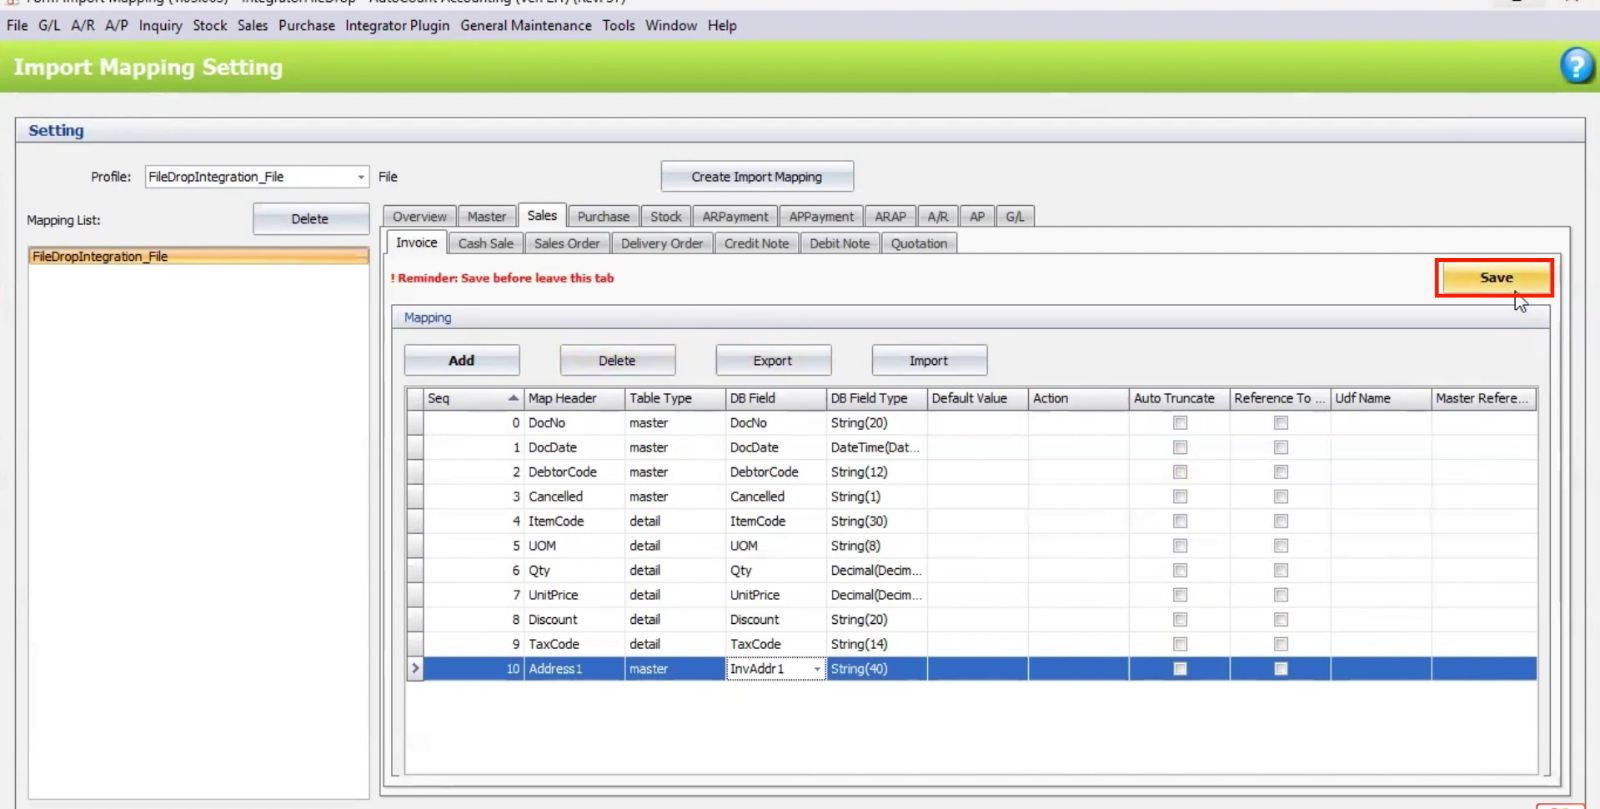
Go to Import Mapping.
Map the source file fields (e.g., Customer Code, Item Code) to corresponding fields in AutoCount.
Save the mapping template for future use.
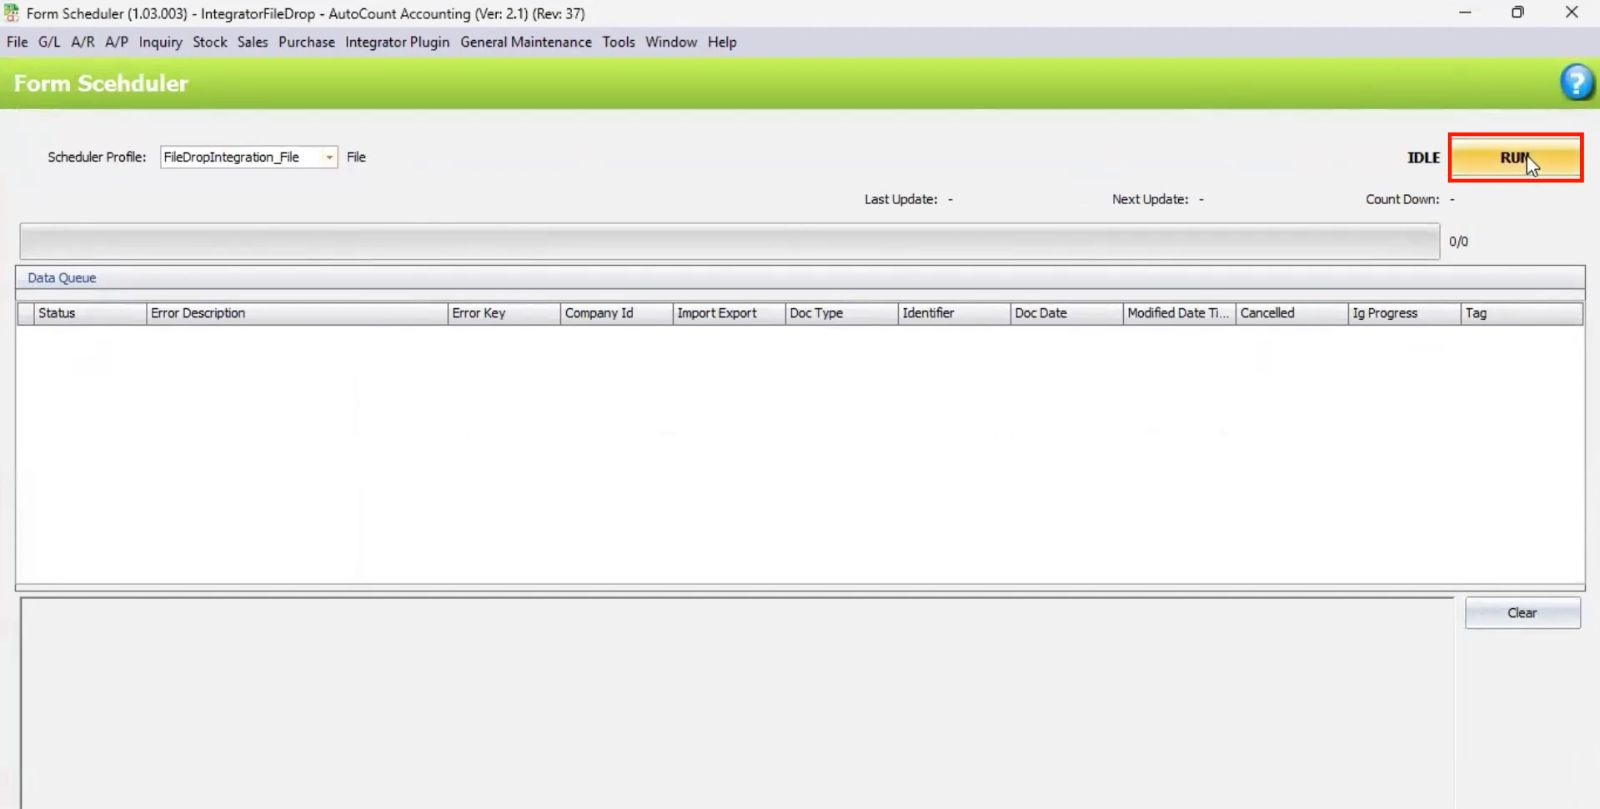
Enable the Scheduler to run the import process at set intervals.

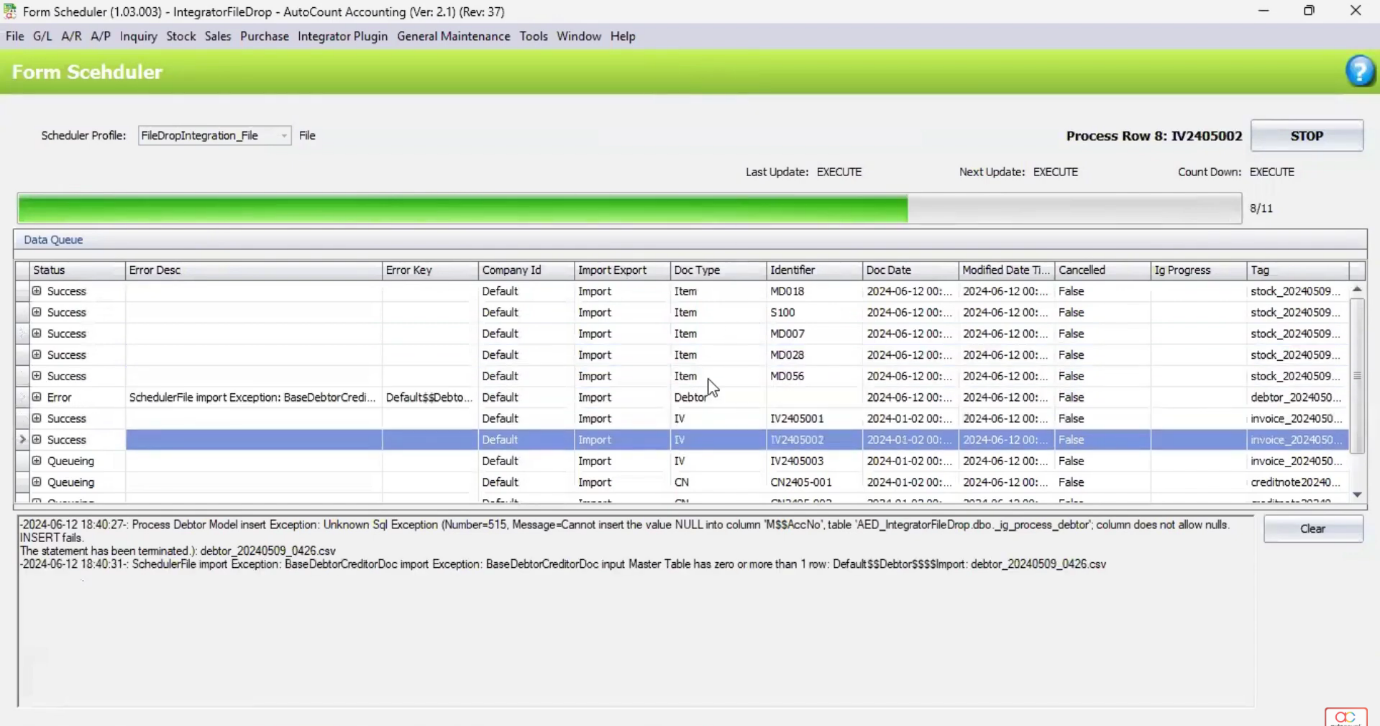
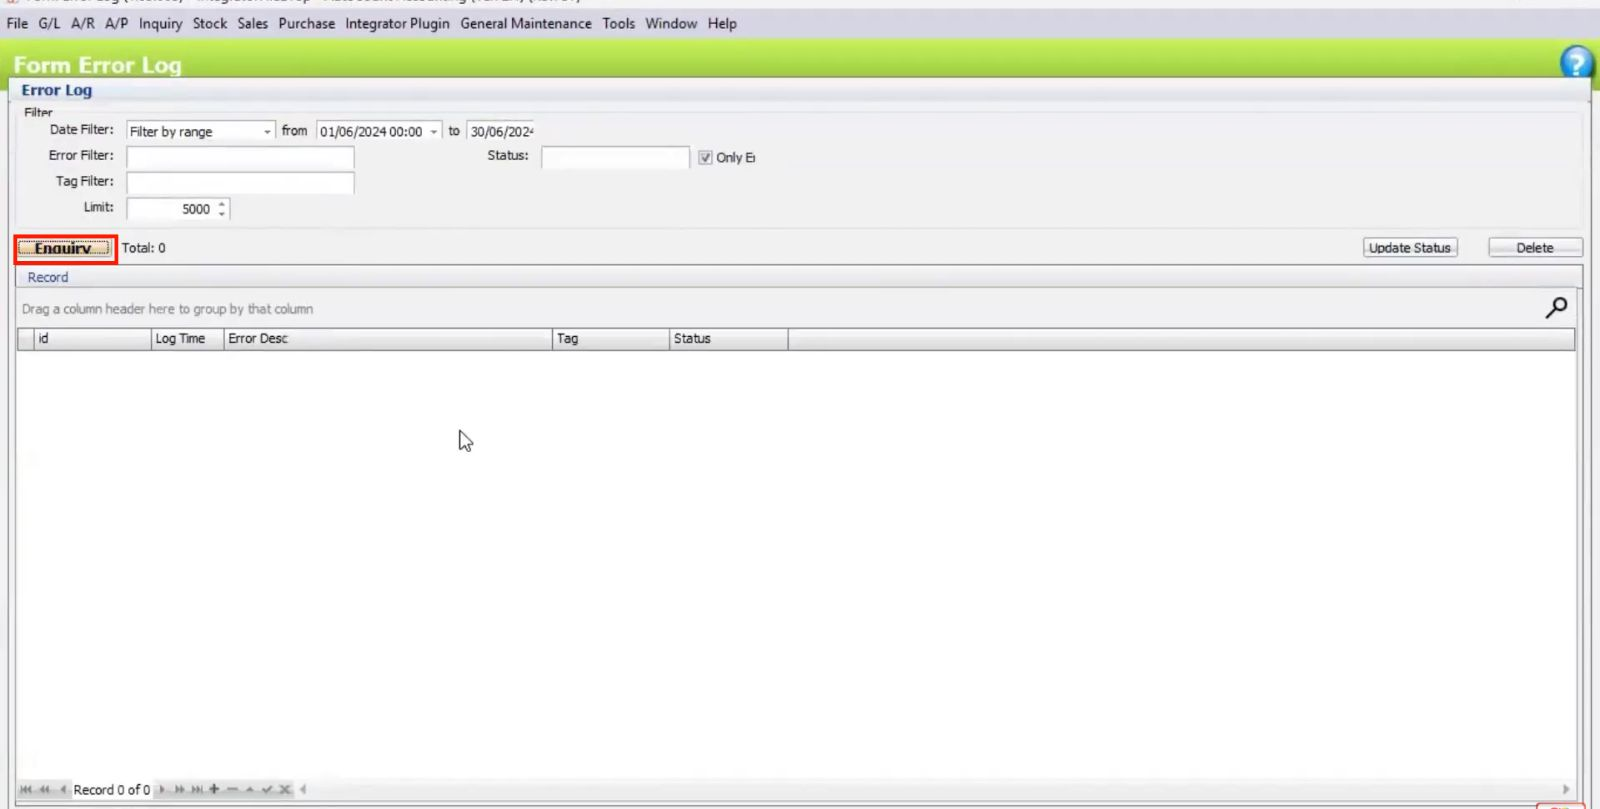
Check the log for specific file-related issues.
If necessary, manually edit problematic files (e.g., incorrect date formats) and re-upload.
After file corrections, use Retry Sync to import fixed data.
Automates data transfers, reducing manual work and human error.
Real-time data syncing ensures accurate and up-to-date information across systems.
Supports multiple systems and companies, making it ideal for growing businesses.
Automatic error logging and handling minimize disruptions and keep your processes running smoothly.
The AutoCount Integrator Plugin is a powerful tool for automating data imports from third-party systems into AutoCount. With its ability to handle various file formats (CSV, Excel) and integration methods (File Drop, API, Direct Access), this plugin greatly reduces the need for manual data entry. It offers real-time, scheduled imports, supports multiple companies, and provides seamless error handling for smooth operation.
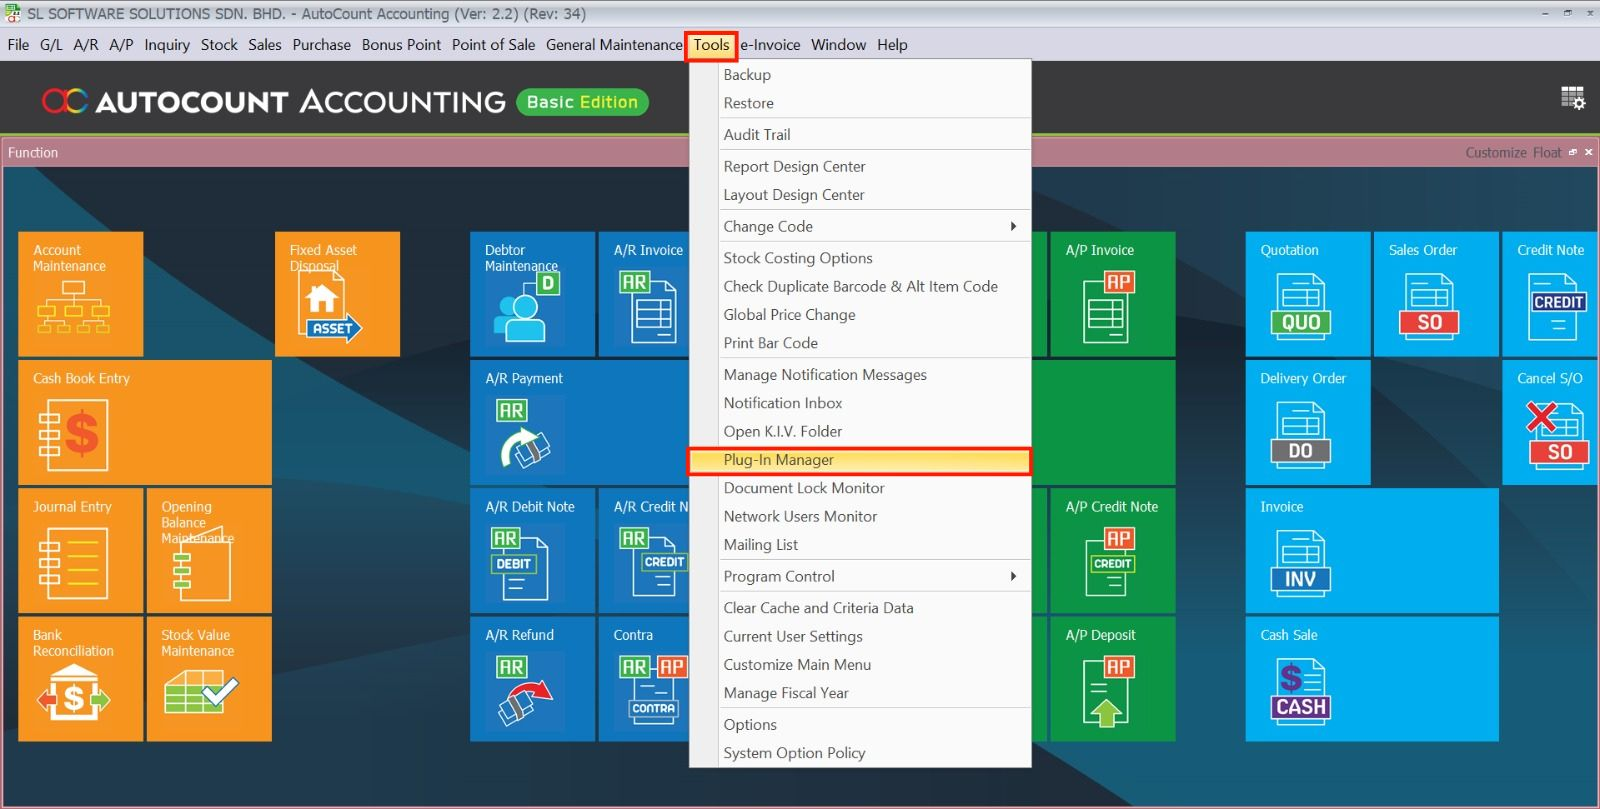
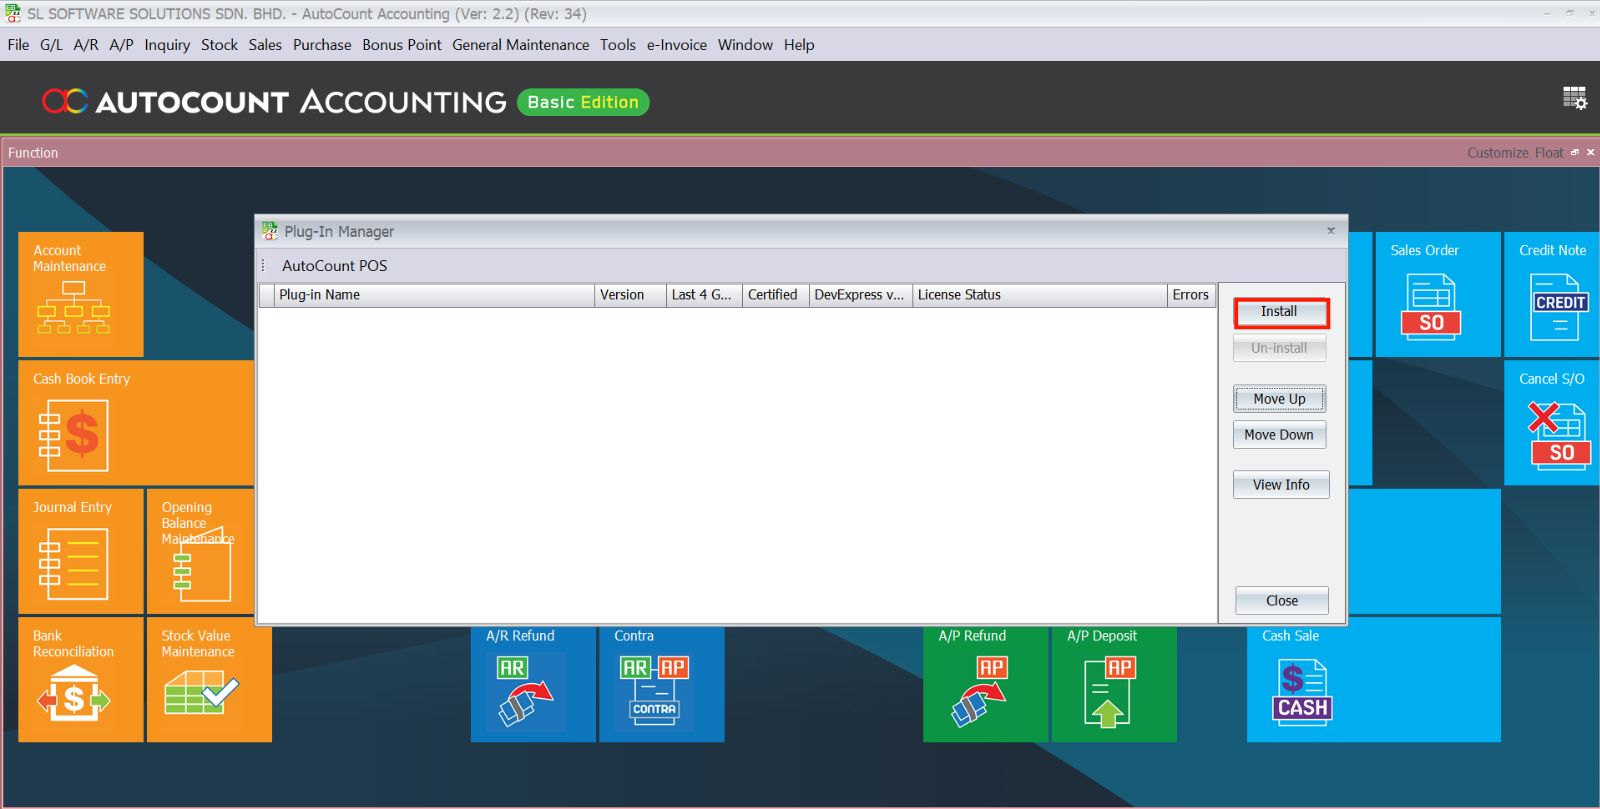
Go to Tools > Plug-In Manager in AutoCount, click Install, and browse for the AutoCount Integrator Plugin installation file. Follow the prompts to complete the installation.
The plugin supports importing CSV and Excel files. It can also handle data from various sources through File Drop, API, or Direct Access.
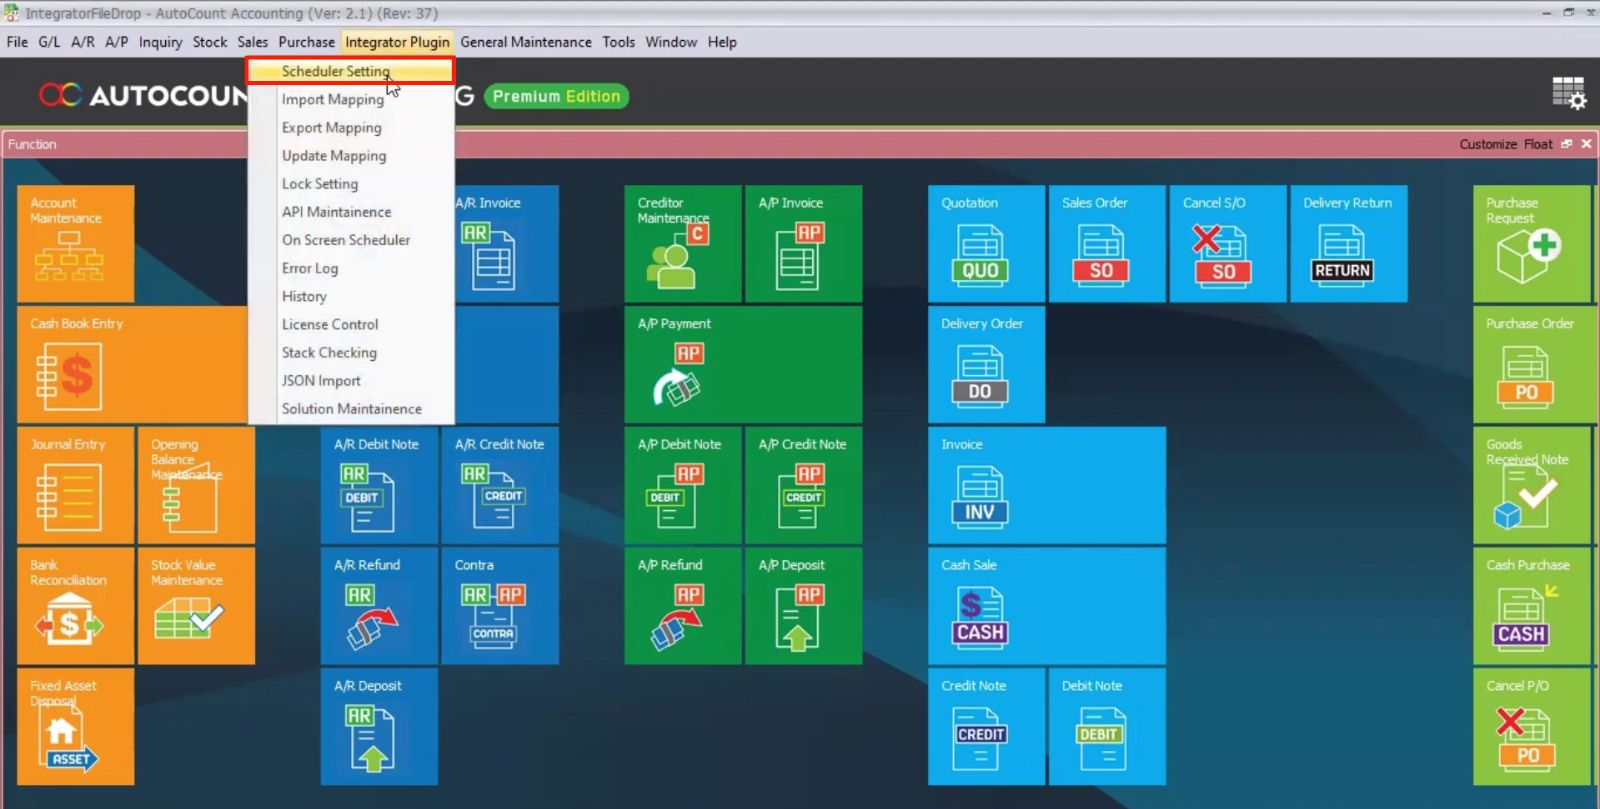
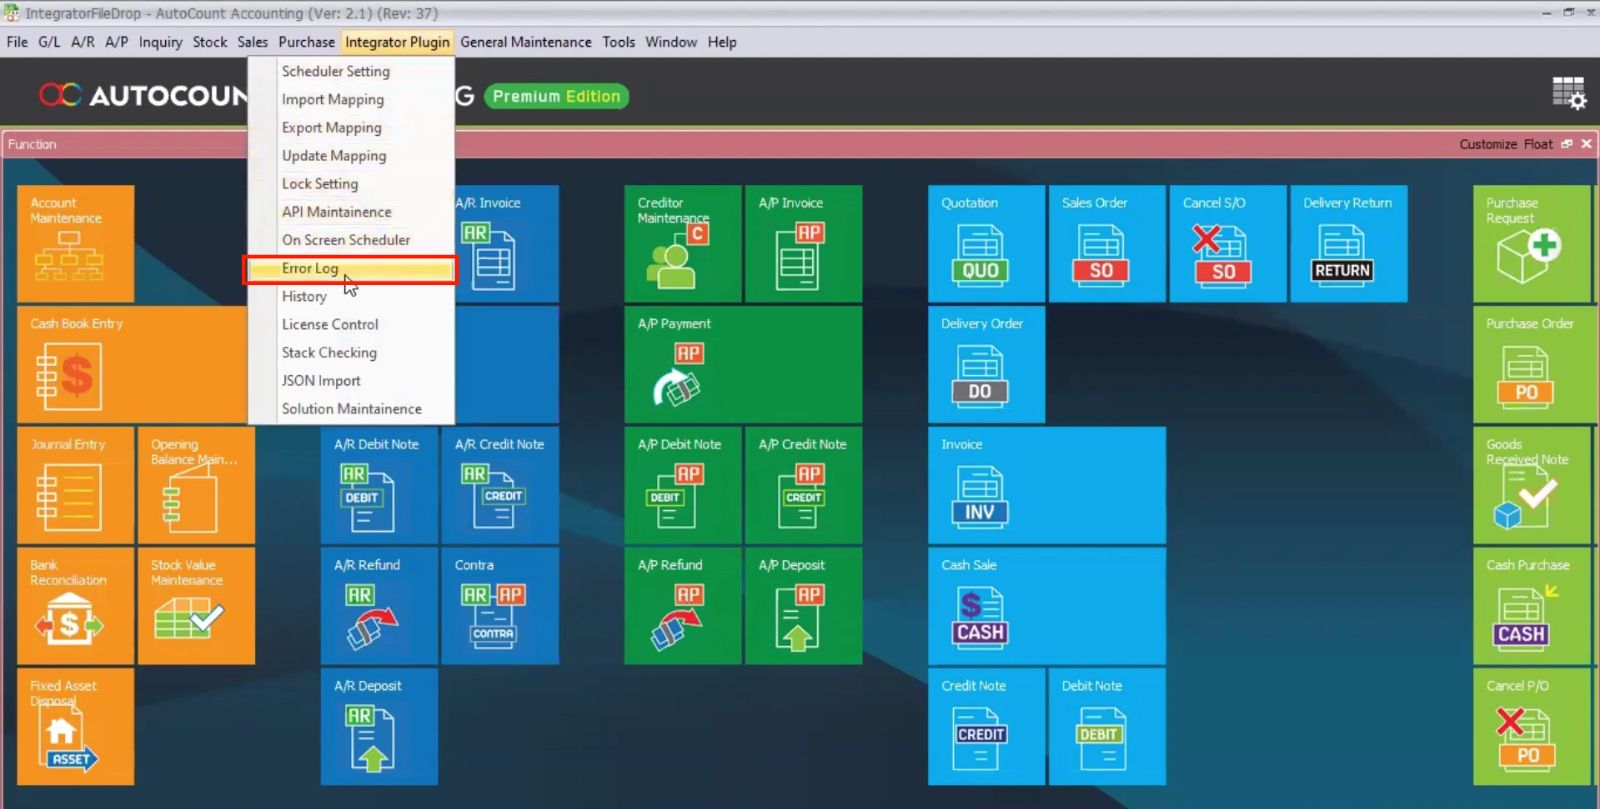
Go to Integrator Plugin > Scheduler Setting and set the time interval for the scheduler (e.g., every 60 seconds or 30 minutes). You can also configure the plugin to run on specific triggers.
The plugin will log the error in the Error Log. You can review the error description, manually fix the issue (e.g., incorrect data formatting), and re-import the file.
Yes, the plugin can auto-detect file names and map the data to the appropriate account books based on the configuration set in the Import Mapping section.
Yes, the plugin supports importing data into multiple companies based on the Company ID detected in the file name.
You can monitor the import status in the Form Scheduler window, which shows the status, error description, and log details for each import.
The AutoCount Integrator Plugin is the ideal solution for businesses seeking to automate data synchronization. Seamlessly connect AutoCount with your external systems (ERP, CRM, eCommerce) to eliminate manual entry errors and ensure real-time accuracy.