
AUTOCOUNT ACCOUNTING 2.0 USER GUIDE
Install a compatible .app plugin package in AutoCount Accounting 2.0 using this AutoCount Plugin Installation Guide. Follow the six steps below to prepare your account book, open Plug-In Manager, install the package and check the result.
The original screenshots accompany each stage so you can follow the process in AutoCount. This guide covers compatible .app packages; follow your provider’s instructions if your plugin uses a different installation method.
Check your AutoCount Accounting version and confirm that the plugin package supports it. If compatibility is unclear, ask your software provider before installation.
Have the correct .app installation file supplied by your software provider ready on your computer.
Create a backup of your AutoCount database before installing the plugin so you have a copy of your existing account book data.
Use an account with permission to open Plug-In Manager and install plugins. Ask your system administrator if you do not have access.
Open AutoCount Accounting, select the company account book where the plugin is required, and log in.
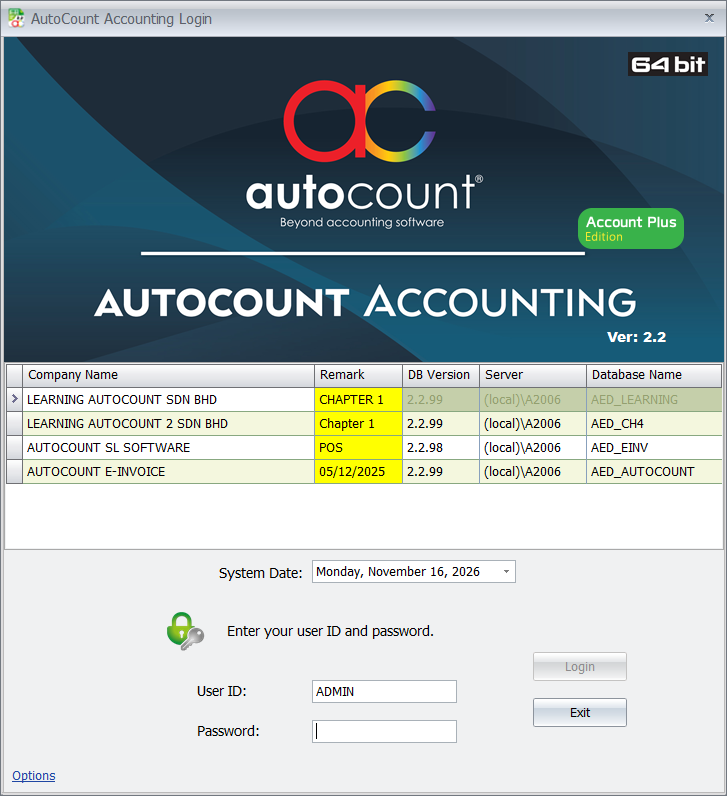
Before continuing: Back up your AutoCount database before making installation changes.
From the top menu in AutoCount Accounting, select Tools → Plug-In Manager. This opens the window used to manage installed plugins.
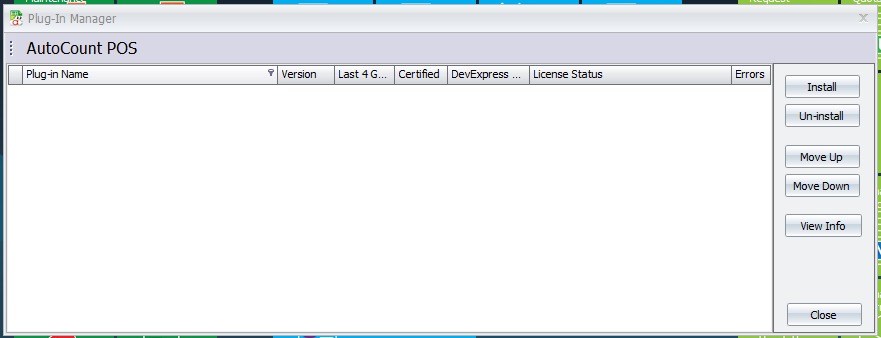
Cannot open Plug-In Manager? Check your access rights with your AutoCount system administrator before proceeding.
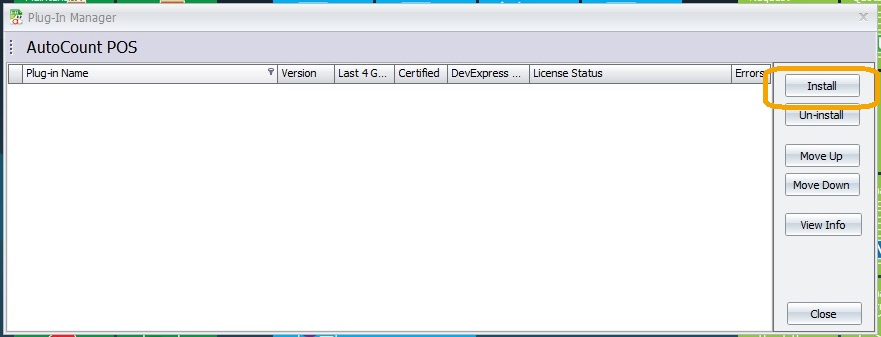
In Plug-In Manager, click Install to open the file selection window.
Browse to the folder where you saved the plugin package. Select the correct .app file, then click Open.
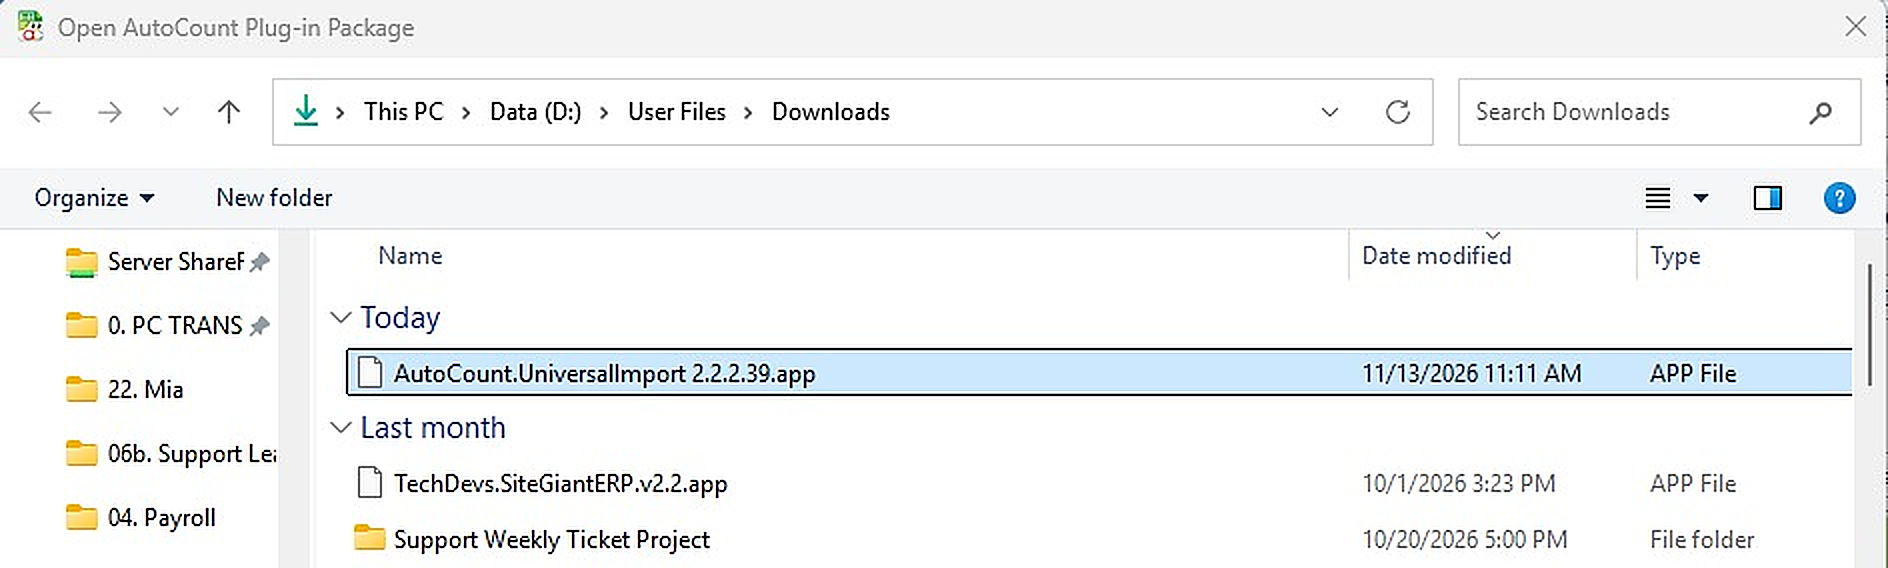
Use the correct package: Select the .app file supplied by your software provider and confirm its compatibility with your AutoCount version.
In the Install Plug-in Package window, review the plugin name and version. Make sure the details match the package you intend to install.
Click Install once you have confirmed the details.
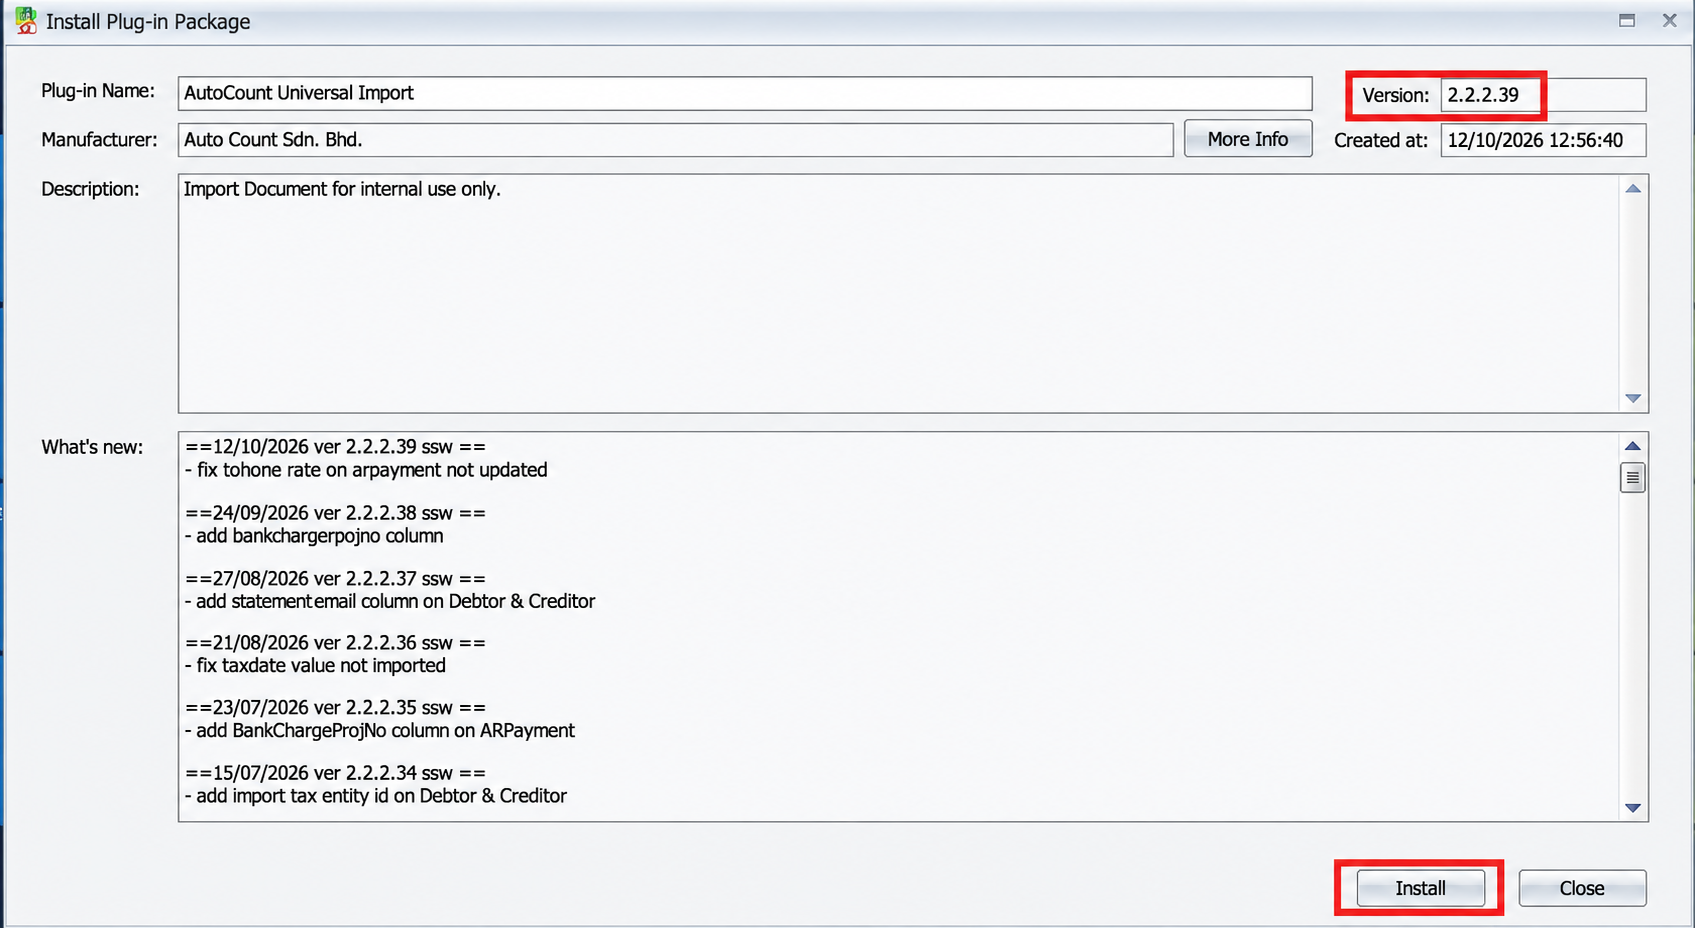
Wrong package details? Click Close and ask your software provider to confirm the correct file before continuing.
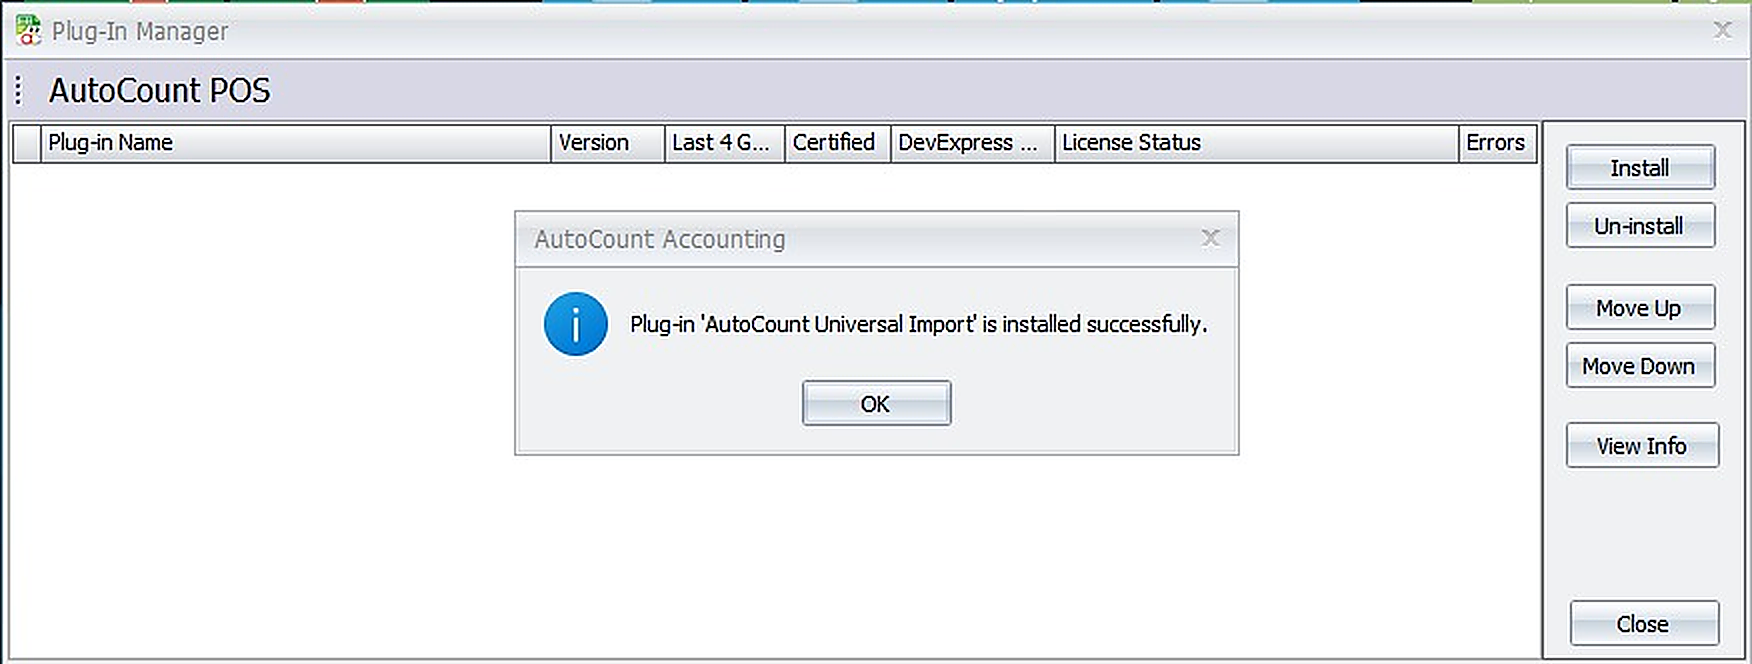
When installation finishes successfully, AutoCount displays a confirmation message.
Click OK to return to Plug-In Manager.
Find the plugin in the Plug-In Manager list. Check the displayed name and version to confirm that the expected package has been installed.
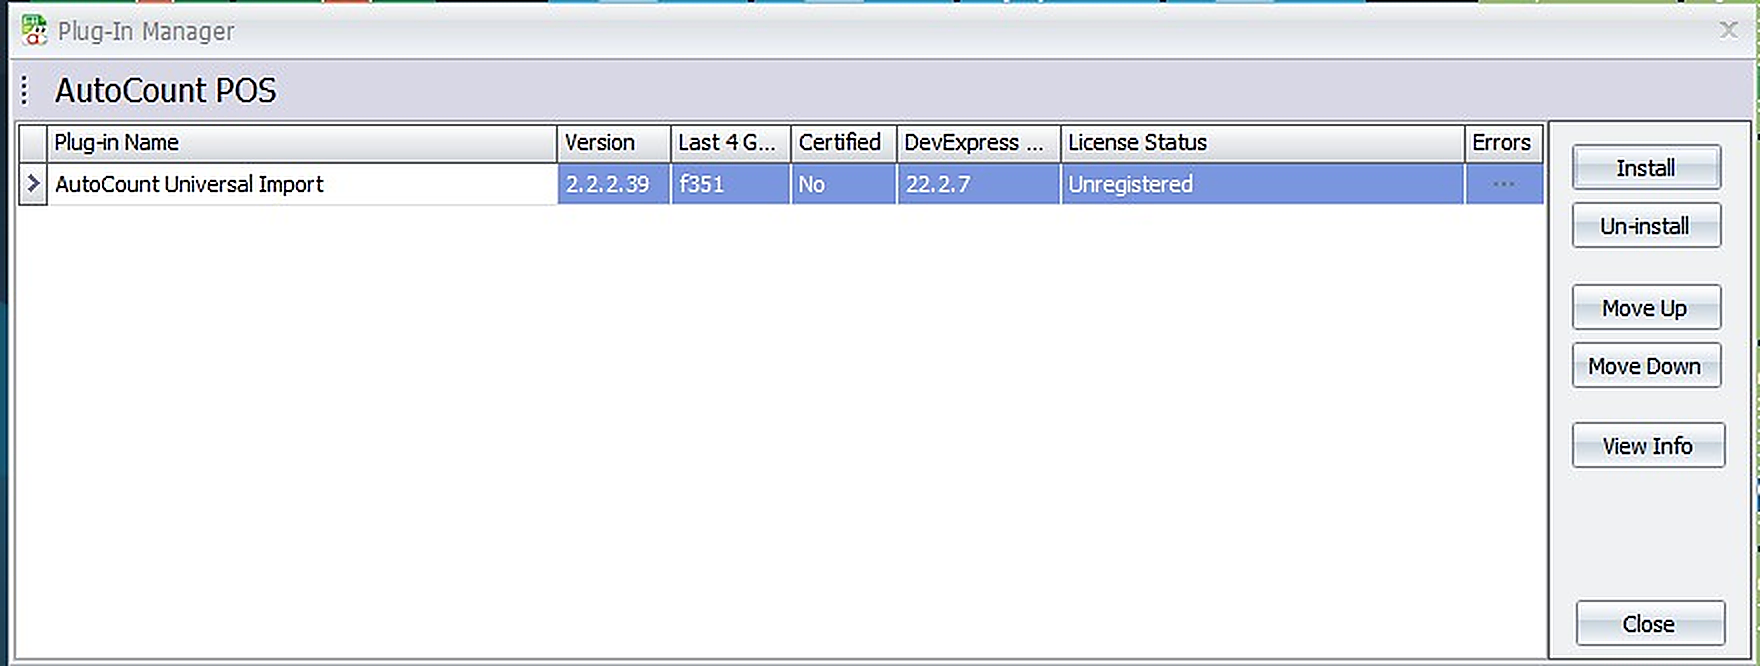
Close AutoCount Accounting and log in again so the installed plugin can load. Check that you can access the functions required for your workflow.
For other computers, follow your provider’s deployment instructions. Affected users may need to reopen AutoCount.
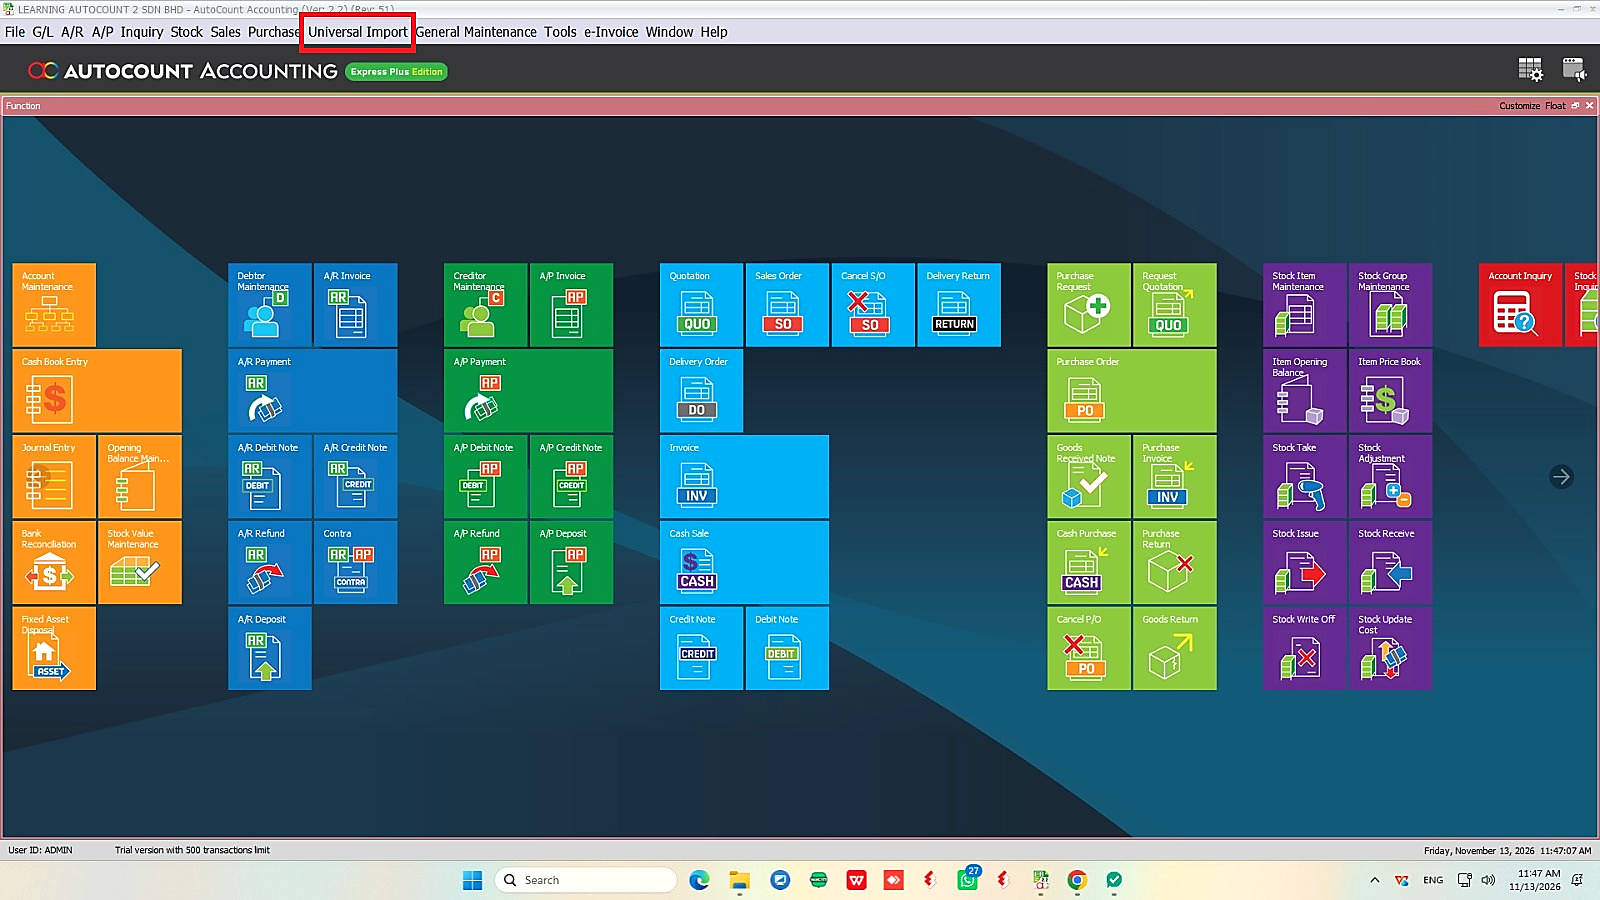
Installation and licensing are separate: Installing the package does not automatically activate its licence. Check the plugin’s licence status, user access rights and any additional configuration required by your provider.
Use these checks to narrow down a problem after following the installation steps.
Check that you selected the correct .app file and that it supports your AutoCount version. Confirm your installation permissions and note the exact error message before contacting support.
Look for the plugin name and version in Plug-In Manager. If it is listed, close and reopen AutoCount so the installed plugin can load.
Review the user’s access rights and any setup required by the plugin. Check the licence status if the feature remains unavailable.
Confirm the plugin licence and configuration. If the issue continues, send support the plugin name, AutoCount version and exact error message.
This guide uses a compatible .app package supplied by your software provider. Confirm the package name, version and AutoCount compatibility before installation.
Close and reopen AutoCount when required so the installed plugin functions can load. Follow the provider’s instructions for your package and deployment.
Confirm that the plugin appears in Plug-In Manager. Then check user access rights, licence status and any plugin-specific configuration.
This AutoCount Plugin Installation Guide covers compatible .app packages for AutoCount Accounting 2.0. Plugins supplied in another format or for a different product may require a different procedure.
Contact SL Software Solutions for help with AutoCount plugin installation, access or activation.
To help us investigate, provide the plugin name, your AutoCount Accounting version and the exact error message or a screenshot of the problem.