-
AutoCount Accounting Features
-
- Approval Workflow
- Audit Trail
- Auto Save in Draft Folder
- AutoCount Contra Account
- AutoCount License Setting Guide
- Deposit Tracking & Management
- Documents Numbering Format
- Full Transfer and Partial Transfer
- Import Data to AutoCount Accounting Using Excel
- Informative Charts and Analytical Data
- Layout Customization
- Multi Pricing
- Sales and Services Tax
- Schedule Backup
- Search Lookup Edit
- View Documents Flow
- AutoCount Feature Stock Take
- Column Chooser
- Show Remaining (3) Collapse
-
AutoCount Cloud Accounting
-
AutoCount E-Invoice
-
AutoCount HRMS User Guide
-
AutoCount Modules
-
- Activity Stream
- Advanced Financial Report
- Advanced Item
- Advanced Multi-UOM
- Advanced Quotation Module
- Basic Multi-UOM
- Budget Module
- Consignment
- Filter By Salesman
- FOC Quantity
- Formula
- Item Batch
- Item Package
- Landing Cost
- Multi-Currency
- Multi-Dimensional Analysis
- Multi-Location
- Project Account
- Recurrence
- Remote Credit Control Module
- Stock Assembly
- User Defined Fields (UDF)
- AutoCount SST Hidden Functions
- AutoCount SST Submission - Service Tax
- AutoCount Scripting Module User Guide
- AutoCount Bonus Point Module User Guide
- Show Remaining (11) Collapse
-
AutoCount Plugins
-
- Fixed Assets Management
- Goldsmith
- TD Ordering Mobile Apps
- TD Stock Mobile Apps
- Universal Import Plugin
- DMS Import Plugin
- AutoCount Item Scope Plugin
- AutoCount Easy Knock Off Plugin
- AutoCount Pick List Plugin User Guide
- AutoCount Agent Validation Plugin User Guide
- AutoCount Barcode Generator Plugin User Guide
- AutoCount Bill Remark Plugin User Guide
- AutoCount Easy Batch Number Entry Plugin User Guide
- AutoCount Recurring Invoice Plugin User Guide
- AutoCount Easy Photo 2.0 User Guide
- AutoCount Pain Tracker User Guide
- AutoCount Credit Memo Plugin User Guide
- Show Remaining (2) Collapse
-
- AutoCount Easy Recurrence Plugin
- AutoCount Recurring Billing Plugin
- Event Management System
- AutoCount To-Do List Plugin
- AutoCount AutoBank Reconciliation Plugin
- Intercompany Billing Plugin User Guide
- AutoCount Basket Plugin User Guide
- Lead Management 2.0 Plugin
- AutoCount Service Contract Plugin User Guide
- Autocount Repacking Plugin
- AutoCount Scale Barcode Plugin User Guide
- AutoCount Progressive Billing
- AutoCount Optical Plugin
- AutoCount Meter Reading Plugin User Guide
- AutoCount Car Tint Film Plugin
- AutoCount Leasing Plugin User Guide
- AutoCount Integrator Plugin
- AutoCount Procurement Planning Plugin
- Show Remaining (3) Collapse
-
-
Form Template
-
Report Template
-
- Advance Quotation
- Cash Sale
- Consignment
- Consignment Movement
- Credit Note
- Debit Note
- Delivery Order
- FOC Quantity Analysis By Document Report
- Invoice
- Item Package Sales Report
- Monthly Sales Analysis
- Outstanding Sales Order Listing
- Profit And Loss Of Documents
- Quotation
- Sales Agent Contribution Report
- Sales Order
- Top/Bottom Sales Ranking
- Show Remaining (2) Collapse
-
- Available Stock Status Report
- Expired Item Batch Listing
- Inventory Physical Worksheet
- Stock Adjustment
- Stock Aging Report
- Stock Assembly
- Stock Assembly Order
- Stock Balance By Location
- Stock Balance Report
- Stock Card Report
- Stock Disassembly
- Stock Issue
- Stock Item Profit Margin
- Stock Movement Report
- Stock Receive
- Stock Take
- Stock Transfer
- Stock Write Off
- Show Remaining (3) Collapse
AutoCount HRMS: How to Set Shift Schedule Guide
AutoCount HRMS: Shift Schedule Guide
Manage your workforce like a pro with the Shift Schedule in AutoCount HRMS! From regular office hours to flexible or rotating shifts, this feature gives you the freedom to assign schedules that fit your team. Start by creating your shifts and rules — once that’s done, use the schedule wizard to roll out your shift plan fast
- Shift Schedule Setup Guide
This guide will assist you in setting up the shift schedule in AutoCount HRMS.
Important Note: To setup a shift, ensure that you have created the shift under Shift Maintenance & the rules under Rule Maintenance before proceeding.
Step-by-Step Clock In Process
Follow these 5 simple steps to successfully clock in using the AC Payroll mobile app
1. Access Shift Schedule Module
- To setup the shift schedule, navigate to Human Resource > Shift Schedule under Attendance Management in the AutoCount HRMS main menu.
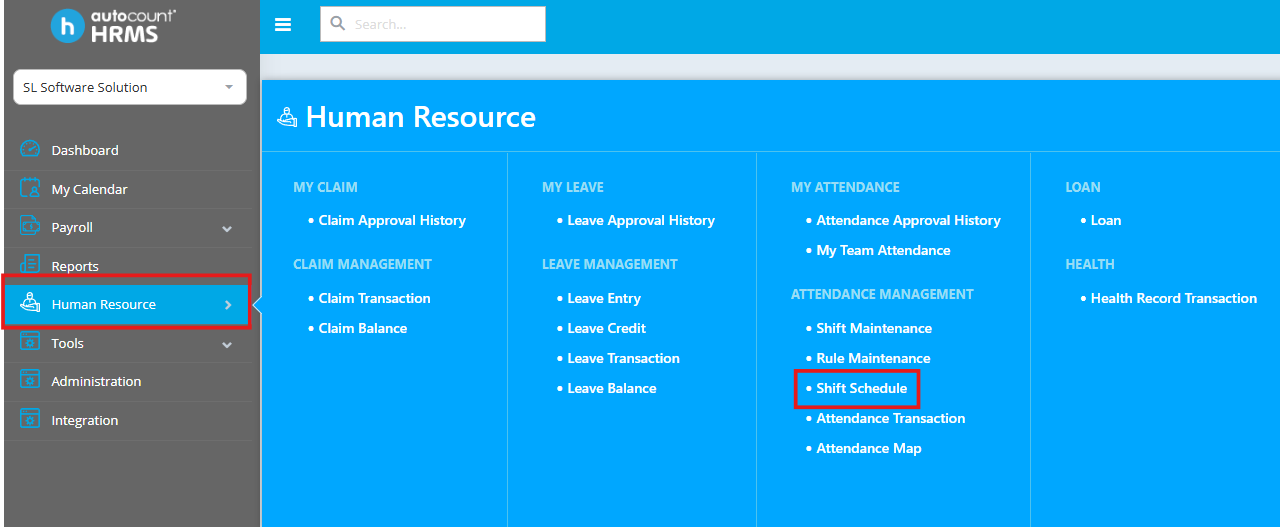
You will be presented with the shift schedule interface where you can view existing schedules and create new ones.
2. Create New Shift Schedule
Click on Add New at the top right corner of the Shift Schedule screen to create a new shift schedule.
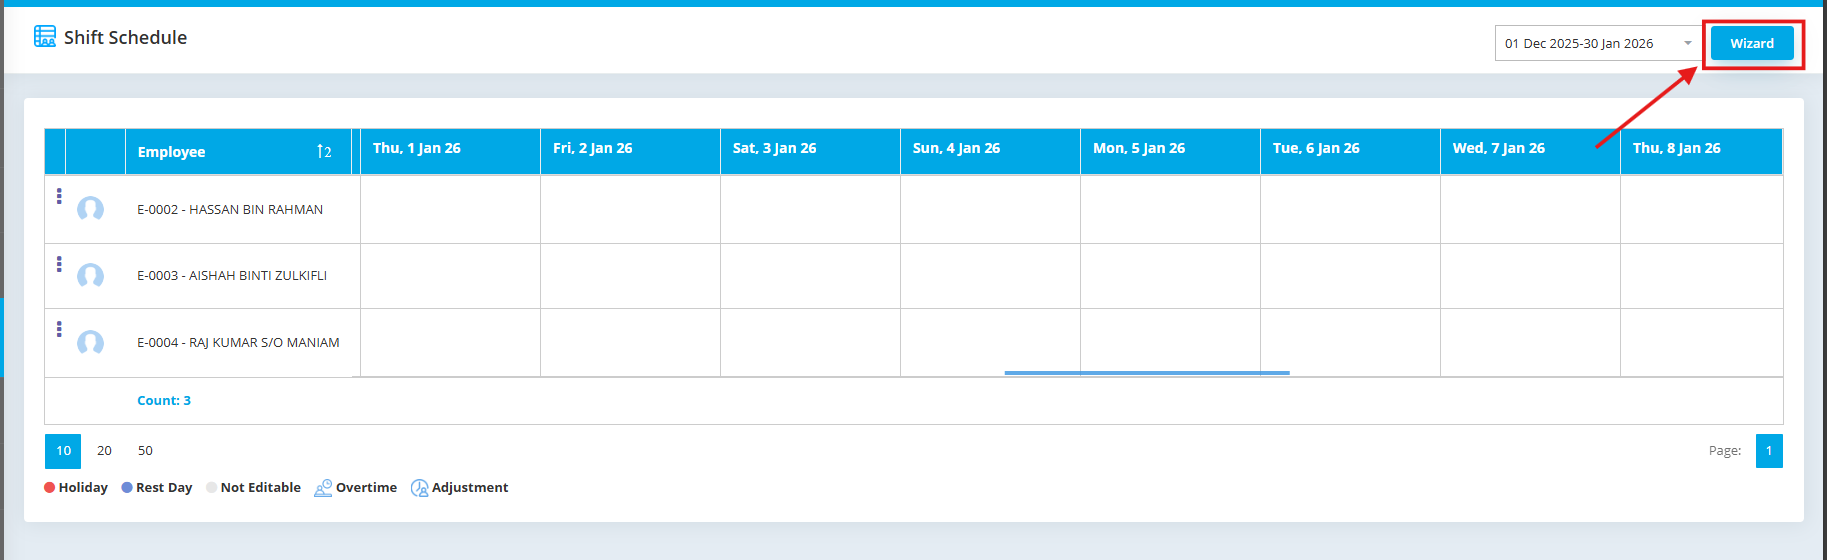
This will open the schedule creation wizard where you can define the parameters for your shift schedule.
3. Select Scheduling Method
- AutoCount HRMS provides three different ways to assign shifts to employees. Select the method that best fits your organization’s needs:

Standard
This method is more suitable for office or companies that has a fixed schedule throughout the entire year.
Roster
This is more suitable for office with contract workers or restaurants with alternating schedules on a monthly basis.
Flex
This is also suitable for restaurants or companies with daily / weekly alternating schedules.
Select your preferred method of schedule wizard and click on Next to proceed to employee selection.
4. Select Employees
Click on Employee to select the employee(s) that you would like to create the schedule for.
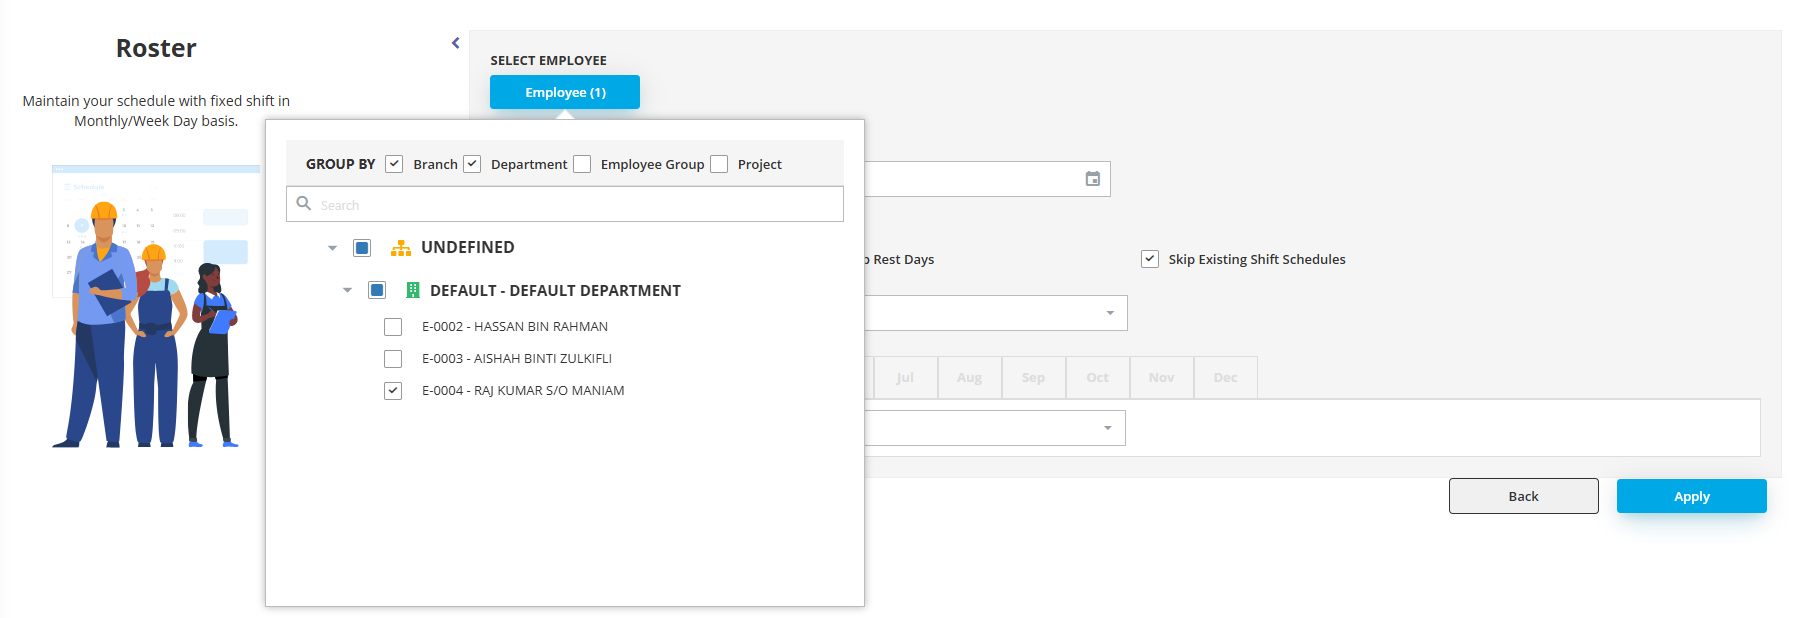
You can select individual employees, groups, or departments depending on your organizational structure.
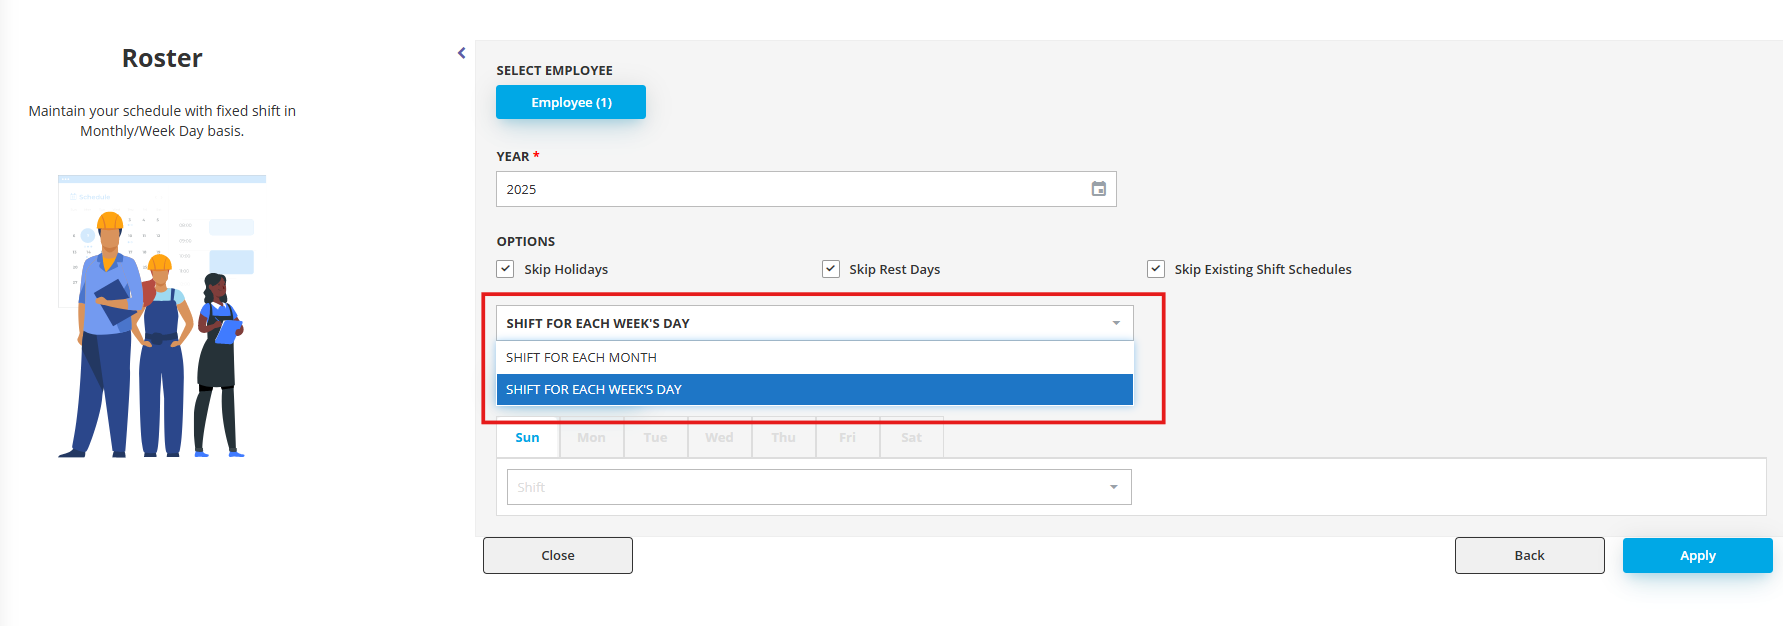
5. Configure Schedule Parameters
Select the Year and configure any optional settings specific to your scheduling needs.
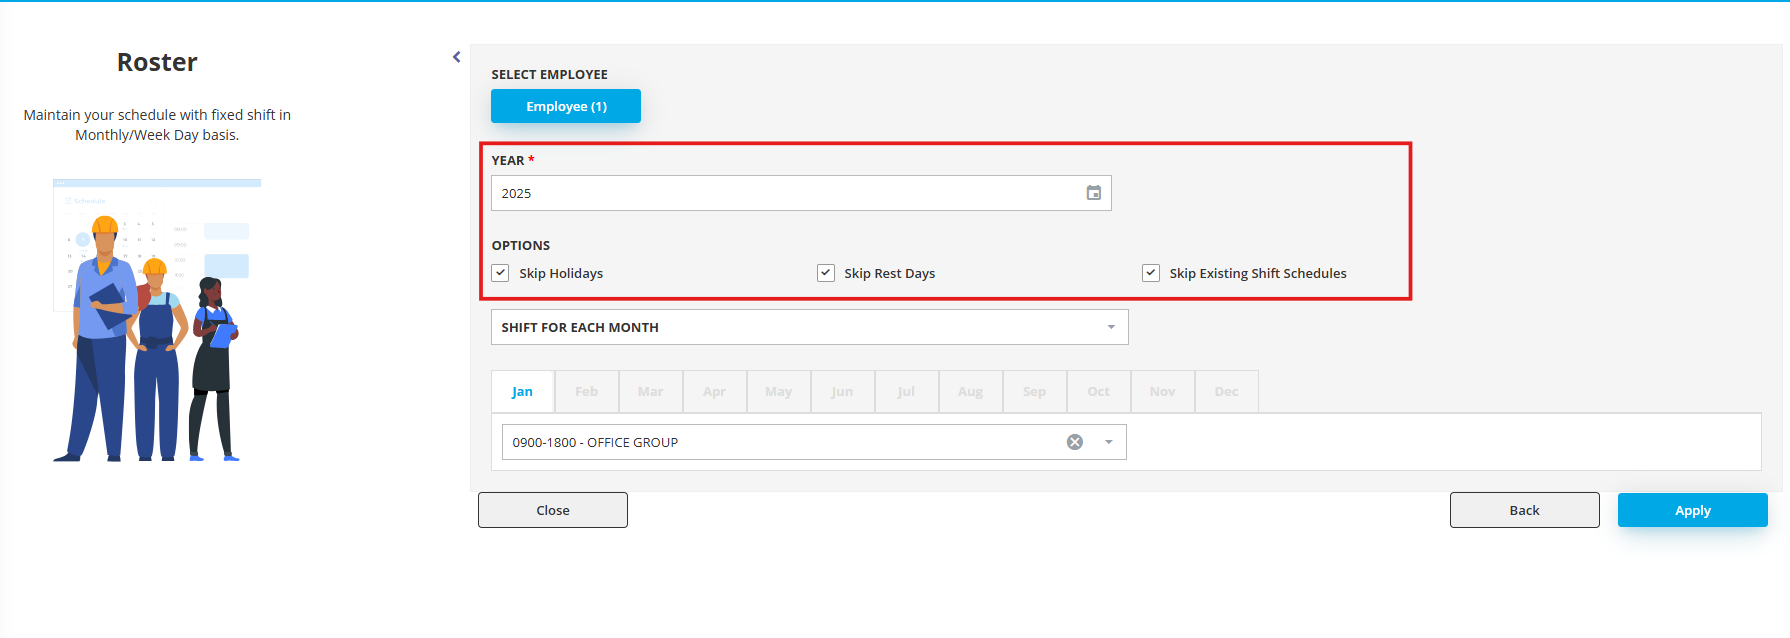
Choose your preferred method of batch creation for the shift:
- Shift for each month– Apply the same shift pattern across an entire month
- Shift for each week’s day– Define shifts based on days of the week (e.g., different shifts for weekends)
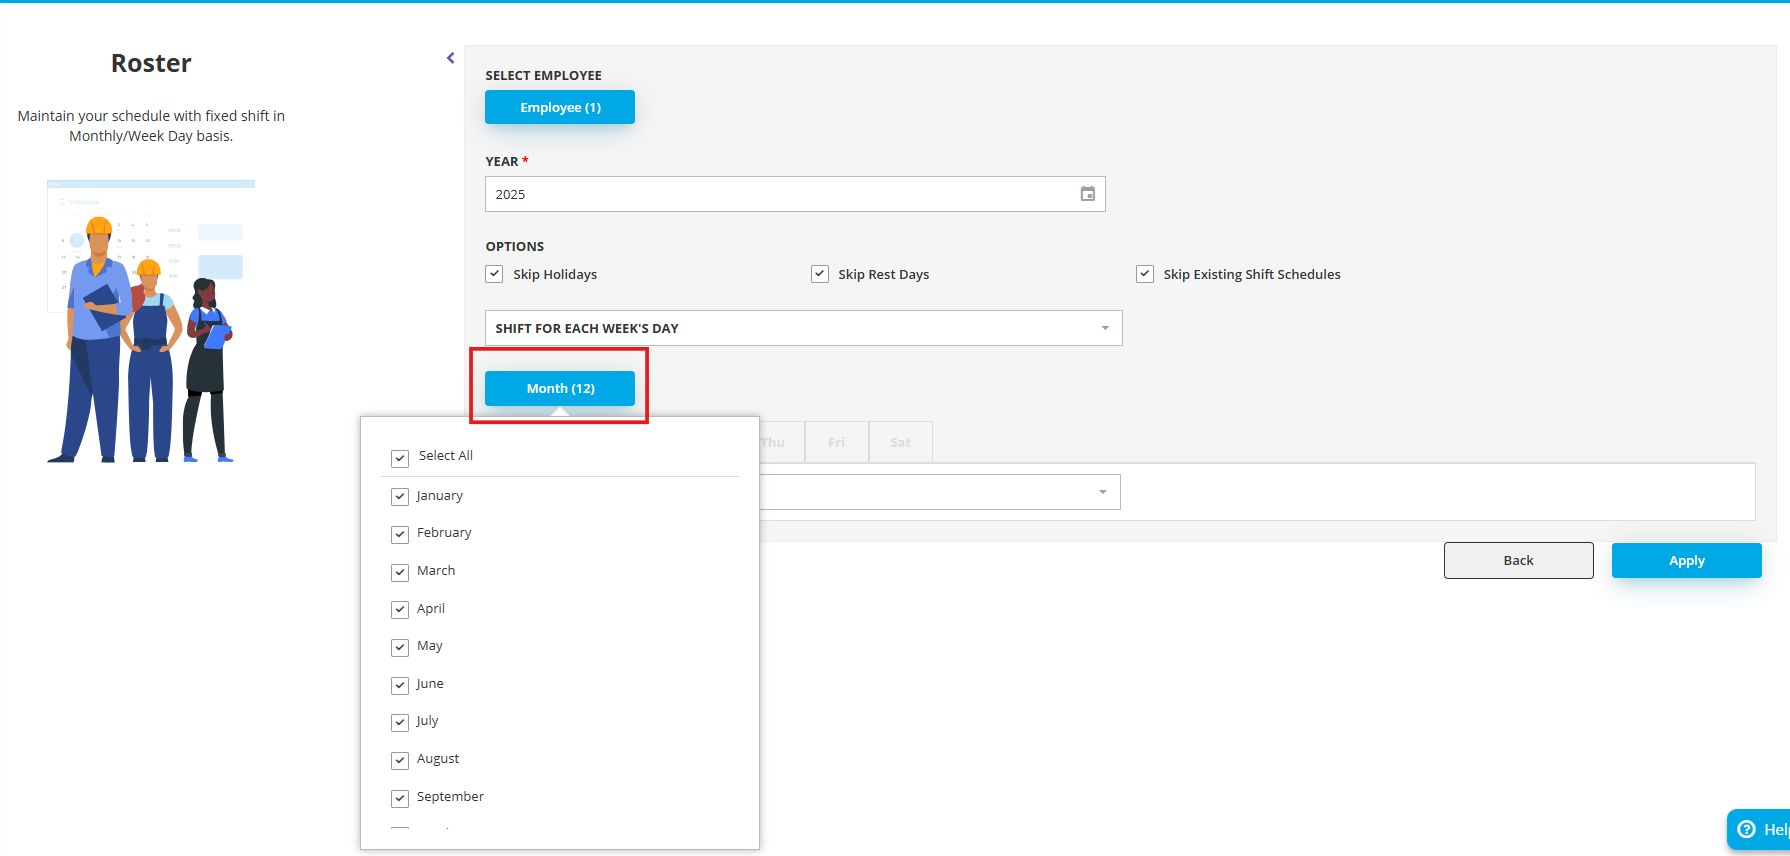
6. Assign Shifts to Days
Select the month you want to schedule.
Choose the specific day(s) you would like to assign a shift to, then select the shift along with the rule that you would like to assign for those days
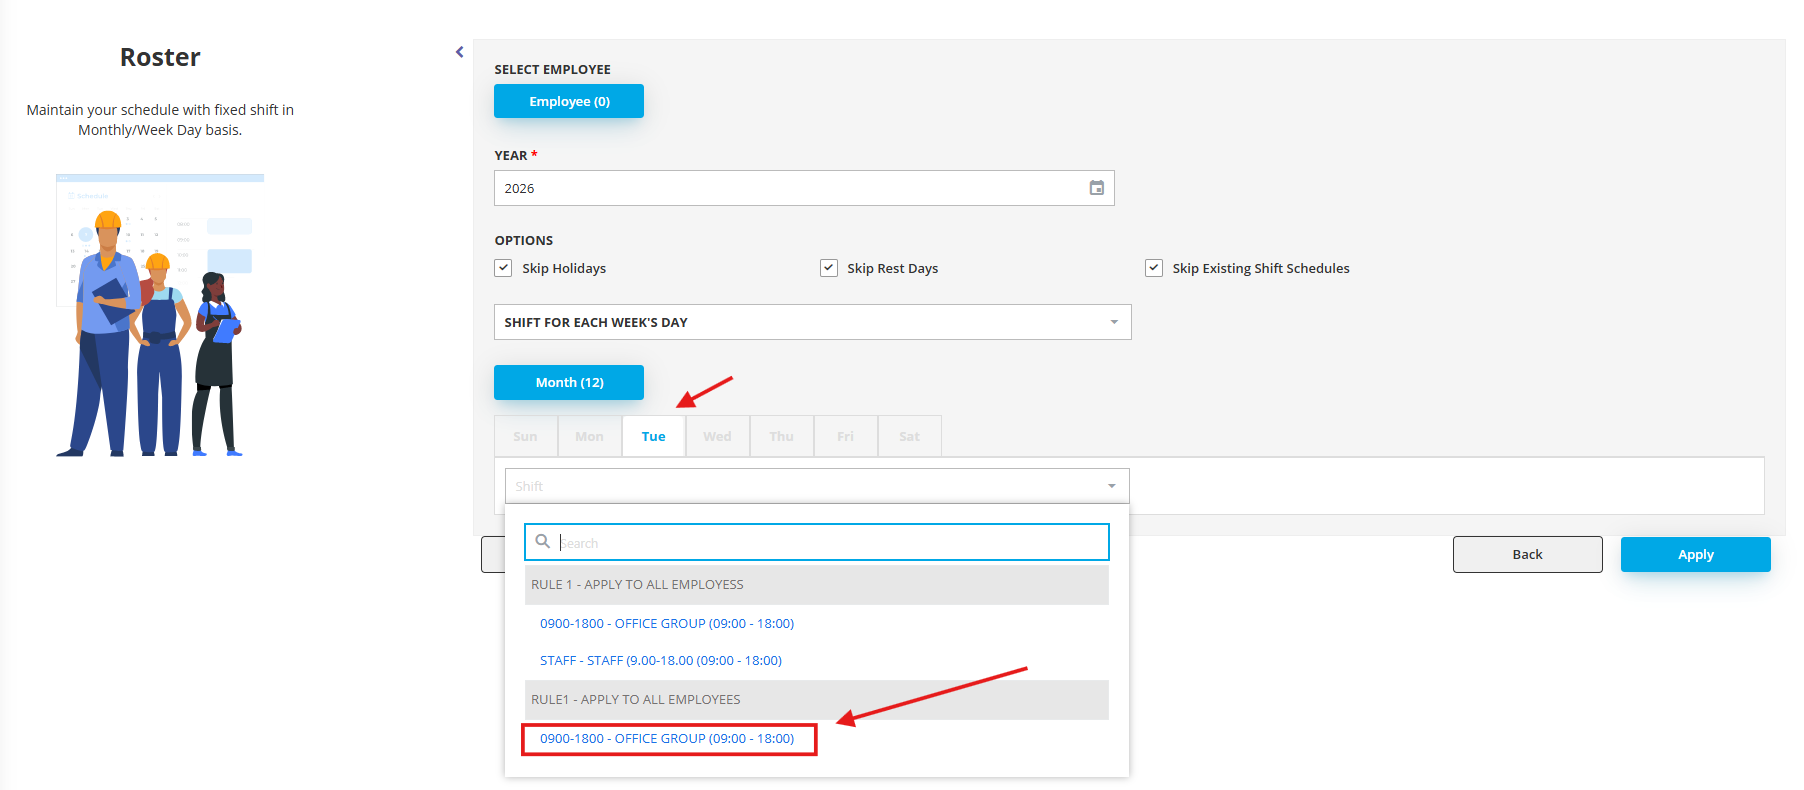
Note: Rules determine overtime calculations, break times, and other shift-specific parameters. Make sure you have set up rules in Rule Maintenance before assigning them here.
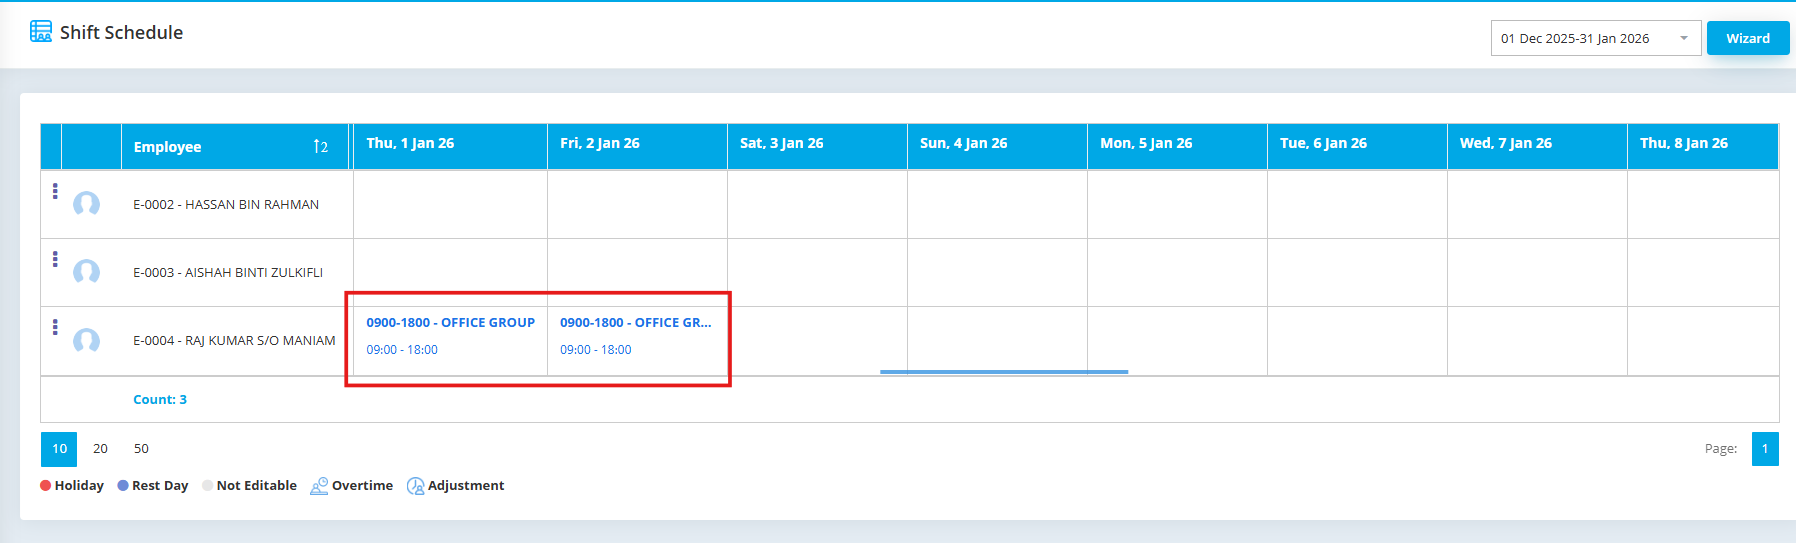
7. Apply and Confirm Schedule
Once you have configured all parameters, click on Apply to create the shift schedules.
A confirmation message will appear. Click on Confirm to apply the shift into the schedule.
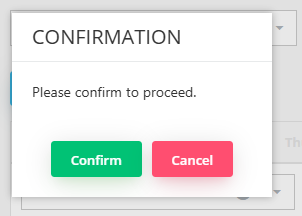
The shift would then be created.
Need Professional Payroll Management Solutions?
Our certified payroll specialists ensure accurate, compliant, and efficient payroll processing, allowing you to focus on strategic business priorities.