-
AutoCount Accounting Features
-
- Approval Workflow
- Audit Trail
- Auto Save in Draft Folder
- AutoCount Contra Account
- AutoCount License Setting Guide
- Deposit Tracking & Management
- Documents Numbering Format
- Full Transfer and Partial Transfer
- Import Data to AutoCount Accounting Using Excel
- Informative Charts and Analytical Data
- Layout Customization
- Multi Pricing
- Sales and Services Tax
- Schedule Backup
- Search Lookup Edit
- View Documents Flow
- AutoCount Feature Stock Take
- Column Chooser
- Show Remaining (3) Collapse
-
AutoCount Cloud Accounting
-
AutoCount E-Invoice
-
AutoCount HRMS User Guide
-
AutoCount Modules
-
- Activity Stream
- Advanced Financial Report
- Advanced Item
- Advanced Multi-UOM
- Advanced Quotation Module
- Basic Multi-UOM
- Budget Module
- Consignment
- Filter By Salesman
- FOC Quantity
- Formula
- Item Batch
- Item Package
- Landing Cost
- Multi-Currency
- Multi-Dimensional Analysis
- Multi-Location
- Project Account
- Recurrence
- Remote Credit Control Module
- Stock Assembly
- User Defined Fields (UDF)
- AutoCount SST Hidden Functions
- AutoCount SST Submission - Service Tax
- AutoCount Scripting Module User Guide
- AutoCount Bonus Point Module User Guide
- Show Remaining (11) Collapse
-
AutoCount Plugins
-
- Fixed Assets Management
- Goldsmith
- TD Ordering Mobile Apps
- TD Stock Mobile Apps
- Universal Import Plugin
- DMS Import Plugin
- AutoCount Item Scope Plugin
- AutoCount Easy Knock Off Plugin
- AutoCount Pick List Plugin User Guide
- AutoCount Agent Validation Plugin User Guide
- AutoCount Barcode Generator Plugin User Guide
- AutoCount Bill Remark Plugin User Guide
- AutoCount Easy Batch Number Entry Plugin User Guide
- AutoCount Recurring Invoice Plugin User Guide
- AutoCount Easy Photo 2.0 User Guide
- AutoCount Pain Tracker User Guide
- AutoCount Credit Memo Plugin User Guide
- Show Remaining (2) Collapse
-
- AutoCount Easy Recurrence Plugin
- AutoCount Recurring Billing Plugin
- Event Management System
- AutoCount To-Do List Plugin
- AutoCount AutoBank Reconciliation Plugin
- Intercompany Billing Plugin User Guide
- AutoCount Basket Plugin User Guide
- Lead Management 2.0 Plugin
- AutoCount Service Contract Plugin User Guide
- Autocount Repacking Plugin
- AutoCount Scale Barcode Plugin User Guide
- AutoCount Progressive Billing
- AutoCount Optical Plugin
- AutoCount Meter Reading Plugin User Guide
- AutoCount Car Tint Film Plugin
- AutoCount Leasing Plugin User Guide
- AutoCount Integrator Plugin
- AutoCount Procurement Planning Plugin
- Show Remaining (3) Collapse
-
-
Form Template
-
Report Template
-
- Advance Quotation
- Cash Sale
- Consignment
- Consignment Movement
- Credit Note
- Debit Note
- Delivery Order
- FOC Quantity Analysis By Document Report
- Invoice
- Item Package Sales Report
- Monthly Sales Analysis
- Outstanding Sales Order Listing
- Profit And Loss Of Documents
- Quotation
- Sales Agent Contribution Report
- Sales Order
- Top/Bottom Sales Ranking
- Show Remaining (2) Collapse
-
- Available Stock Status Report
- Expired Item Batch Listing
- Inventory Physical Worksheet
- Stock Adjustment
- Stock Aging Report
- Stock Assembly
- Stock Assembly Order
- Stock Balance By Location
- Stock Balance Report
- Stock Card Report
- Stock Disassembly
- Stock Issue
- Stock Item Profit Margin
- Stock Movement Report
- Stock Receive
- Stock Take
- Stock Transfer
- Stock Write Off
- Show Remaining (3) Collapse
AutoCount HRMS: How to Upload CP22 File to MyTax Portal Using AutoCount Payroll
Introduction
If you’re handling payroll and need to submit CP22 forms for employees, AutoCount Payroll can help streamline the process. Follow this step-by-step guide to upload the CP22 file to MyTax Portal.
Step-by-Step to Upload CP22 File
Step 1: Login to AutoCount Payroll
1. Start by logging into your AutoCount Payroll system.
2. Once logged in, you can begin the process of generating the CP22 form for your employees.

Step 2: Generate the CP22 Form
1. Navigate to the “Report” section: On the left sidebar, click on Report.

2. Search for “CP22”: In the search engine, type “CP22” and select the option when it appears.
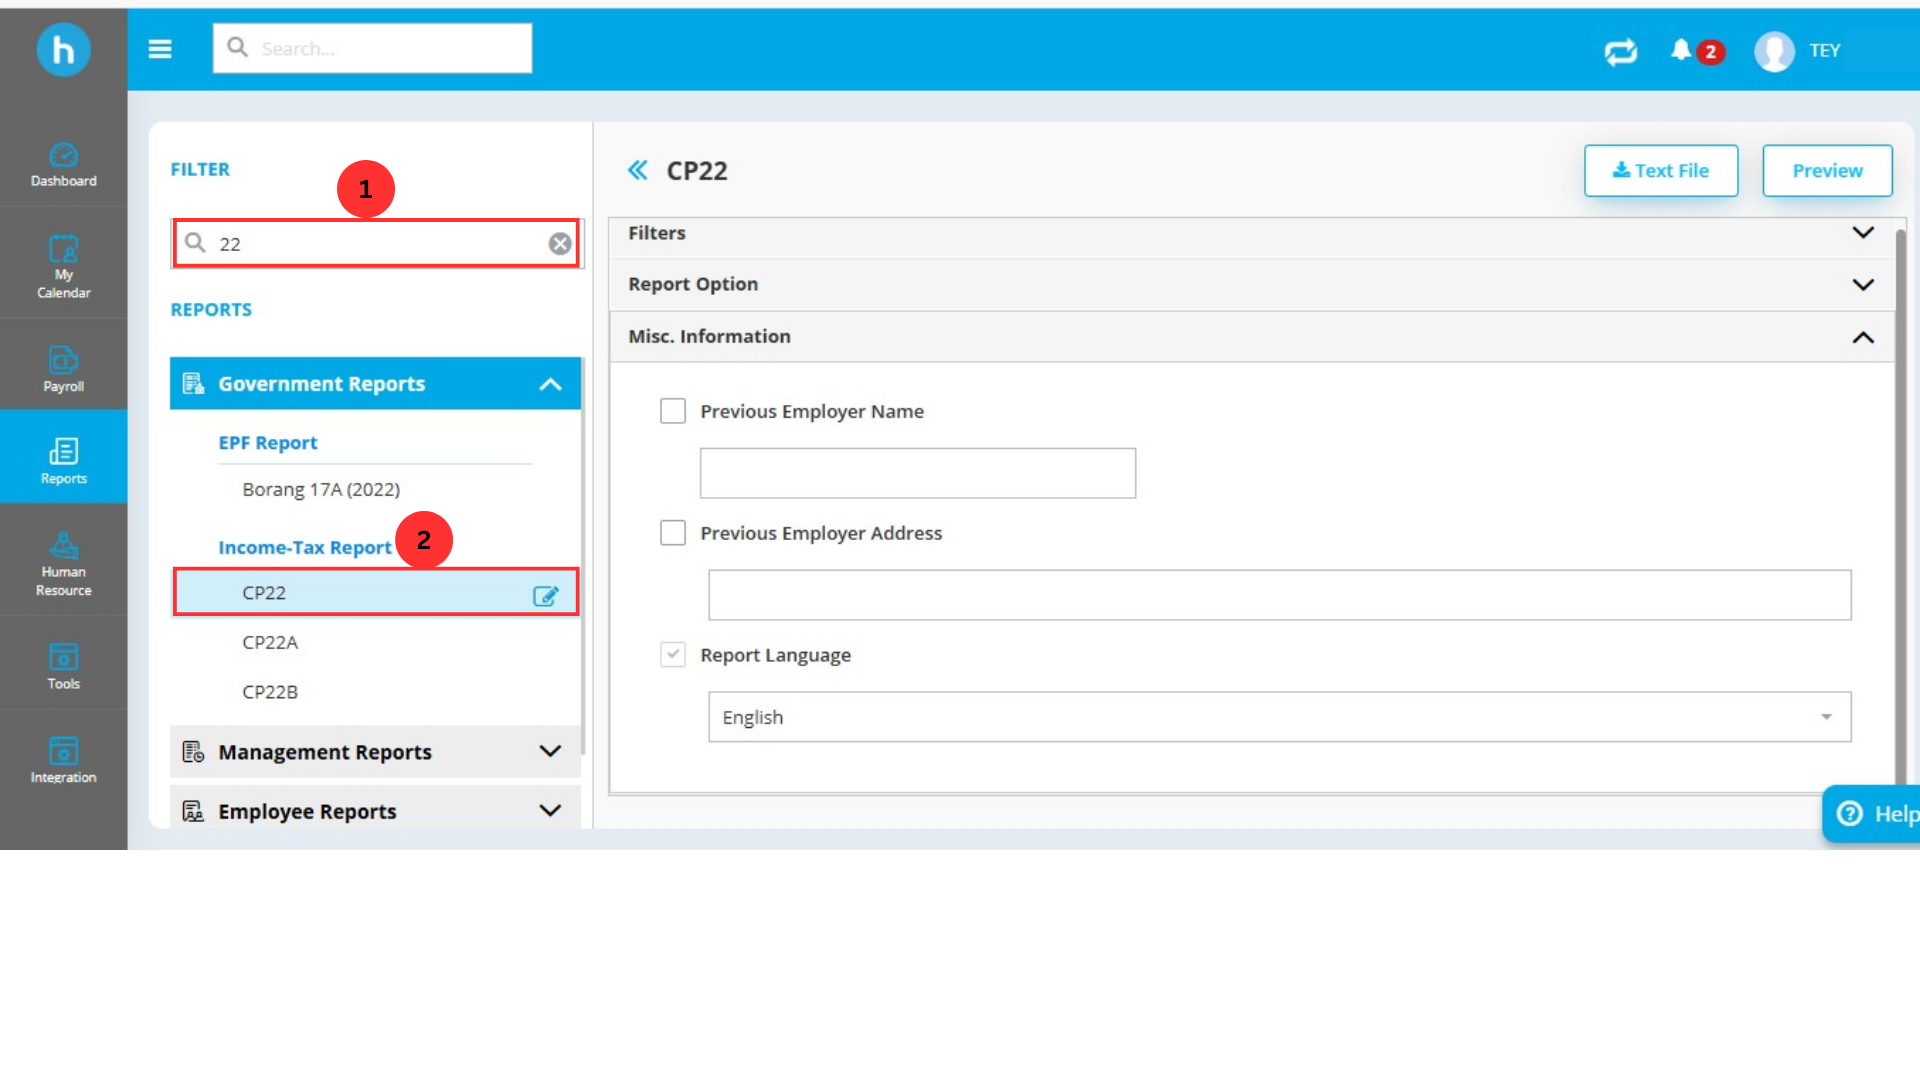
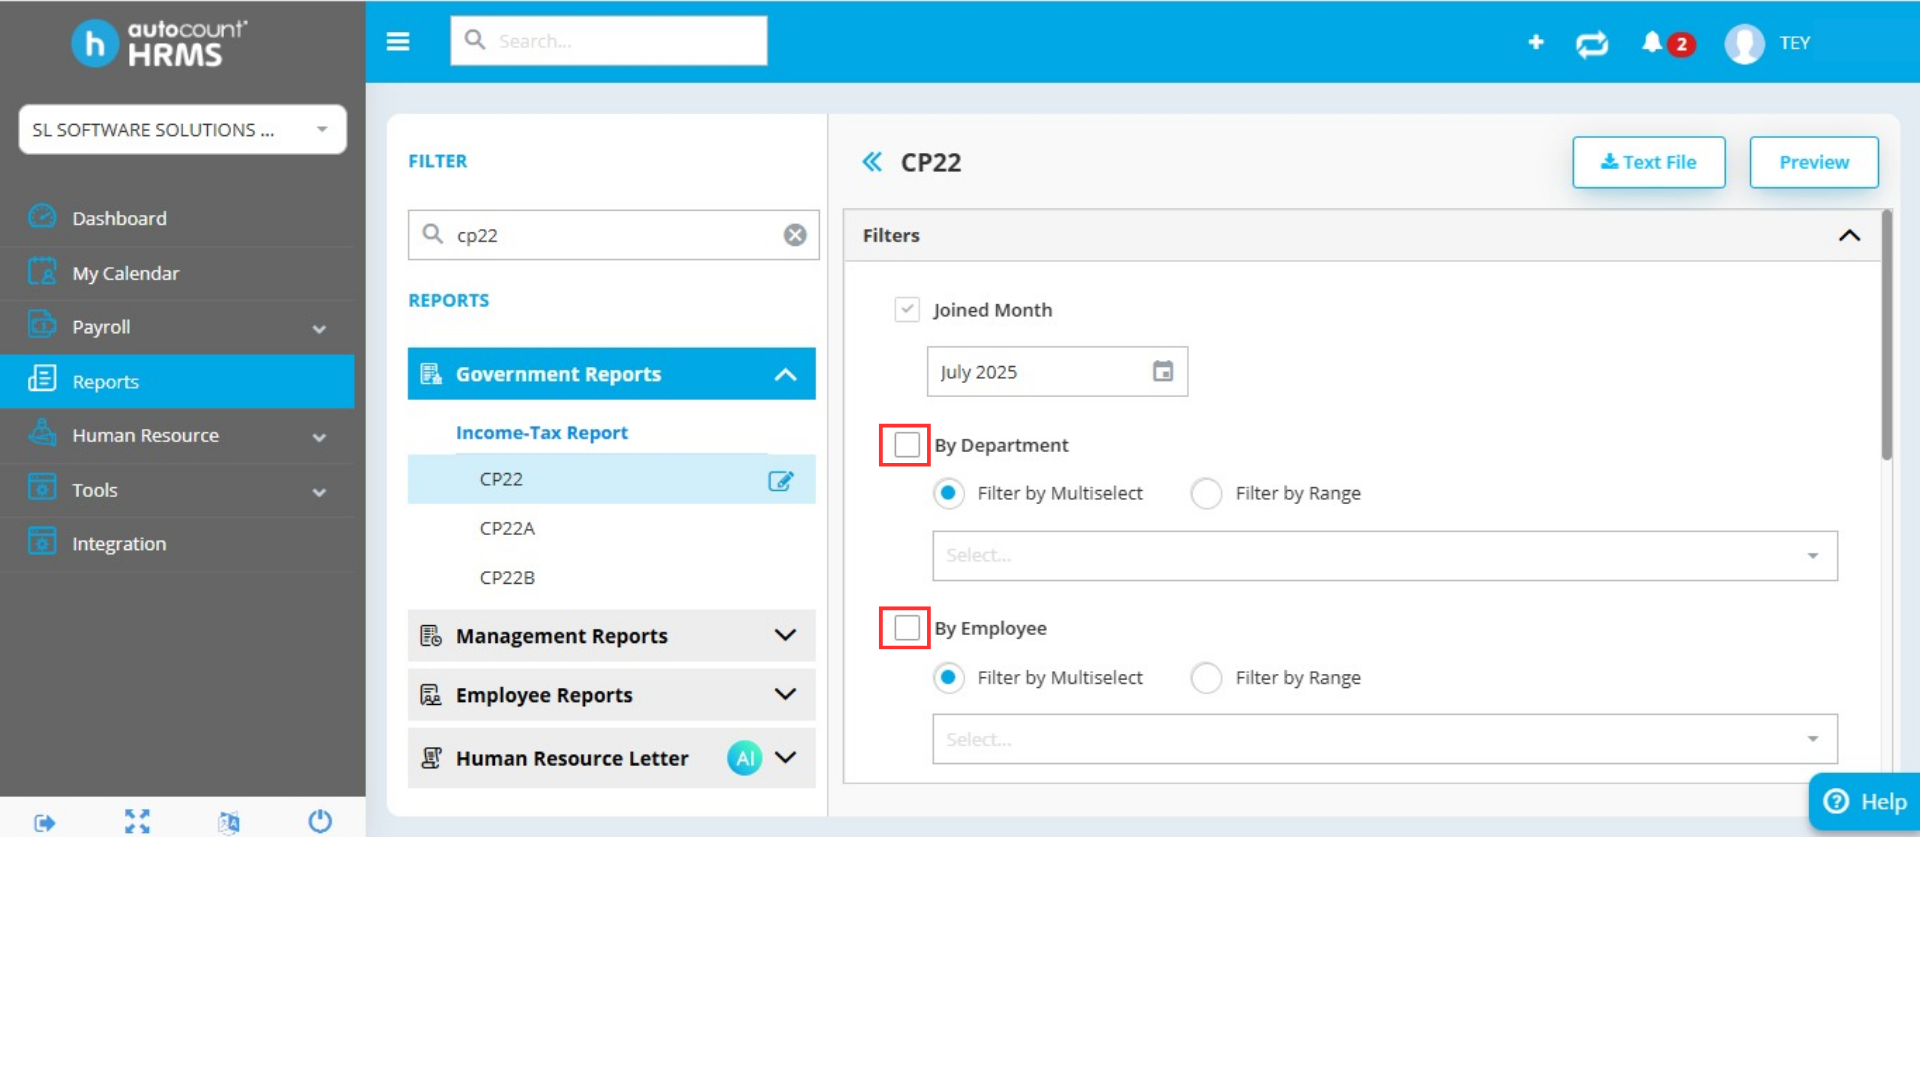
3. Select Employees: You can filter the employees based on several criteria such as department, employee type, branch, or project.
- Alternatively, you can search by employee name and month they joined.
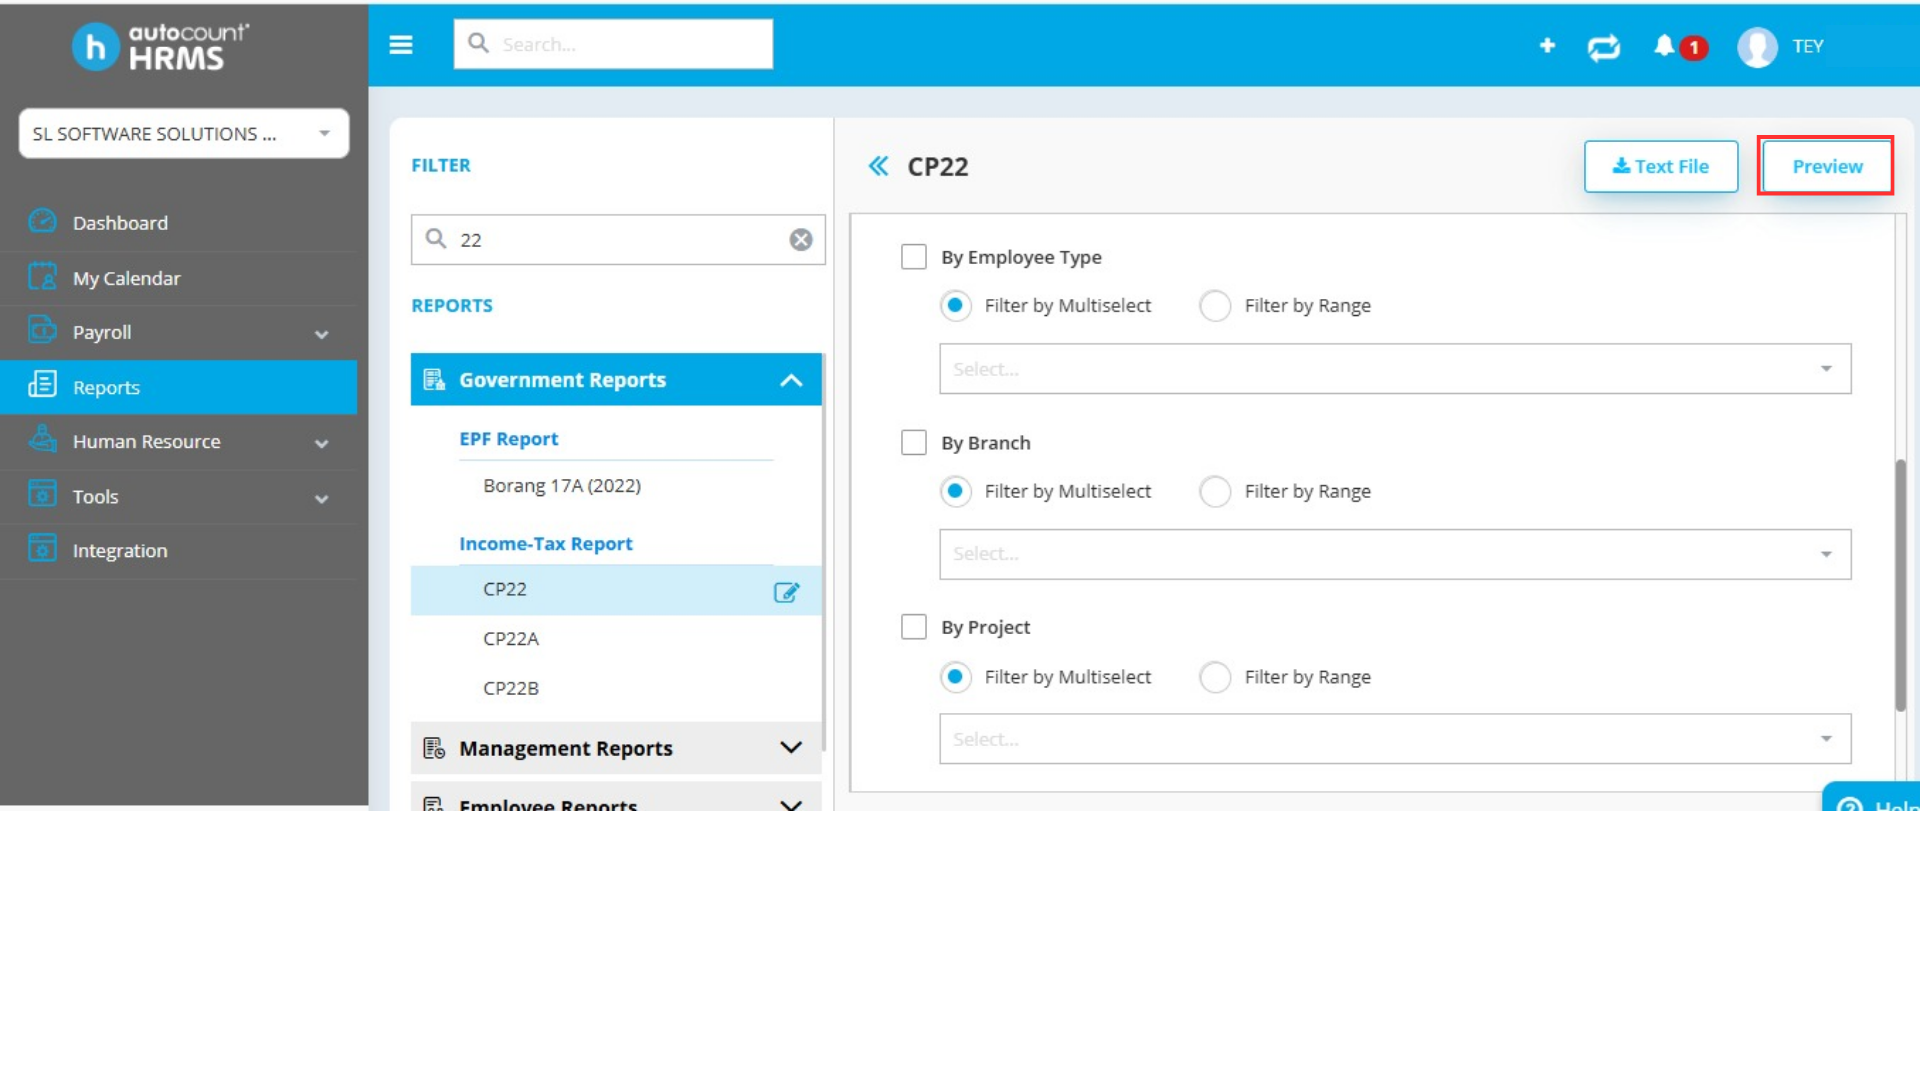
4. Preview the Form: Once you’ve selected the relevant employees, click the Preview button to generate the CP22 form for review.
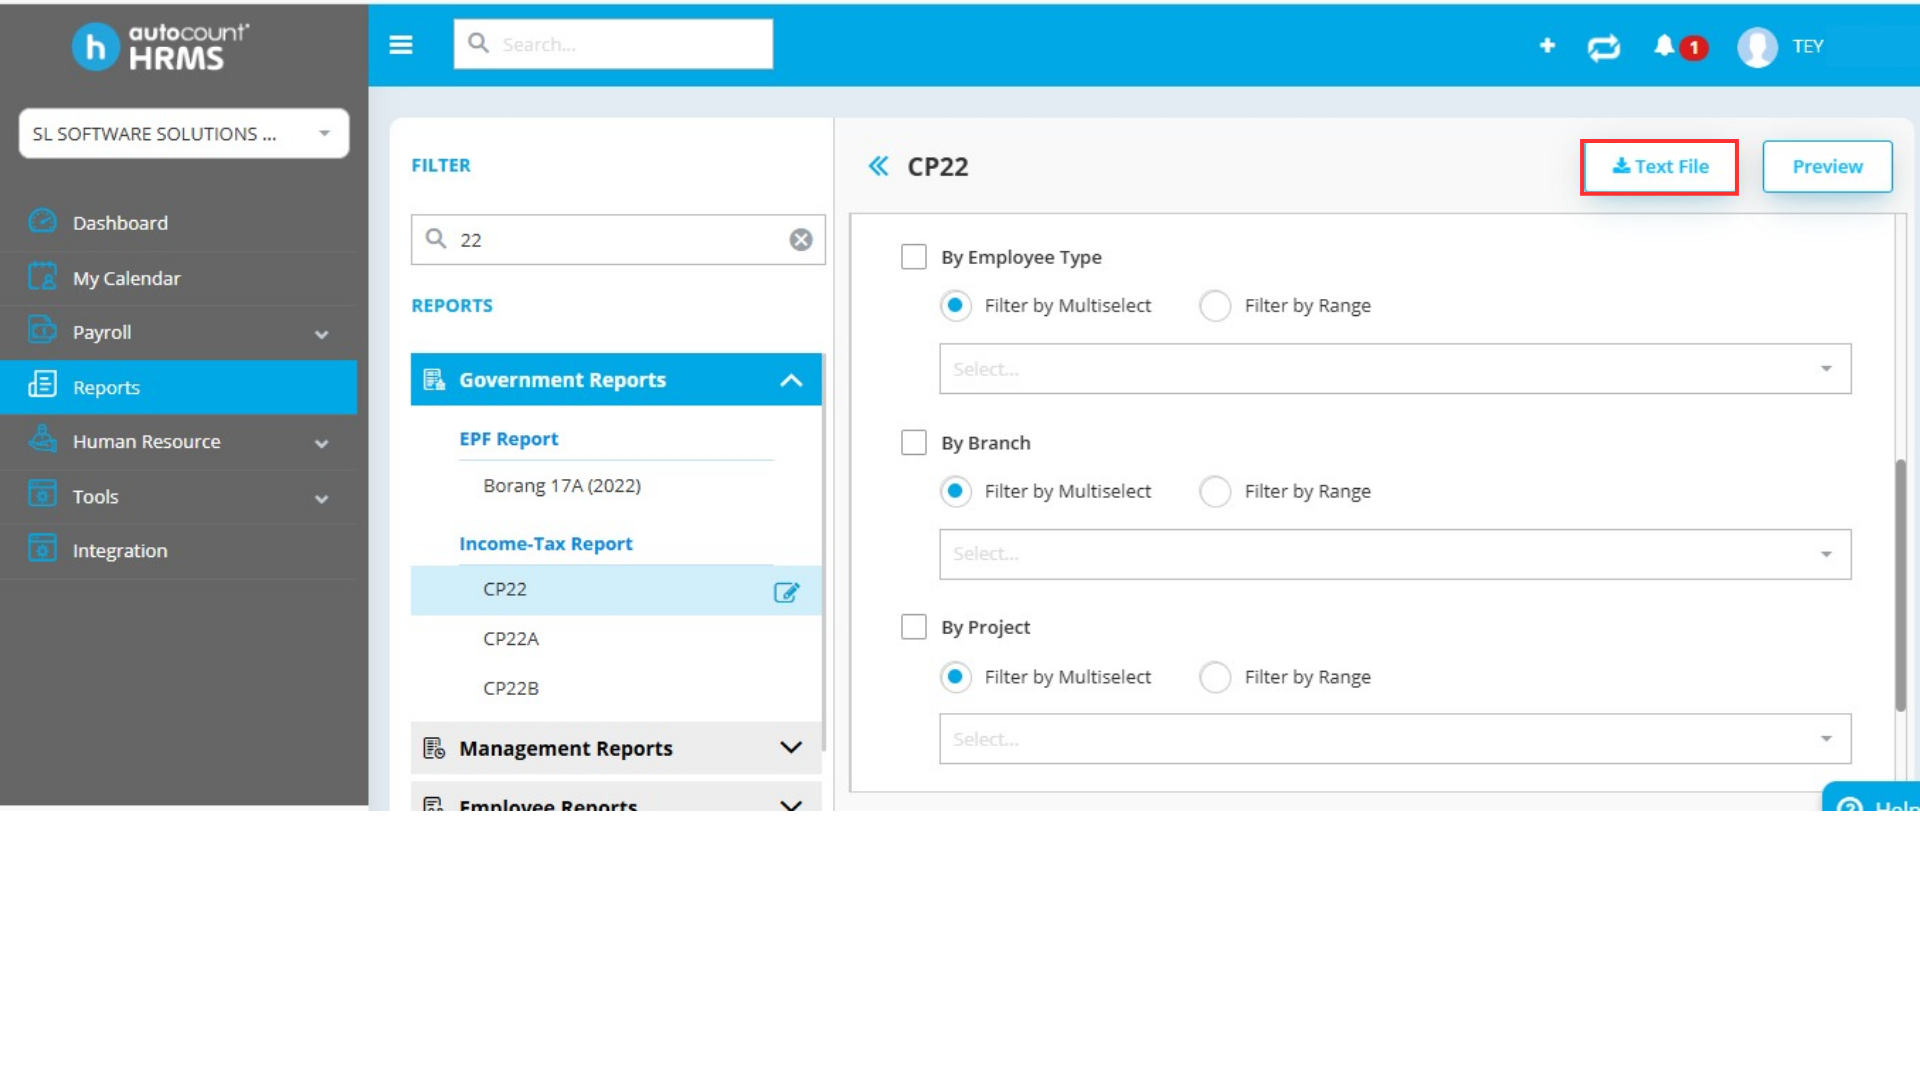
5. Download the Text File: After confirming the details, click Text File to download the CP22 text file.
Step 3: Login to MyTax Portal
Next, access the MyTax Portal to upload the CP22 file.
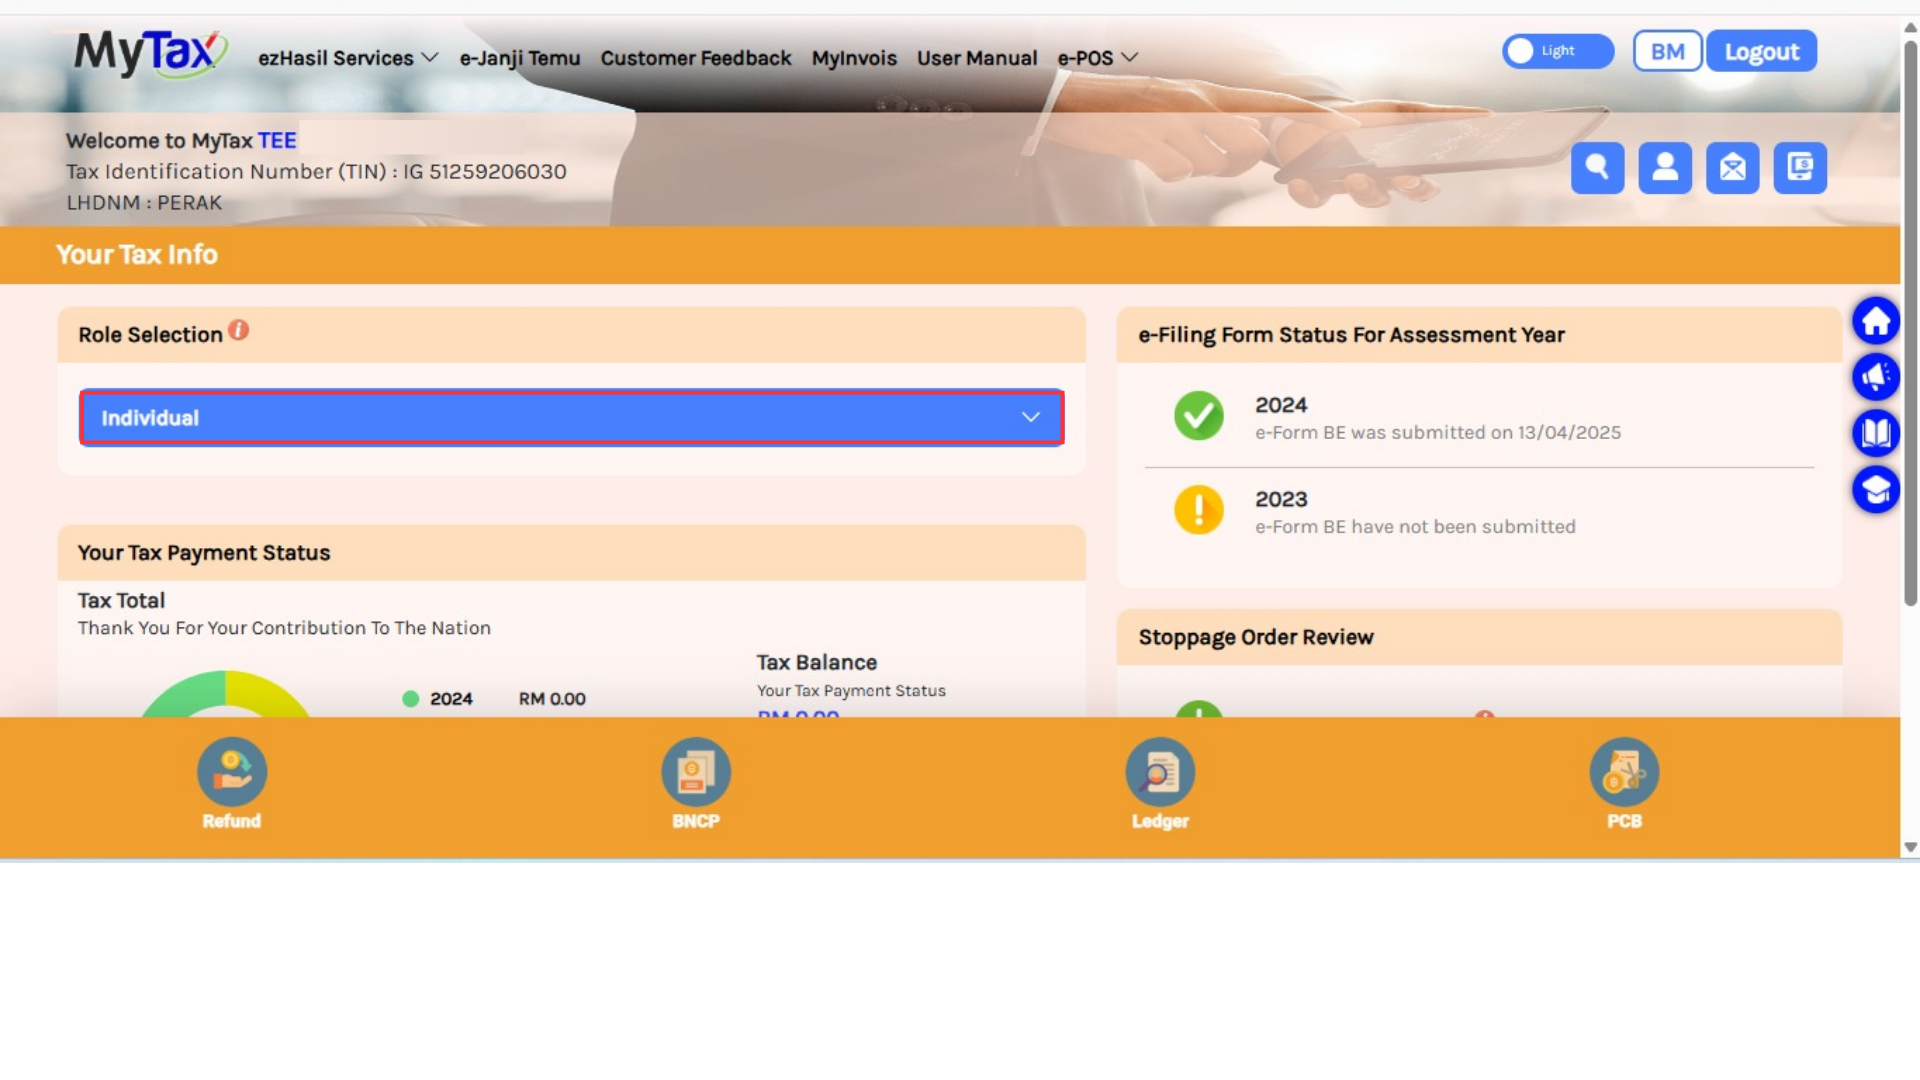
1. Login: Go to the MyTax Portal and log in to your account.

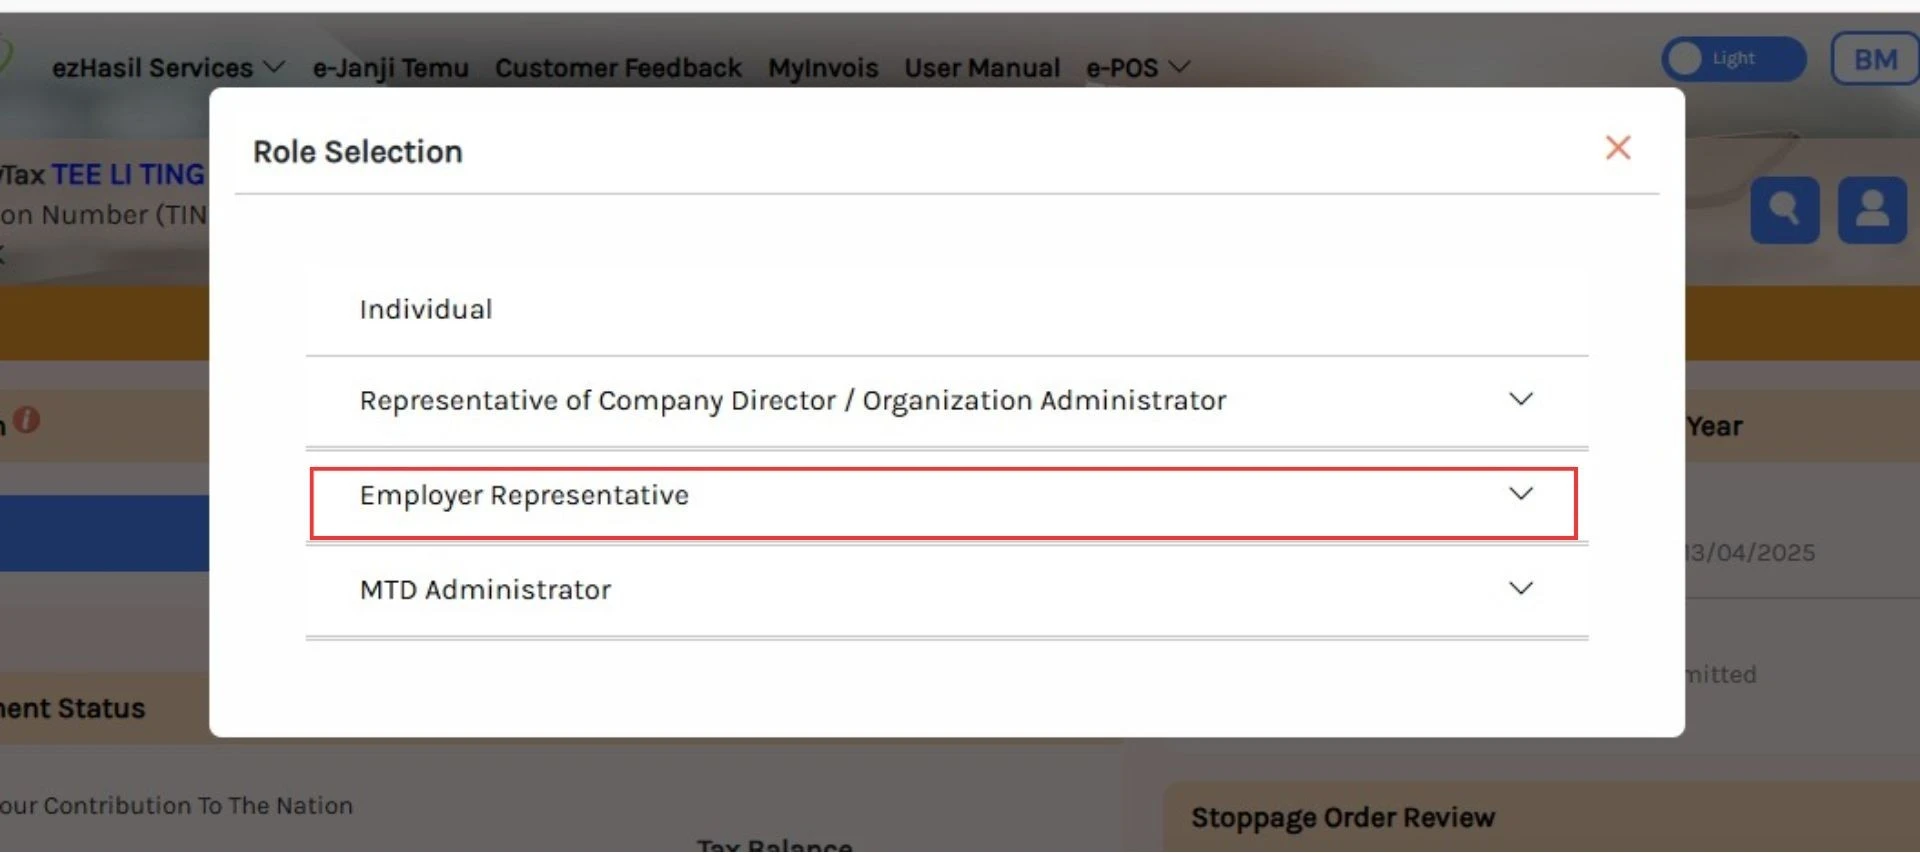
2. Change Role: Switch your role from “Individual” to “Employer Representative.“
3. Navigate to e-CP22: Click on ezHasil Services, and then select e-CP22.

4. Start Submission: After clicking into e-CP22, your company details will appear. Click Next to proceed to the submission page.

Step 4: Upload the CP22 File
Now, you’re ready to upload the CP22 text file:
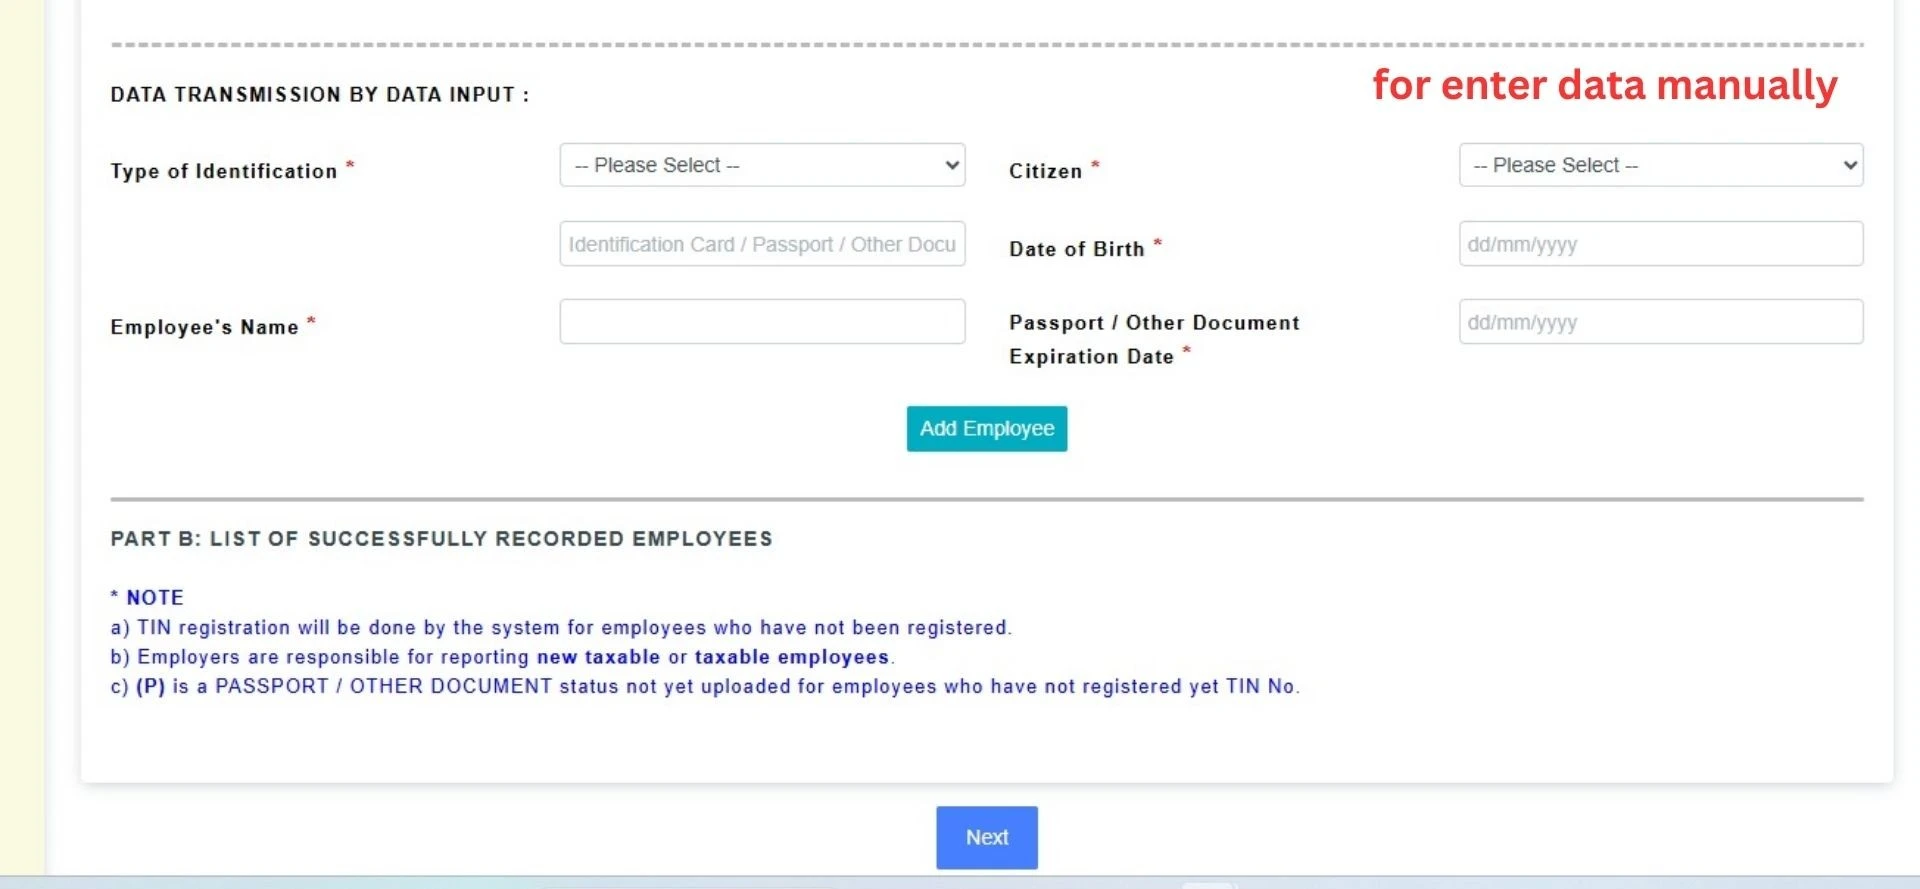
1. Choose the Submission Method: You have two methods for submitting data:
Upload the text file
Enter data manually
For the first method, select Upload Text File and choose the CP22 file you downloaded earlier. Click Upload to submit it.

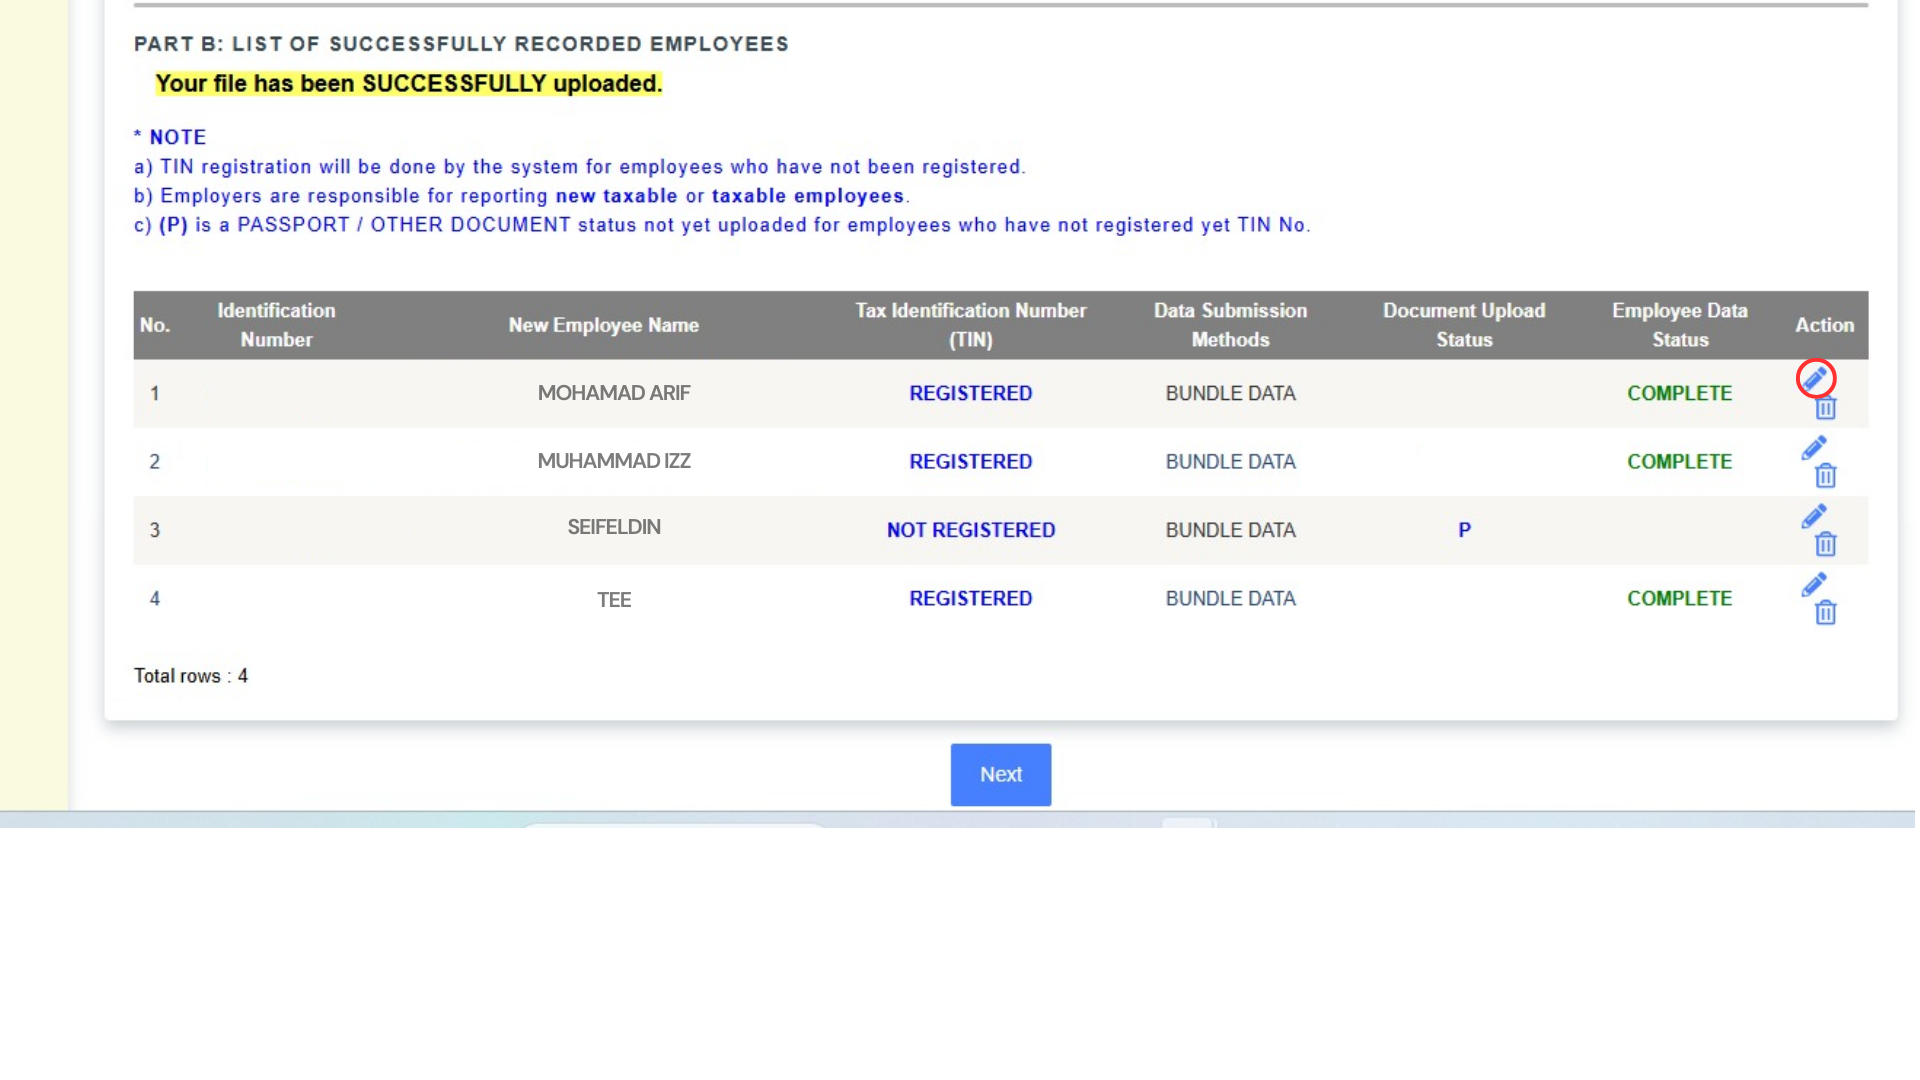
2. Review the Submission: After uploading, the system will show whether the upload was successful. If there are issues, you can find details in Part B of the form.

3. Confirm Employee Data: Once the file is correctly formatted, the list of employees will appear in Part B. Verify each employee’s information.

Step 5: Complete the Submission
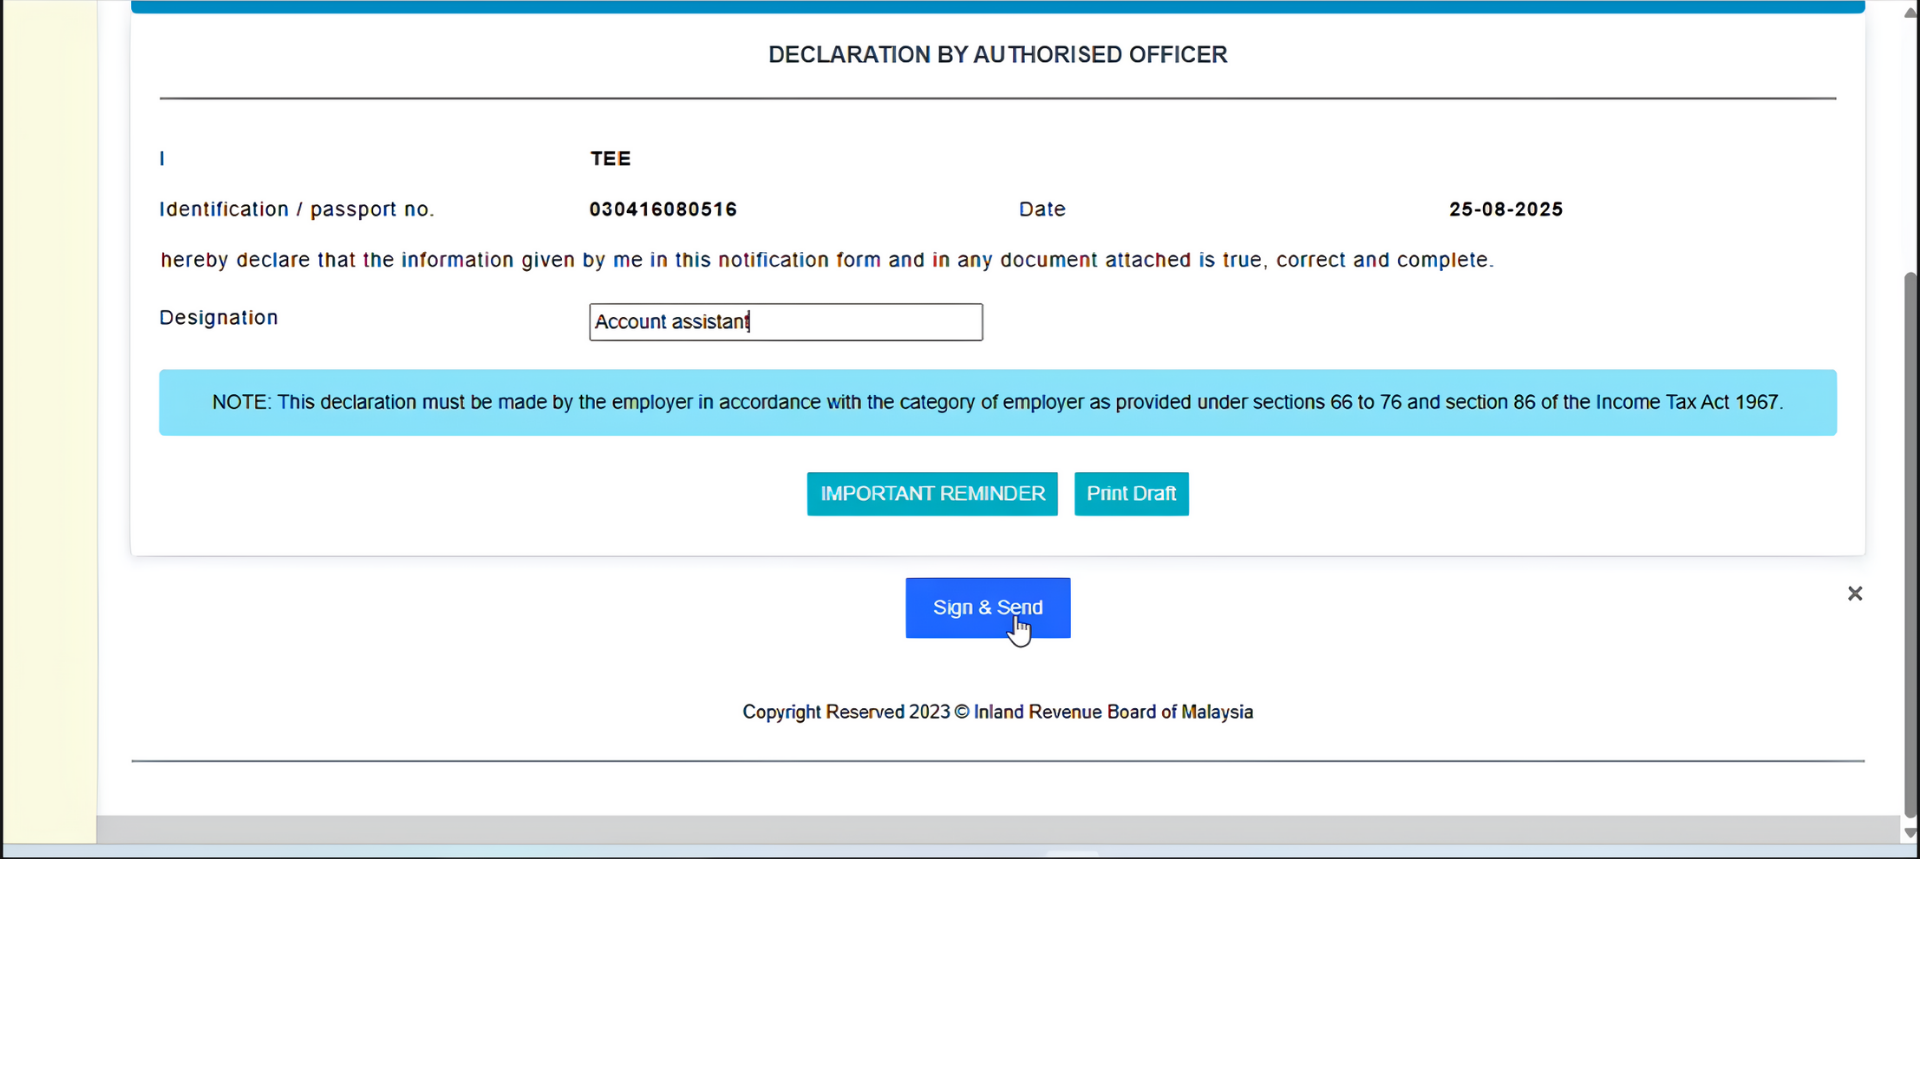
1. Add Additional Information: If using the manual method, click Add to enter details for each employee such as previos company information.
2. Finalize: After reviewing the information, click Next to proceed.
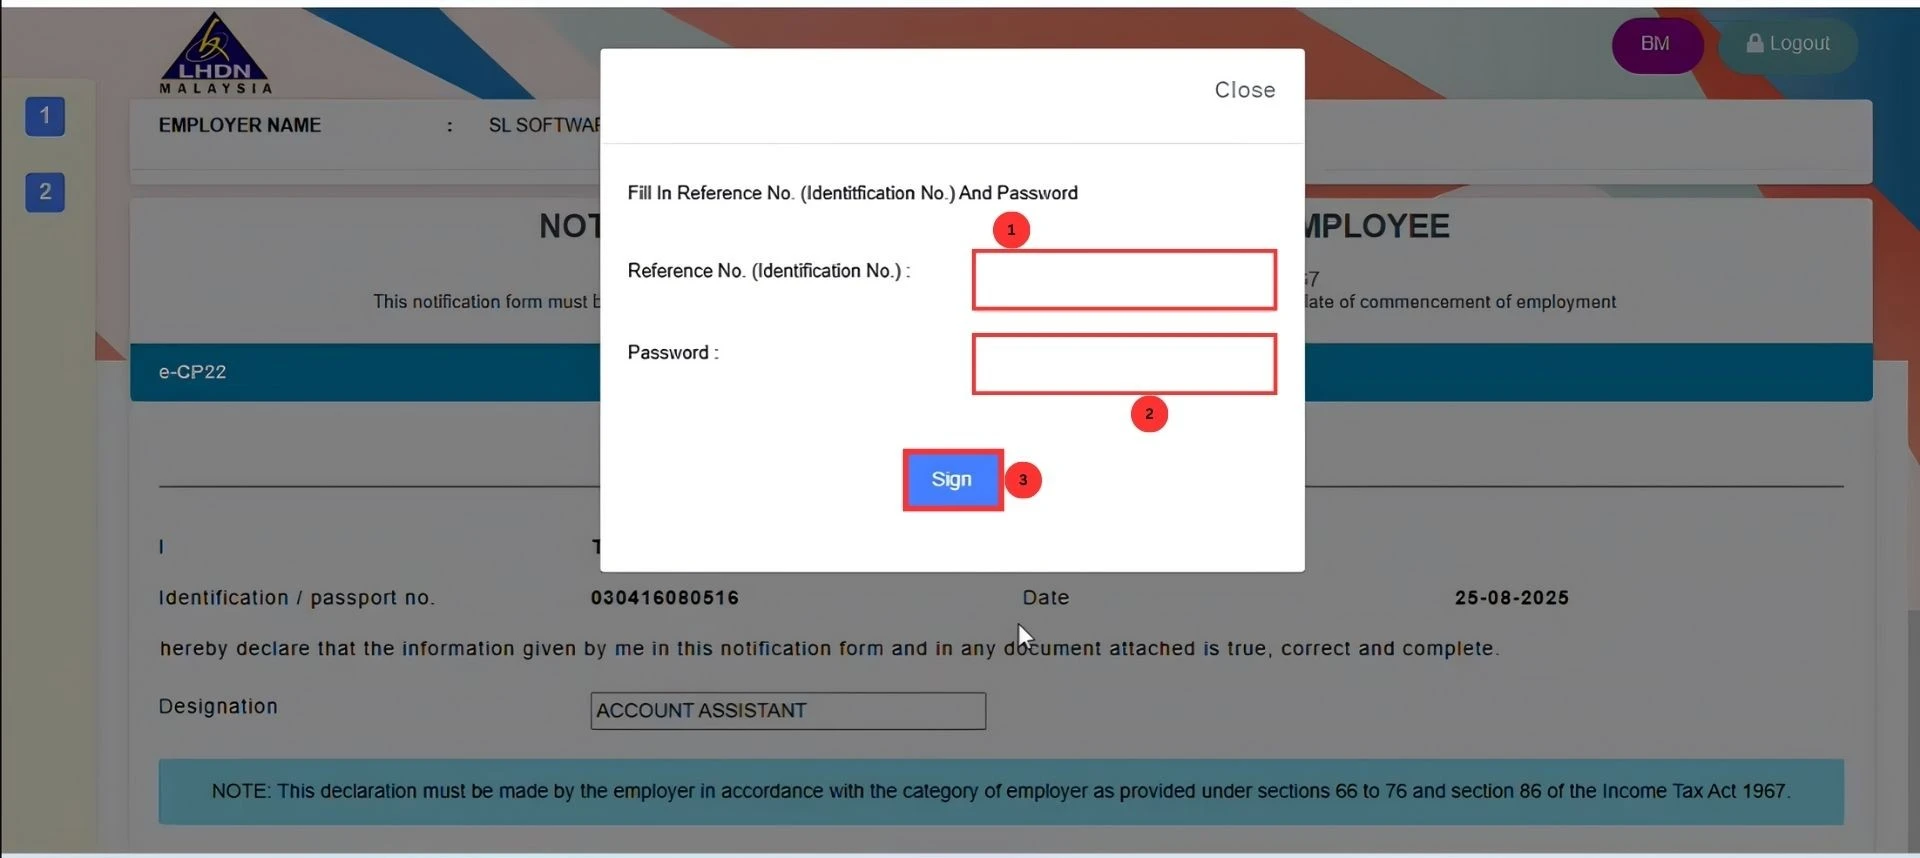
3. Sign and Submit: Confirm the data is correct and click Sign & Send to submit the CP22 form. Enter your MyTax password and IC number, then click Submit.
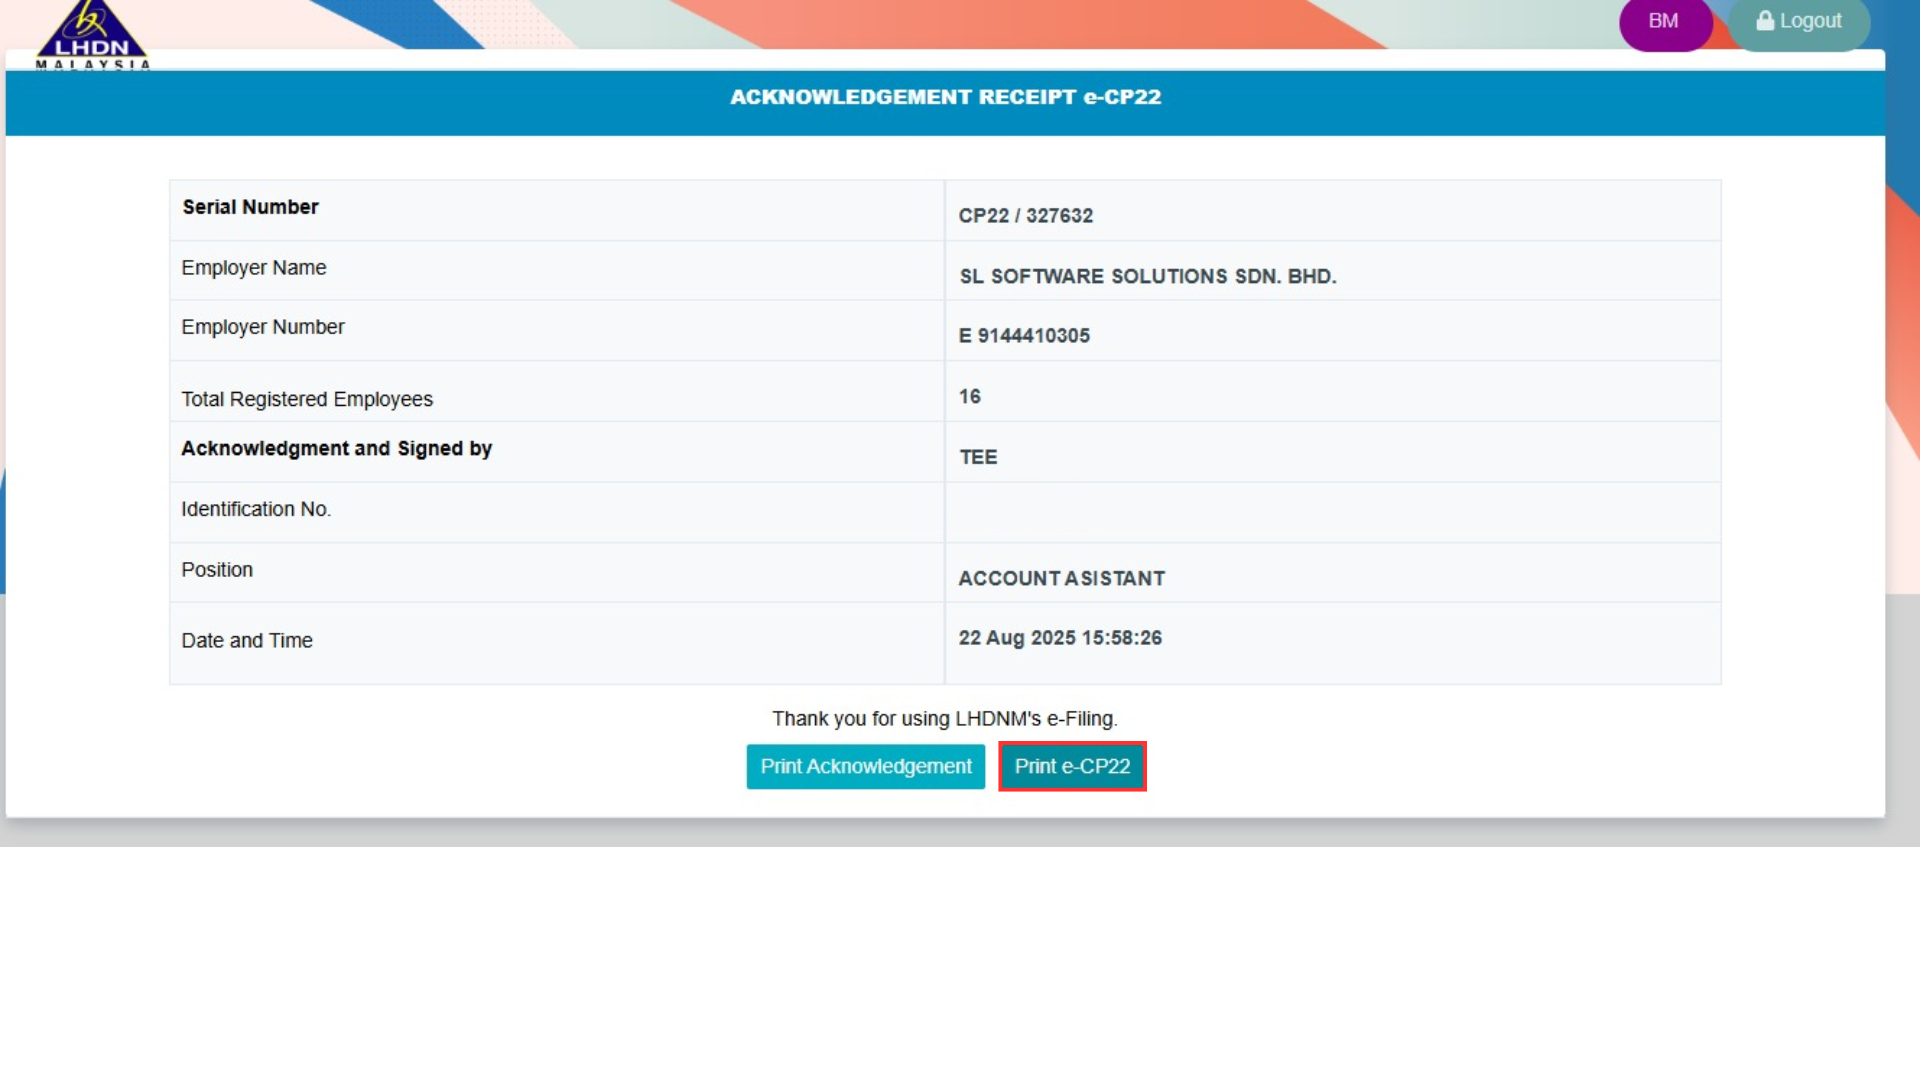
4. Print the CP22 Form: Once submitted, you can print a copy of the e-CP22 form for your records.
Conclusion
Uploading a CP22 form to MyTax Portal through AutoCount Payroll is a simple, efficient process. By following these steps, you can ensure that your payroll submissions are accurate and comply with government regulations.
Need Professional Payroll Management Solutions?
Our certified payroll specialists ensure accurate, compliant, and efficient payroll processing, allowing you to focus on strategic business priorities.