-
AutoCount Accounting Features
-
- Approval Workflow
- Audit Trail
- Auto Save in Draft Folder
- AutoCount Contra Account
- AutoCount License Setting Guide
- Deposit Tracking & Management
- Documents Numbering Format
- Full Transfer and Partial Transfer
- Import Data to AutoCount Accounting Using Excel
- Informative Charts and Analytical Data
- Layout Customization
- Multi Pricing
- Sales and Services Tax
- Schedule Backup
- Search Lookup Edit
- View Documents Flow
- AutoCount Feature Stock Take
- Show Remaining (2) Collapse
-
AutoCount Cloud Accounting
-
AutoCount E-Invoice
-
AutoCount HRMS User Guide
-
AutoCount Modules
-
- Activity Stream
- Advanced Financial Report
- Advanced Item
- Advanced Multi-UOM
- Advanced Quotation Module
- Basic Multi-UOM
- Budget Module
- Consignment
- Filter By Salesman
- FOC Quantity
- Formula
- Item Batch
- Item Package
- Landing Cost
- Multi-Currency
- Multi-Dimensional Analysis
- Multi-Location
- Project Account
- Recurrence
- Remote Credit Control Module
- Stock Assembly
- User Defined Fields (UDF)
- AutoCount SST Hidden Functions
- AutoCount SST Submission - Service Tax
- Show Remaining (9) Collapse
-
AutoCount Plugins
-
Form Template
-
Report Template
-
- Advance Quotation
- Cash Sale
- Consignment
- Consignment Movement
- Credit Note
- Debit Note
- Delivery Order
- FOC Quantity Analysis By Document Report
- Invoice
- Item Package Sales Report
- Monthly Sales Analysis
- Outstanding Sales Order Listing
- Profit And Loss Of Documents
- Quotation
- Sales Agent Contribution Report
- Sales Order
- Top/Bottom Sales Ranking
- Show Remaining (2) Collapse
-
- Available Stock Status Report
- Expired Item Batch Listing
- Inventory Physical Worksheet
- Stock Adjustment
- Stock Aging Report
- Stock Assembly
- Stock Assembly Order
- Stock Balance By Location
- Stock Balance Report
- Stock Card Report
- Stock Disassembly
- Stock Issue
- Stock Item Profit Margin
- Stock Movement Report
- Stock Receive
- Stock Take
- Stock Transfer
- Stock Write Off
- Show Remaining (3) Collapse
AutoCount Plugin: Pick List Plugin User Guide
Understanding AutoCount Pick List Plugin
Managing inventory across multiple storage locations can be timeconsuming and errorprone when done manually. The AutoCount Pick List Plugin helps businesses quickly view stock levels by location, create pick lists based on sales orders, and automate stock transfers — all aimed at improving warehouse efficiency and accuracy.
What Is The AutoCount Pick List Plugin?
This plugin enhances AutoCount’s inventory capabilities by allowing users to:
Generate pick lists from sales orders
Automatically post stock transfers
Track available stock by location instantly
Transfer items from pick list to sales or cash sales
Why This Matters?
For businesses with warehouses, multiple storage locations, or high inventory movement, manually checking stock and transferring items can slow operations and introduce errors. With the Pick List Plugin:
- Inventory is centralized and visible by location
- Picking tasks are easier and more accurate
- Stock transfers are automatically processed
- Invoicing from picked stock becomes faster and error‑free
Key Features & Capabilities
Stock Location Maintenance
Configure stock locations to ensure only relevant locations appear in pick lists during picking.
Pick List Generation
Generate pick lists from sales orders with real-time stock availability by location and automatic carton and volume calculations based on item dimensions.
Automated Stock Transfers
Automatically post stock transfers from pick locations to loading locations after saving a pick list, simplifying stock movement without manual processing.
Integration with Invoicing
Automatically load picked items into invoices using the “Transfer from Pick List” function, reducing repeated data entry.
Step by Step Instructions
1.0 Installing the Plug-In
- Go to Tools > Plug-In Manager.
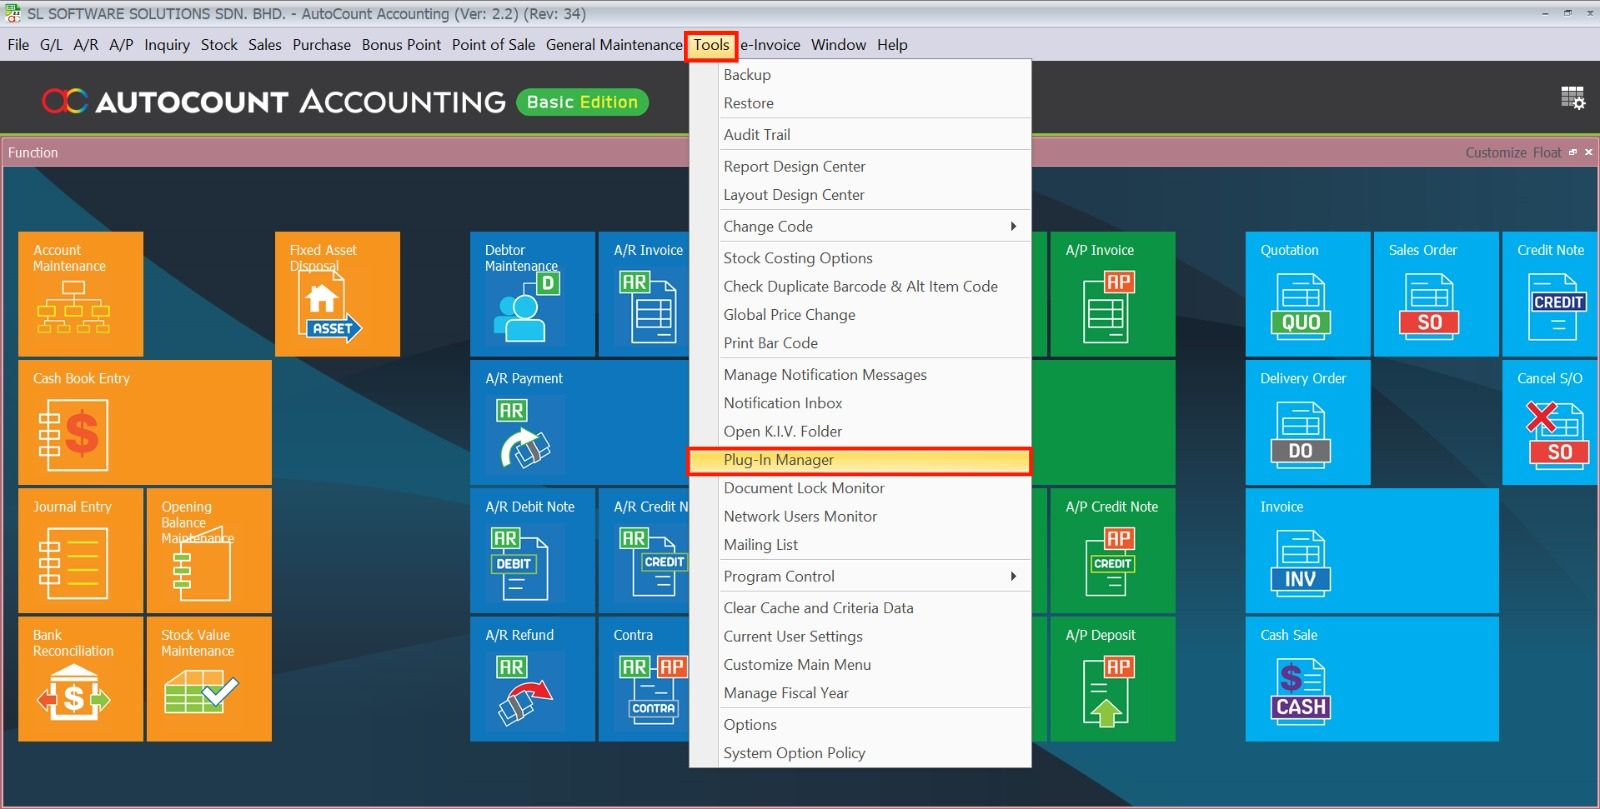
- Next,click on the Install.
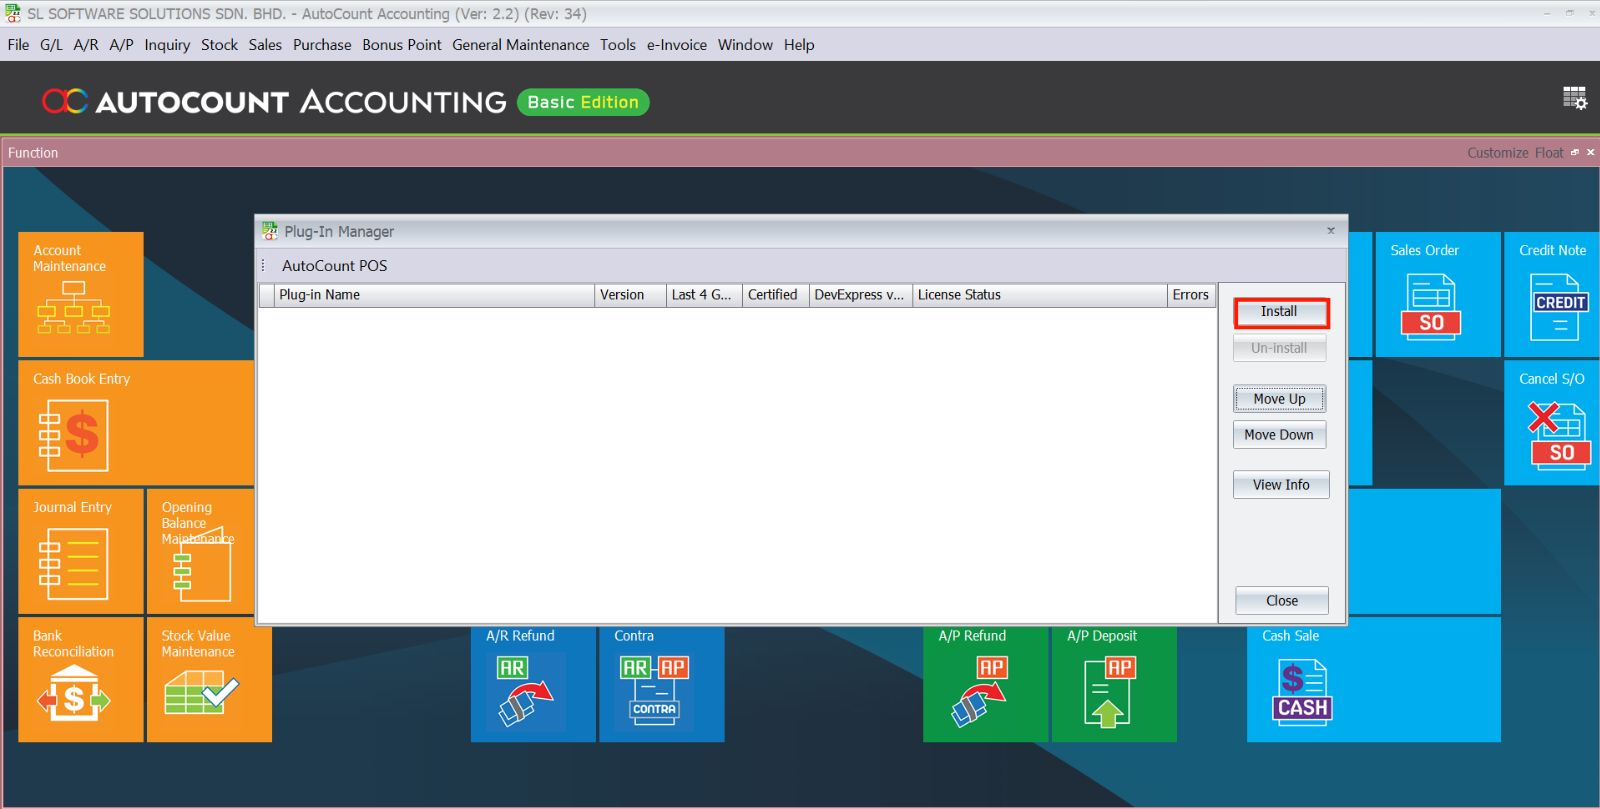
- Browse for the Pick List Plugin.app file.
- A confirmation window appears showing plugin details.
- Click Install to proceed.
- When prompted, click Yes to confirm installation.
- A success message will appear once the plugin is correctly installed.
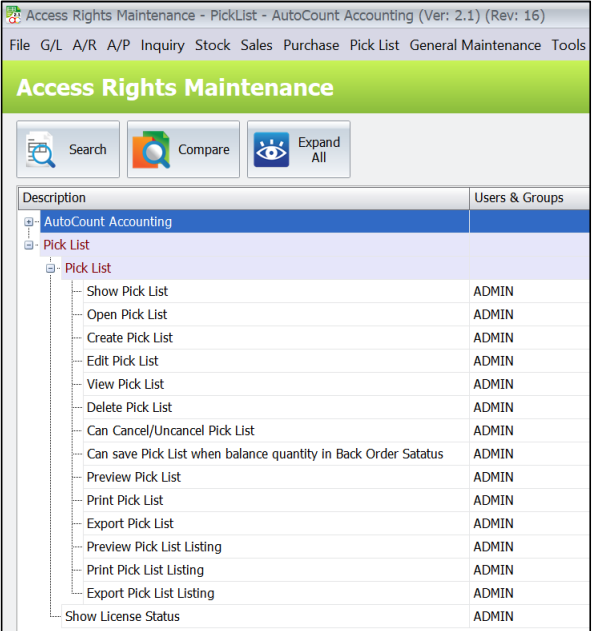
2.0 Assign Access Rights
- Go to General Maintenance > Access Right Maintenance.
- Locate Pick Listand click the + next to it.
- Click “Set Group Access Rights”.
- In the pop-up, select Admin (example).
- Change Don’t change to Add.
- Click OK to save.
- Click Yes to apply to sub-commands.
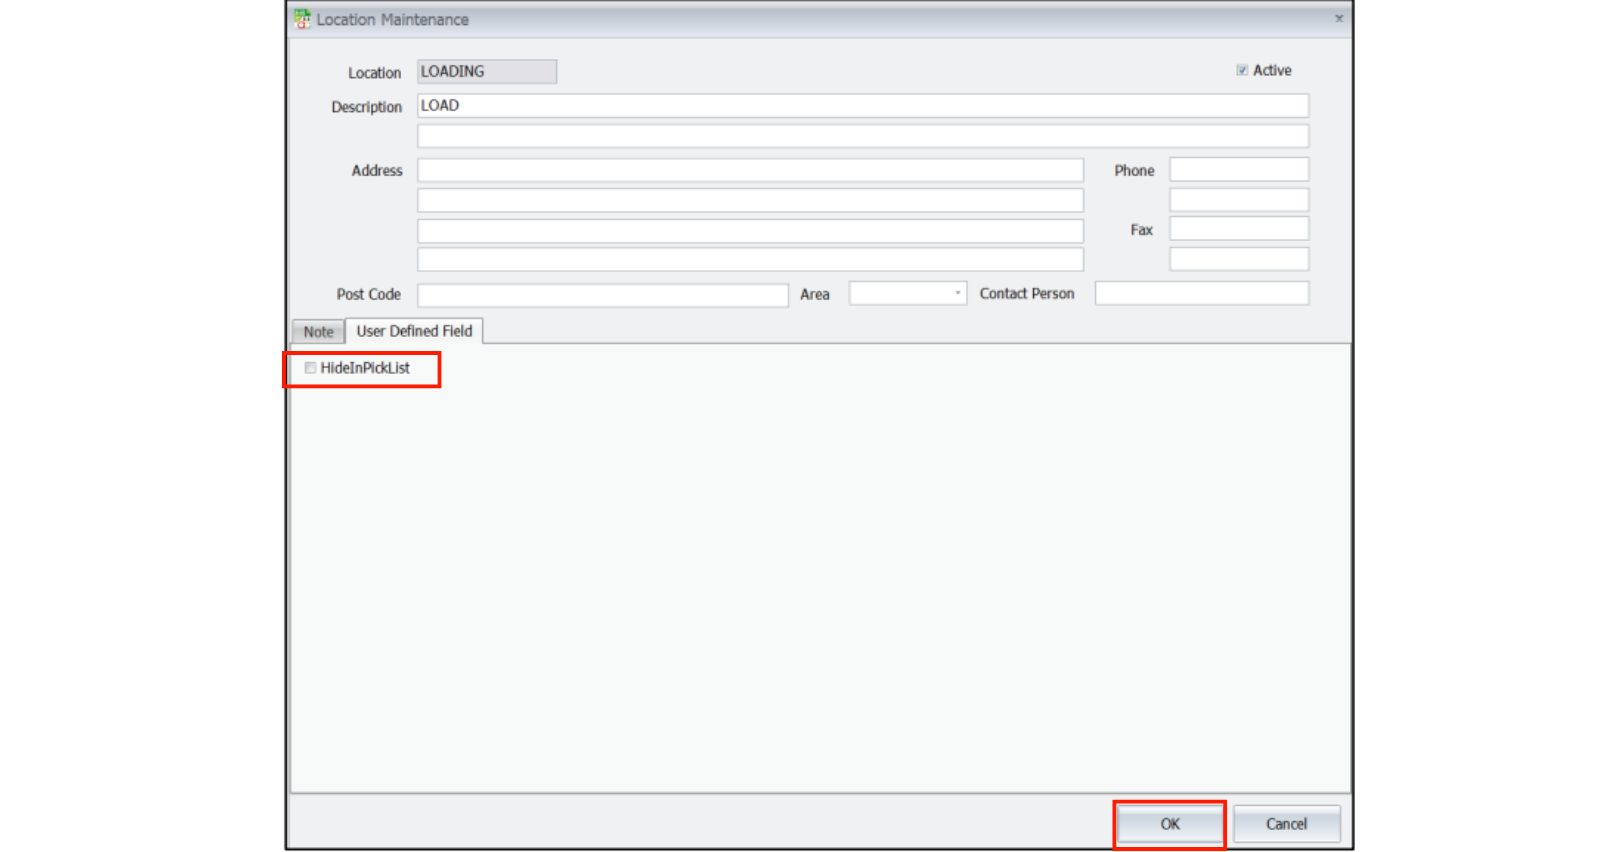
3.0 Stock Location
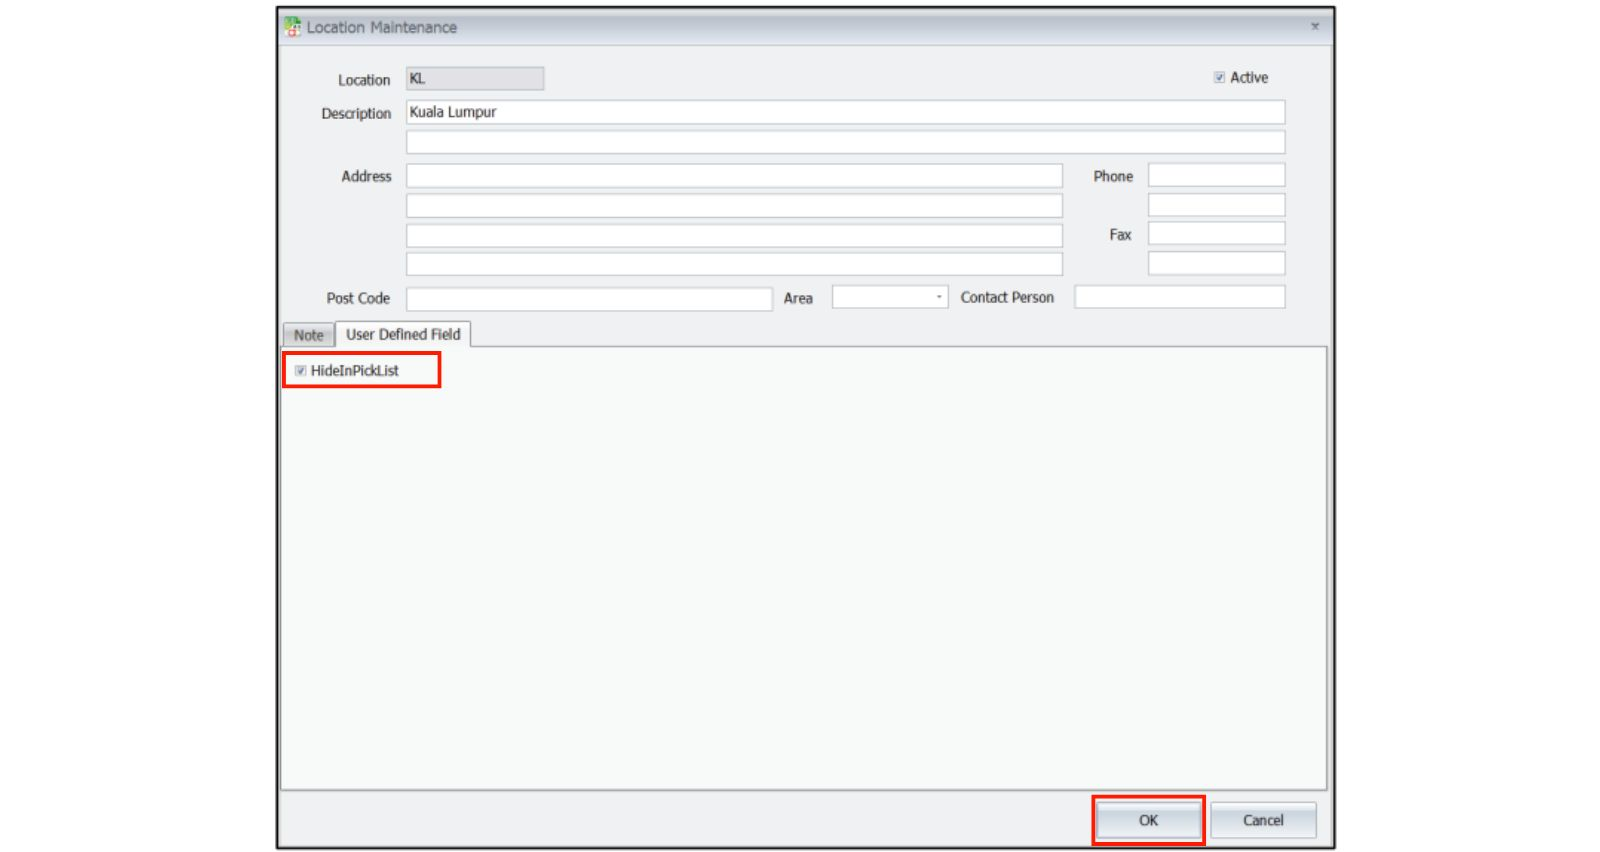
3.1 Stock Location (Hide in Pick List)
- Go to Stock > Stock Location Maintenance.
- Click New.
- Set the location name/info.
- In User Define Field, tick HideInPickList.
- Click OK to save.
3.2 Stock Location (Loading Location)
- Go to Stock > Stock Location Maintenance.
- Click New.
- Name the location Loading.
- Do NOT tick HideInPickList.
- Click OK to save.
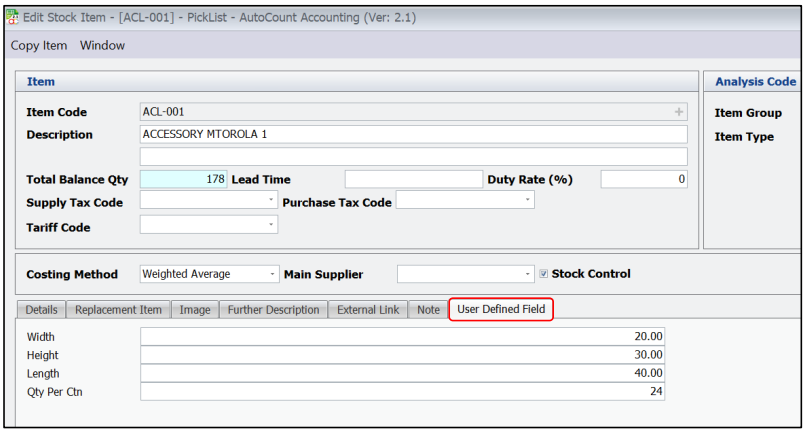
4.0 Stock Item (Dimensions)
- Go to Stock > Stock Item Maintenance.
- Click New.
- Enter item info.
- Go to User Define Field
- Enter Height, Width, Length, and Qty Per Ctn.
- Click OK to save.
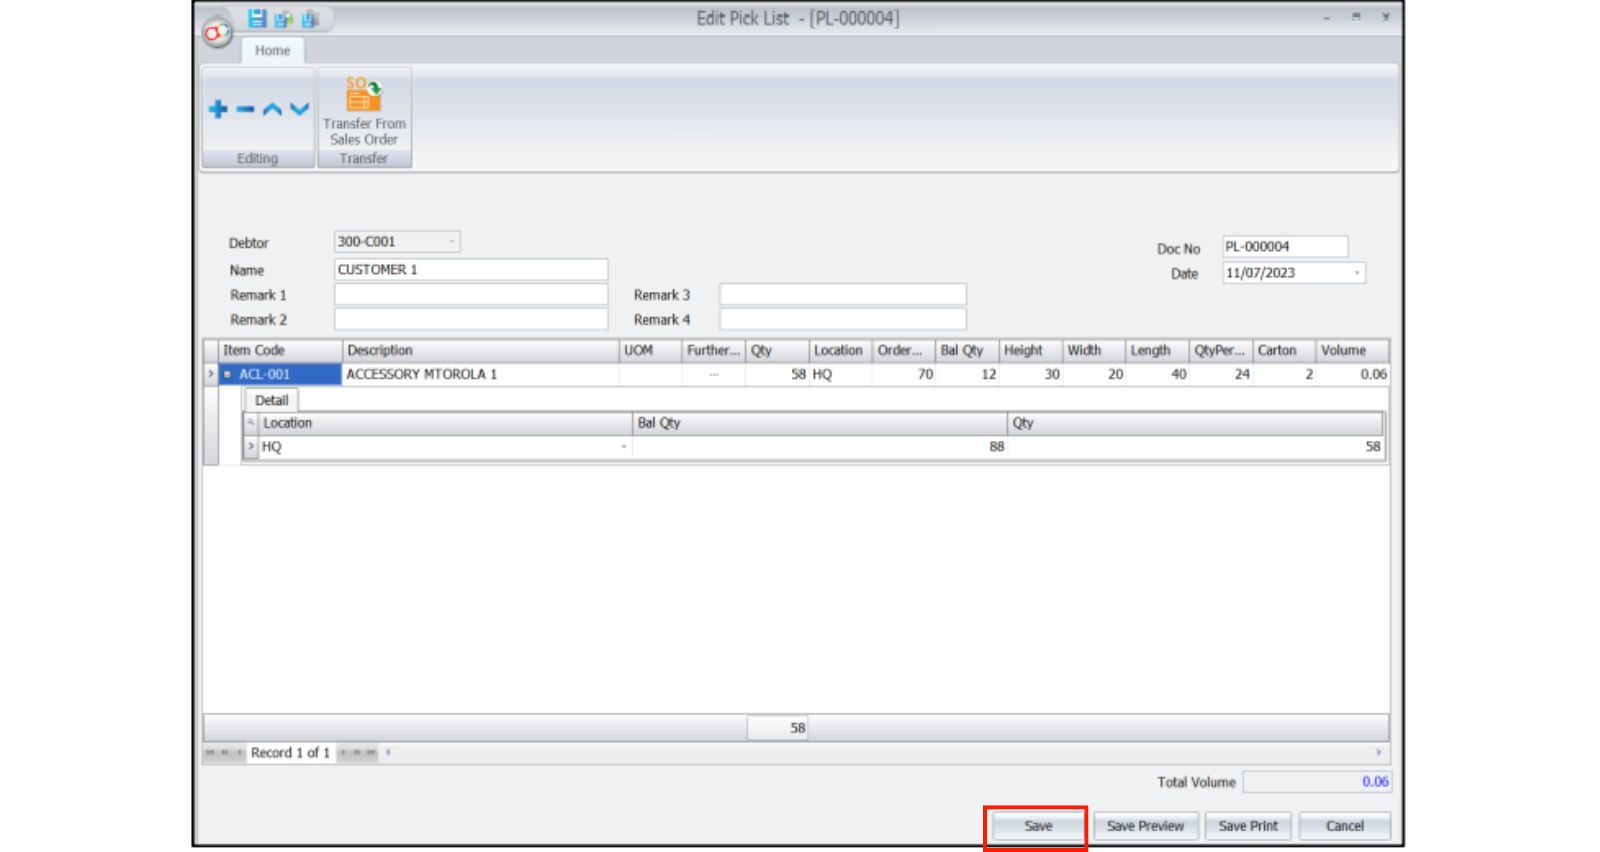
5.0 Pick List
5.1 Pick List (New)
- Go to Sales > Pick List.
- Click New.
- Select a Debtor.
- Click Transfer From Sales Order.
- Cannot add items directly here.
- Enter Packing Quantity.
- System auto-calculates Carton and Volume.
- Click Save.
Note: Packing Qty must not exceed order qty.
5.2 Pick List (Transfer to Invoice / Cash Sales)
- Go to Sales > Pick List.
- Select an existing pick list.
- Right-click and choose a transfer option:
- Partial / Full Transfer to Invoice
- Partial / Full Transfer to Cash Sales

- Click Save to confirm.
Note: Transferred pick list sets location to Loading Location.
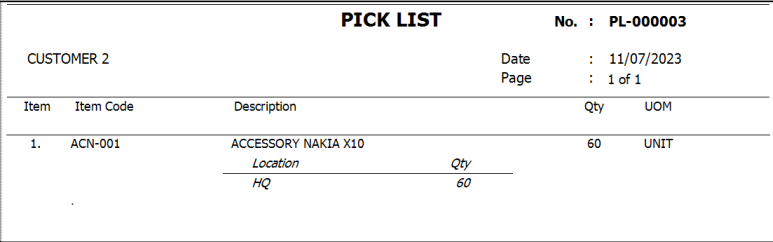
5.3 Pick List (Report)
- Go to Sales > Pick List.
- Select a pick list.
- Click Preview to view the pick list report.
6.0 Stock Transfer – Multi Location
6.1 New Stock Transfer – Multi Location
- Go to Pick List > Stock Transfer – Multi Location.
- Click New.
- Add one or more items.
- Set From Location= Loading and To Location= target location
- Click Save.
Note: Saved entries appear in the Stock Transfer list.

6.2 Stock Transfer – Multi Location (Report)
- Go to Pick List > Stock Transfer – Multi Location.
- Select an existing transfer doc.
- Click Preview to view the report.
Benefits of Using AutoCount Pick List Plugin
Faster Warehouse Operations
Shows available stock by location and speeds up picking tasks.
Improved Accuracy
Reduces manual errors by auto calculating quantities and volumes.
Seamless Transfers
Automates stock transfers from pick location to loading location.
Simplifies Invoicing
Items can be transferred directly into invoices without manual entry.
Frequently Asked Questions
How do I install the Pick List Plugin?
Use Tools > Plug-In Manager to install the Pick List Plugin .app file and confirm installation.
Can I hide certain stock locations from pick lists?
Yes,tick HideInPickList in Stock Location Maintenance to exclude them.
How do I transfer picked items to invoices?
Use Transfer from Pick List in the pick list context menu to push items into Invoice or Cash Sales.
What happens when I save a pick list?
The plugin posts a Stock Transfer to move items from pick location to loading location automatically.
Why input item dimensions?
To calculate carton volume automatically, aiding space planning and packing.
A Better Way to Handle Stock Starts Here
The AutoCount Pick List Plugin streamlines inventory picking, automates stock transfers, and integrates pick lists into sales invoicing — resulting in faster, more accurate warehouse operations with less manual work.