-
AutoCount Accounting Features
-
- Approval Workflow
- Audit Trail
- Auto Save in Draft Folder
- AutoCount Contra Account
- AutoCount License Setting Guide
- Deposit Tracking & Management
- Documents Numbering Format
- Full Transfer and Partial Transfer
- Import Data to AutoCount Accounting Using Excel
- Informative Charts and Analytical Data
- Layout Customization
- Multi Pricing
- Sales and Services Tax
- Schedule Backup
- Search Lookup Edit
- View Documents Flow
- AutoCount Feature Stock Take
- Column Chooser
- Show Remaining (3) Collapse
-
AutoCount Cloud Accounting
-
AutoCount E-Invoice
-
AutoCount HRMS User Guide
-
AutoCount Modules
-
- Activity Stream
- Advanced Financial Report
- Advanced Item
- Advanced Multi-UOM
- Advanced Quotation Module
- Basic Multi-UOM
- Budget Module
- Consignment
- Filter By Salesman
- FOC Quantity
- Formula
- Item Batch
- Item Package
- Landing Cost
- Multi-Currency
- Multi-Dimensional Analysis
- Multi-Location
- Project Account
- Recurrence
- Remote Credit Control Module
- Stock Assembly
- User Defined Fields (UDF)
- AutoCount SST Hidden Functions
- AutoCount SST Submission - Service Tax
- AutoCount Scripting Module User Guide
- AutoCount Bonus Point Module User Guide
- AutoCount Service Management Plugin User Guide
- Show Remaining (12) Collapse
-
AutoCount Plugins
-
- Fixed Assets Management
- Goldsmith
- TD Ordering Mobile Apps
- TD Stock Mobile Apps
- Universal Import Plugin
- DMS Import Plugin
- AutoCount Pick List Plugin User Guide
- AutoCount Credit Memo Plugin User Guide
- AutoCount Lock Price Plugin
- AutoCount Progressive Billing
- AutoCount Easy Recurrence Plugin
- Batch Update Unit Price Plugin
- AutoCount Production order
- AutoCount Car Tint Film Plugin
-
- Event Management System
- AutoCount To-Do List Plugin
- AutoCount AutoBank Reconciliation Plugin
- Intercompany Billing Plugin User Guide
- Lead Management 2.0 Plugin
- AutoCount Service Contract Plugin User Guide
- AutoCount Optical Plugin
- AutoCount Integrator Plugin
- AutoCount Procurement Planning Plugin
- Cage Management Plugin
- AutoCount Vehicle Plugin
- AutoCount Agent Validation Plugin User Guide
- AutoCount Barcode Generator Plugin User Guide
- AutoCount Easy Batch Number Entry Plugin User Guide
- Warranty 2.0 Plugin
- AutoCount Easy Photo 2.0 User Guide
- AutoCount Recurring Invoice Plugin User Guide
- AutoCount Scale Barcode Plugin User Guide
- AutoCount Recurrence Late Interest Plugin
- AutoCount Item Visibility Control
- AutoCount Bill Remark Plugin User Guide
- AutoCount Pain Tracker User Guide
- AutoCount Easy Payment
- AutoCount Easy Deposit Plugin
- AutoCount Easy Knock Off Plugin
- AutoCount Daily Collection Summary Plugin
- Timber Log Plugins
- Batch Transfer SODO Plugin
- AutoCount Plugin: Vege Basket Plugin
- AutoCount Plugin: Fruit Basket Plugin
- Show Remaining (15) Collapse
-
-
Form Template
-
Report Template
-
- Advance Quotation
- Cash Sale
- Consignment
- Consignment Movement
- Credit Note
- Debit Note
- Delivery Order
- FOC Quantity Analysis By Document Report
- Invoice
- Item Package Sales Report
- Monthly Sales Analysis
- Outstanding Sales Order Listing
- Profit And Loss Of Documents
- Quotation
- Sales Agent Contribution Report
- Sales Order
- Top/Bottom Sales Ranking
- Show Remaining (2) Collapse
-
- Available Stock Status Report
- Expired Item Batch Listing
- Inventory Physical Worksheet
- Stock Adjustment
- Stock Aging Report
- Stock Assembly
- Stock Assembly Order
- Stock Balance By Location
- Stock Balance Report
- Stock Card Report
- Stock Disassembly
- Stock Issue
- Stock Item Profit Margin
- Stock Movement Report
- Stock Receive
- Stock Take
- Stock Transfer
- Stock Write Off
- Show Remaining (3) Collapse
-
B2B ORDERING
-
AutoCount AI Agent
- Coming soon
Automate Your Factory Inventory Tracking with AutoCount Production Order and Stock Issues
(EN) AutoCount Production Order Plugin Video Guide
Why You Should Use It?
Enhanced Cost Transparency
By providing a granular view of sub-con wages and allowances, the plugin gives you total visibility and control over your true manufacturing margins.
Automated Document Conversion
Converting sales orders directly into production documents creates a seamless digital workflow that connects your sales team to the factory floor instantly.
Operational Efficiency
Eliminating manual data entry reclaims valuable administrative time, allowing your team to focus on production rather than paperwork.
Improved Data Integrity
Automating the calculation process removes the risk of human error, ensuring your production costs and requirements are always 100% accurate.
Who This Plugin is For?
Outsourced Manufacturers & Traders
Project & Labor Managers
Inventory & Logistics Coordinators
Features of the Plugin
Sub-Con Maintenance
Create and manage a database of sub-contractors, including their specific wage types and allowance rates
Sales Order Integration
Seamlessly pull finished goods requirements from existing Sales Orders to initiate production
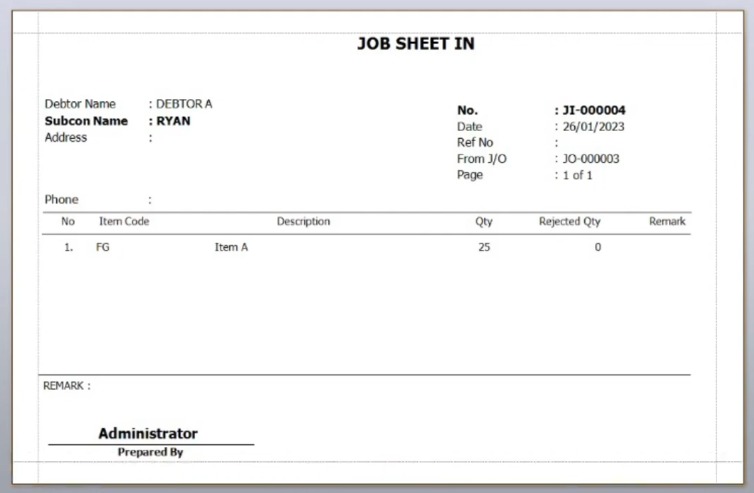
Job Sheet Management
Dual-stage tracking with Job Sheet Out (to sub-con) and Job Sheet In (receipt of goods), which automatically calculates total wages based on quantities
Step-by-Step Configuration
1. Sub-Contractor Setup
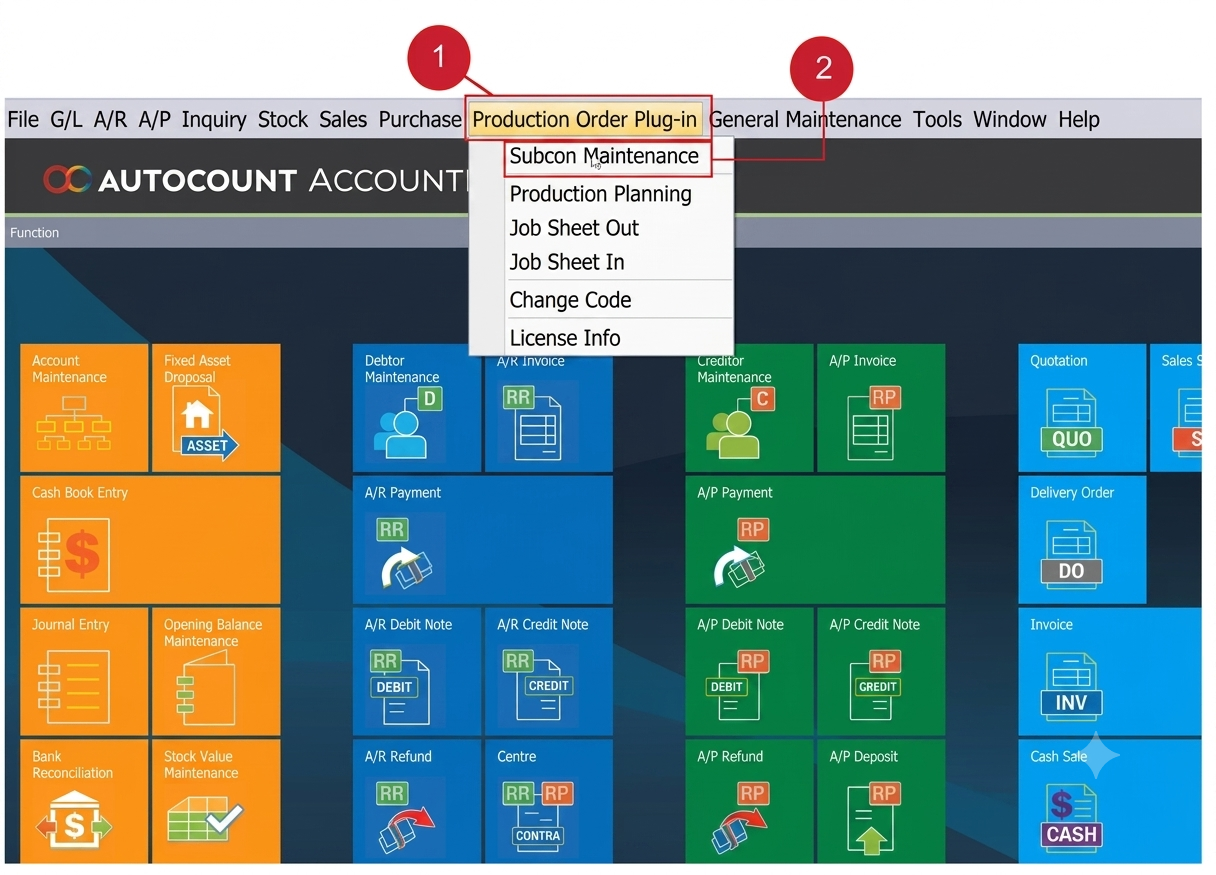
- Access Maintenance: Navigate to Production Order Plugin > Subcon Maintenance to manage your external labor profiles.
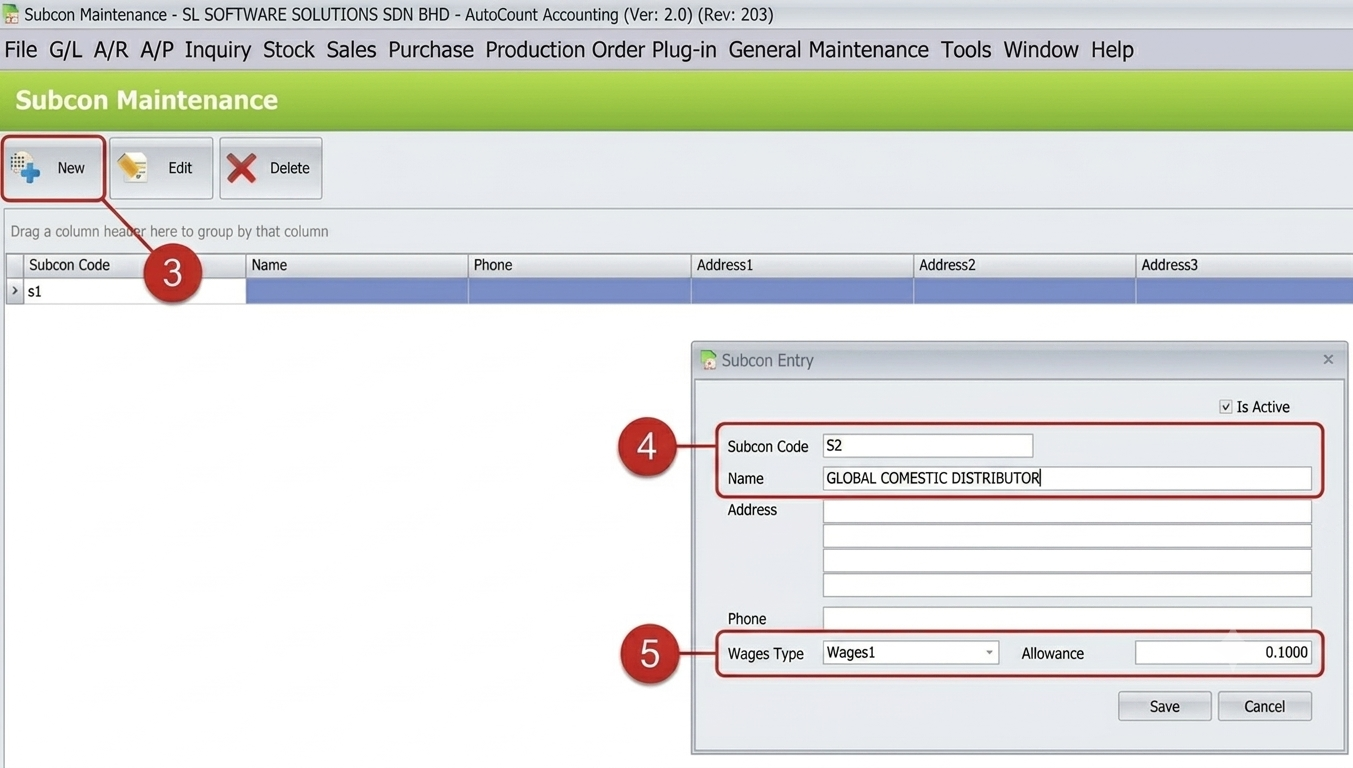
- Register New Subcon: Click New and enter the sub-contractor’s unique Code and Name.
- Set Labor Rates: Define the Wage Type and Allowance (e.g., 0.10) to automate cost calculations.
Pro Tip:
If a sub-contractor changes their rate, update it here first; the system won’t “retroactively” change old saved documents, protecting your historical data.
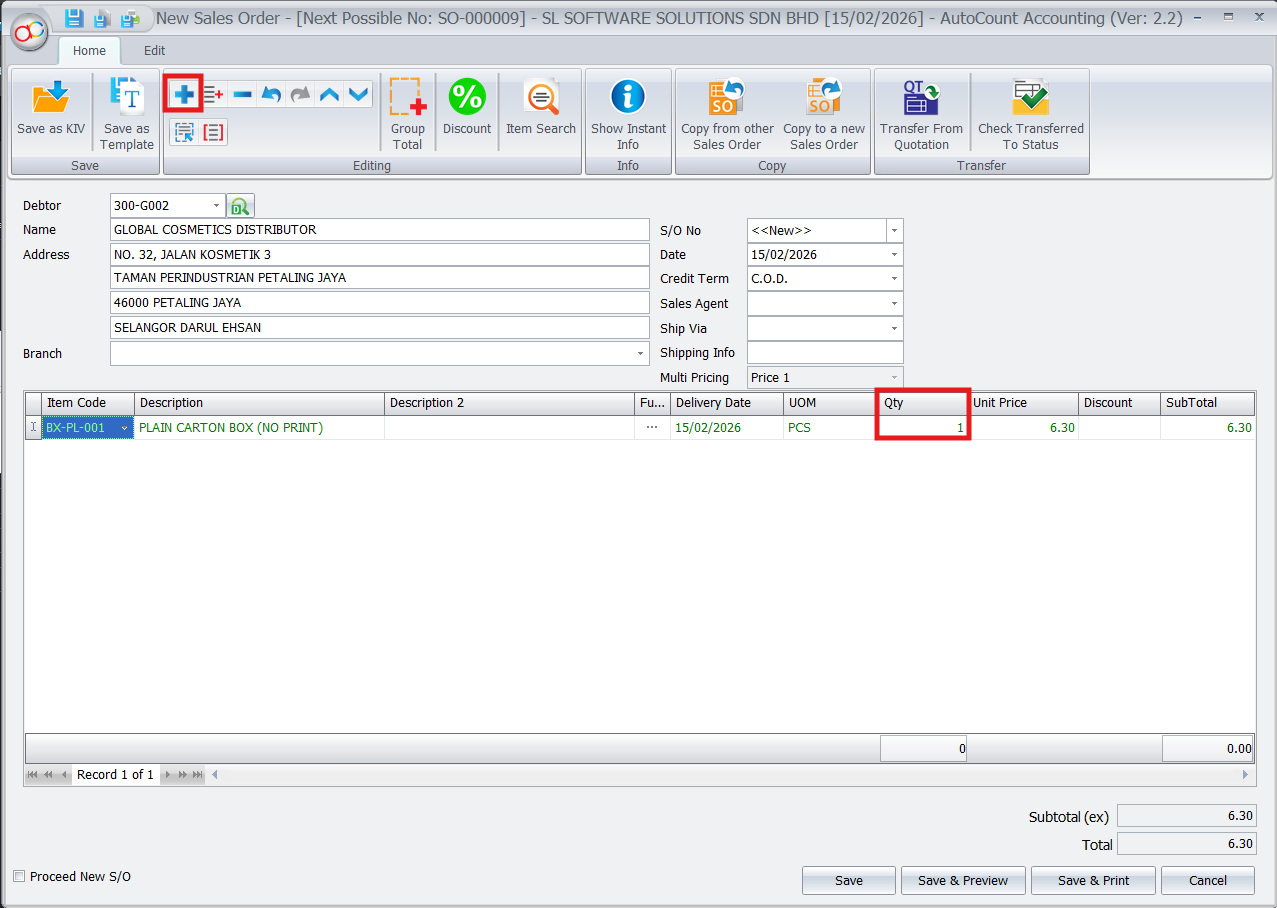
2. Preparing the Sales Order
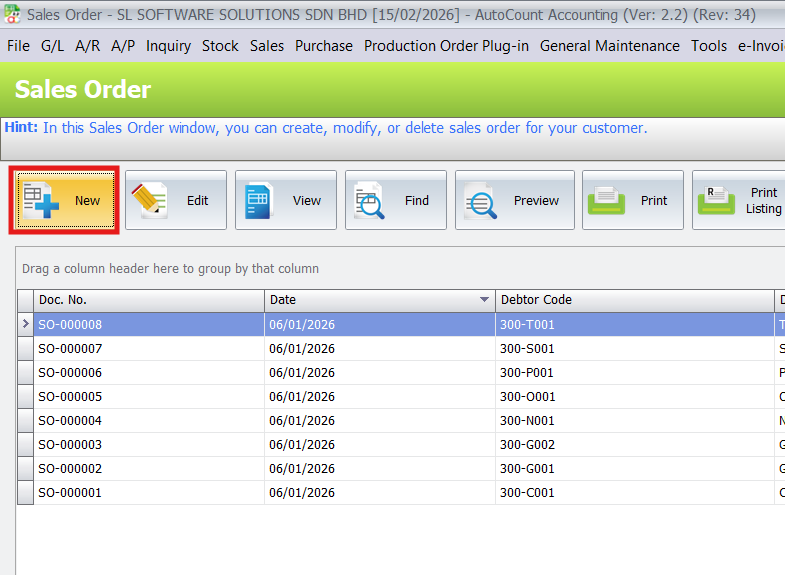
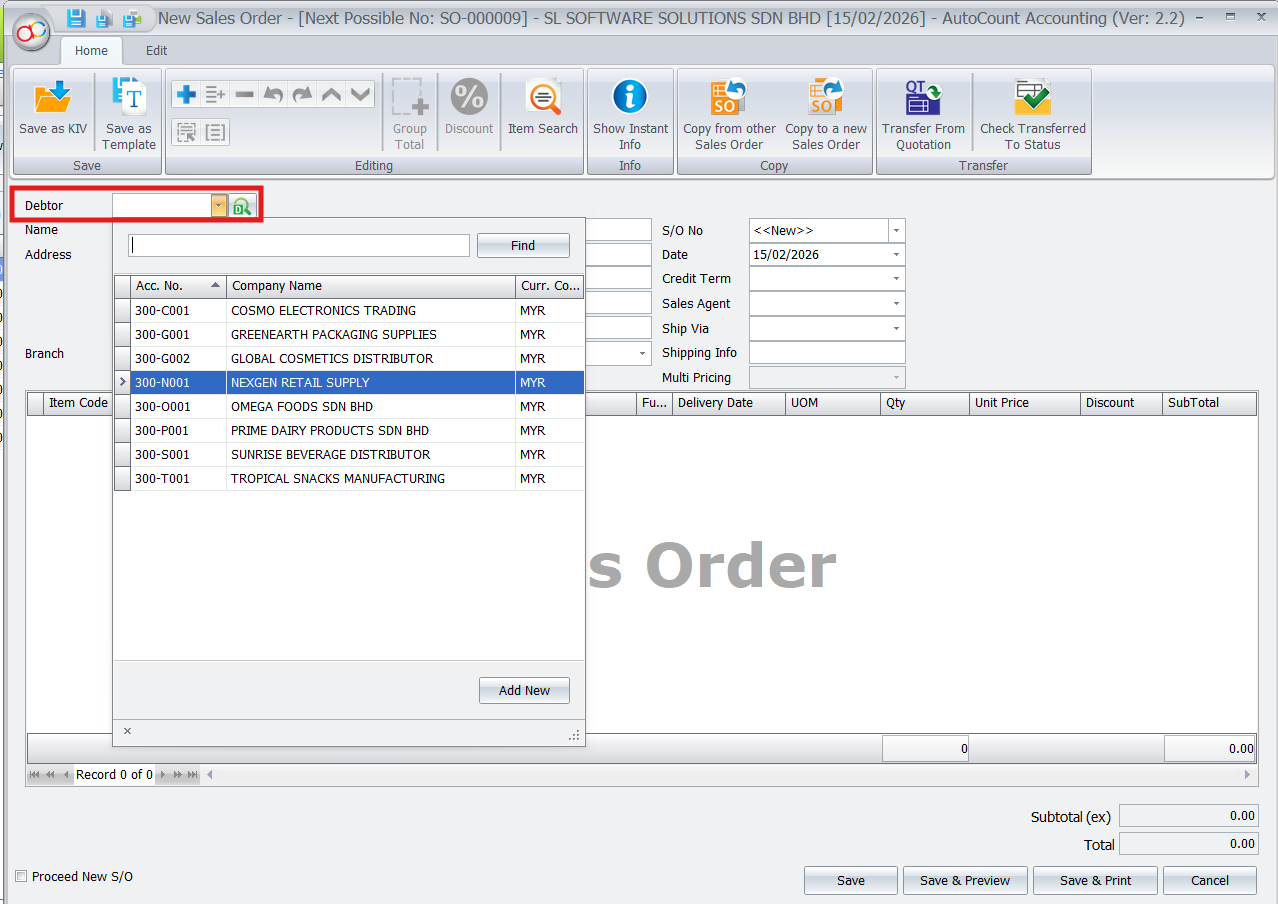
- Create Sales Order: Open the standard Sales > Sales Order menu and select your customer.
- Add Finished Goods: Input the Finished Goods item and the required Quantity (e.g., 25 units) then click Save.
Pro Tip:
Use the “Description” field in the Sales Order to note any special assembly instructions for the sub-contractor to see later.
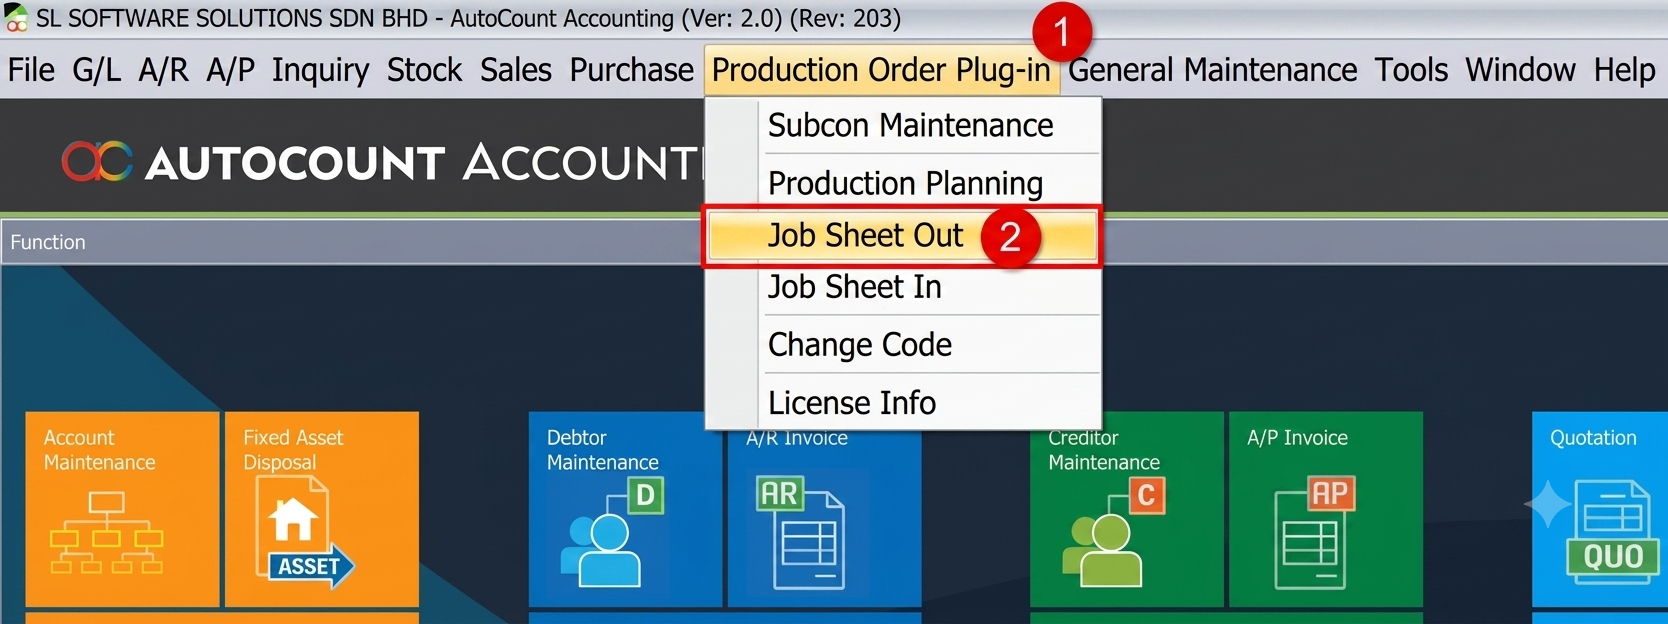
3. Issuing the Job Sheet Out
- Start Job Sheet: Go to Production Order Plugin > Job Sheet Out, click New, and select your Subcon Code.
- Sync with Sales: Click Convert from Sales Order and check the box for your document to pull the item details instantly.
- Finalize Wages: Key in the Wage amount; the system will automatically calculate the subtotal including the pre-set allowances.
Pro Tip:
If you are outsourcing to multiple sub-cons for one order, you can partially convert quantities into different Job Sheets.
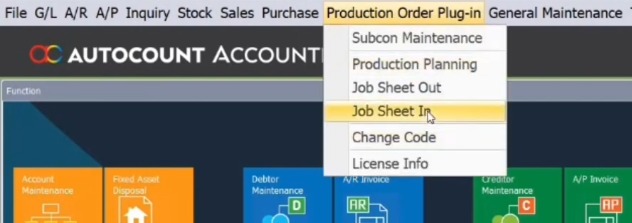
4. Completing the Production (Job Sheet In)
- Transfer Progress: Highlight your active Job Sheet Out and click Transfer to Job Sheet In once the task is finished.
- Update Inventory: Select the specific Location where the finished goods will be stored and click Save.
Pro Tip:
This step is what actually “increases” your stock count in AutoCount—don’t skip it, or your Sales team won’t be able to fulfill the delivery.
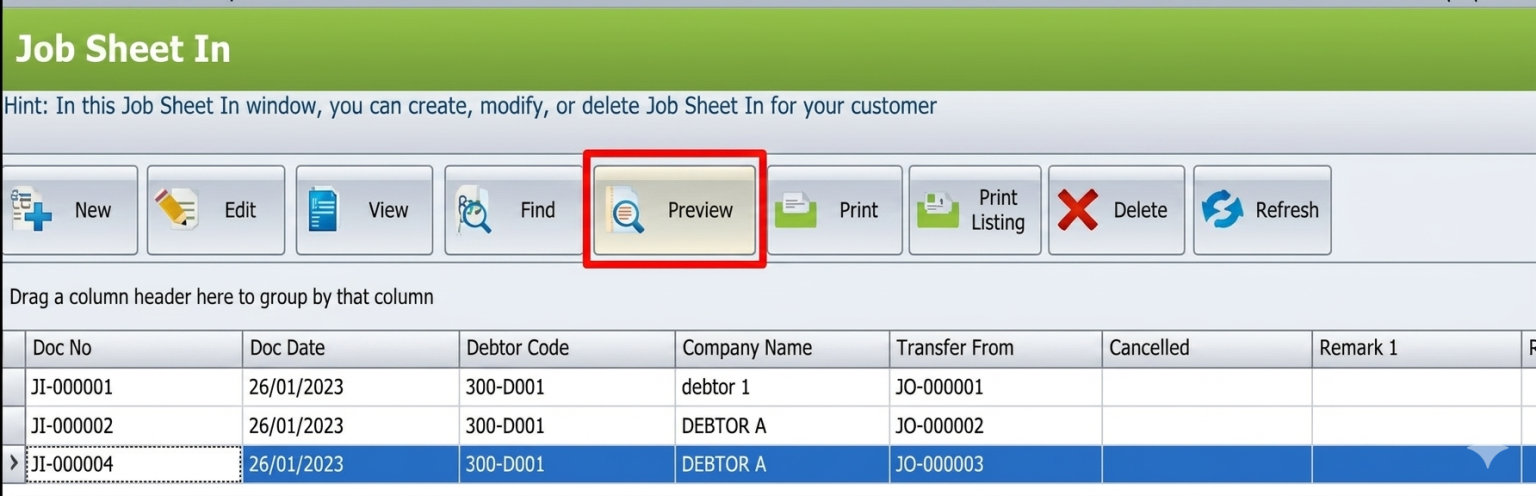
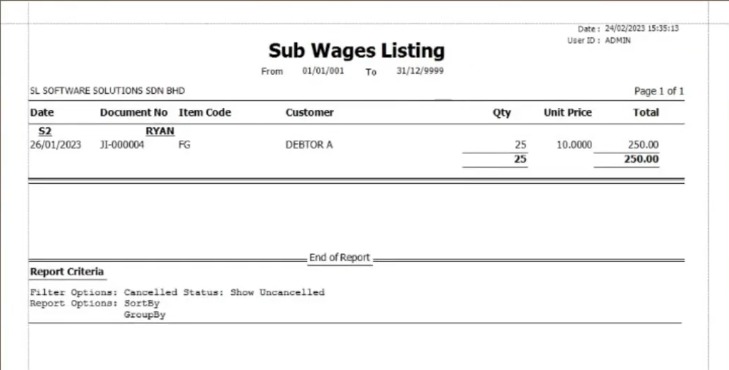
5. Reporting & Auditing
- Quick Preview: Click the Preview button on any document to view a summary of the individual transaction.
- Detailed Listings: Select Print Job Sheet In Listing and use the Inquiry tool to filter and review the detailed link between wages and production.

Conclusion
The AutoCount Production Order plugin serves as a pivotal tool in manufacturing and ERP systems, offering comprehensive solutions for managing and optimizing production processes. From streamlined order creation and material integration to resource allocation and real-time tracking, the plugin empowers businesses to achieve efficient and organized production execution. Therefore, by enhancing production planning, providing visibility into production order status, and ensuring accurate inventory management, the Production Order plugin contributes to improved operational efficiency, resource utilization, and informed decision-making throughout the production lifecycle.
Frequently Asked Questions
How do I start a new production task?
Go to the Production Order Plugin, select Job Sheet Out, and click New. You can then pull data directly from an existing Sales Order.
Can I change the sub-contractor's pay rate for a specific job?
Yes. While you can set a default rate in Sub-Con Maintenance, you can manually edit the Wage and Allowance fields on each individual Job Sheet.
How do I update my stock once the items are finished?
Open your Job Sheet Out, click Transfer to Job Sheet In, and save. This officially moves the finished items into your inventory location.
Where can I see a list of all my sub-contractors?
You can find and manage your list under Production Order Plugin > Sub-Con Maintenance.
Interested in Getting AutoCount for your Business?
Contact our sales team today to explore pricing options and get started with the perfect solution for you.