
Need Help?
Unicart+ / Topic 18 of 19
How SiteGiant Purchase Flow Posts to AutoCount GRN
Implementation steps, settings and original screenshots from the SiteGiant ERP–AutoCount integration guide.
Use this topic when the client creates a Purchase Order (PO) in AutoCount but receives goods in SiteGiant. After Stock In is completed in SiteGiant, the Unicart+ service automatically creates a Goods Received Note (GRN) in AutoCount.
Questions to Ask the Client
- Will staff create the PO in AutoCount and receive goods in SiteGiant?
- Which suppliers and warehouses will be used?
- From which date should the system check SiteGiant Stock In records?
A. One-Time Setup — Mapping and Service
Complete the setup before using purchase integration; review it again when Supplier, Warehouse, Item Mapping or service settings change.
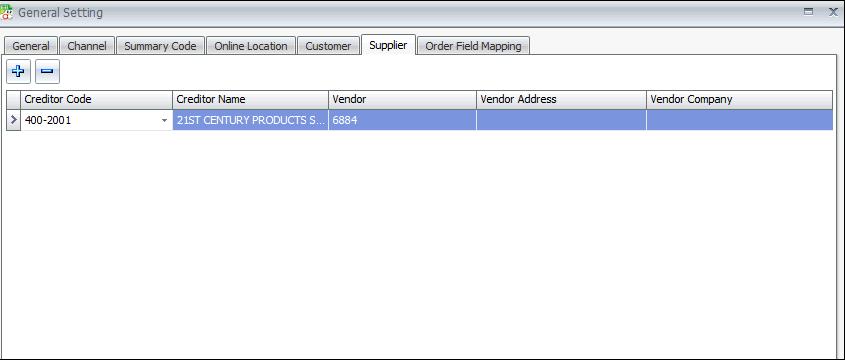
- Go to Unicart+ → General Settings → Supplier. Map the AutoCount Creditor Code to the correct SiteGiant Vendor, then save.
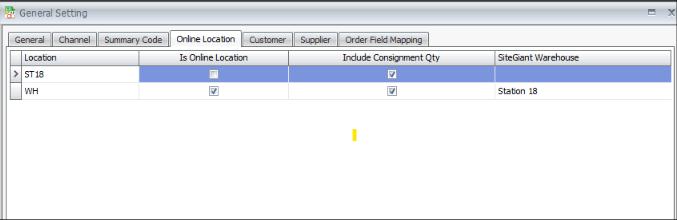
- Go to General Settings → Online Location. Confirm the AutoCount Purchase Location maps to the correct SiteGiant Warehouse.
- Confirm Item Codes and UOMs are mapped correctly. Refer to PDF Topics 03–04 for product mapping and Topic 14 for supplier mapping.
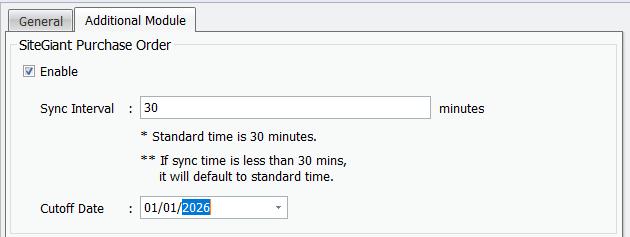
- Go to Unicart+ → Automation → Service Setting → Additional Module. Under SiteGiant Purchase Order, tick Enable; maintain Sync Interval and Cutoff Date.
- Click Save. On the server PC, go to Automation → Install Service, click Install / Update and confirm the service is Running.
| Setting | What to Set |
|---|---|
| Sync Interval | How often service checks for new Stock In records. Use 30 minutes or more. |
| Cutoff Date | Starting date for checking Stock In records. |
B. Create and Send the Purchase Order
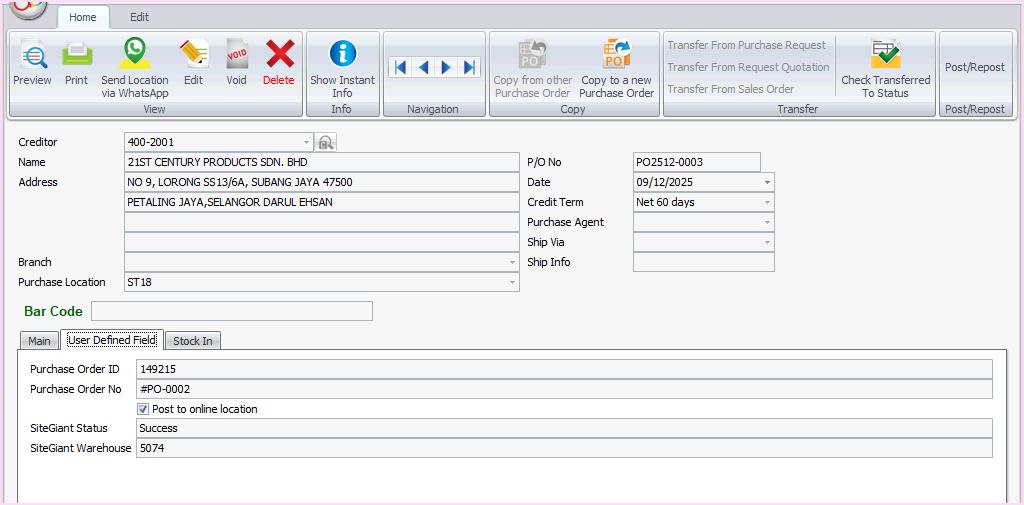
- In AutoCount, go to Purchase → Purchase Order and create the PO.
- Select correct Creditor, Purchase Location, Item Code, UOM and Quantity.
- Open the User Defined Field tab and tick Post to Online Location.
- Save and check for Posted Successfully.
- Open SiteGiant and confirm the PO appears.
C. Receive the Goods and Complete Stock In
First, record how much stock has arrived. After saving the Purchase Order, add the received goods into the correct warehouse using Stock In.
- Open the Purchase Order in SiteGiant.
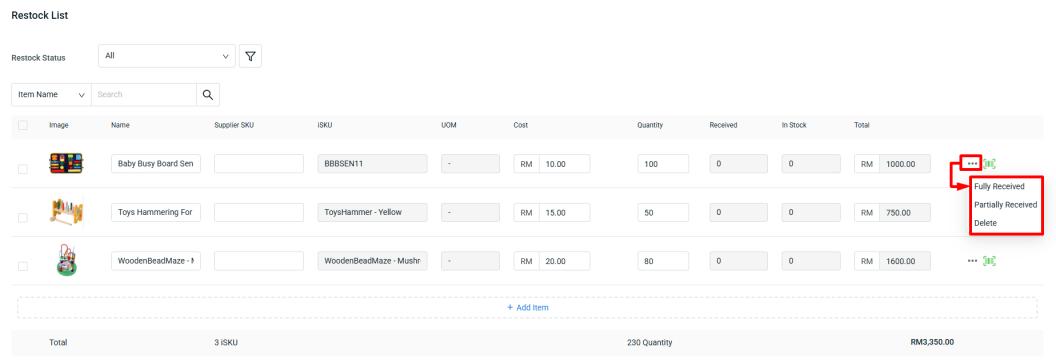
- Click … beside the item. Choose Fully Received if all ordered quantities arrived, or Partially Received and enter actual received quantity if only some arrived.
- Click Save to update the Purchase Order.
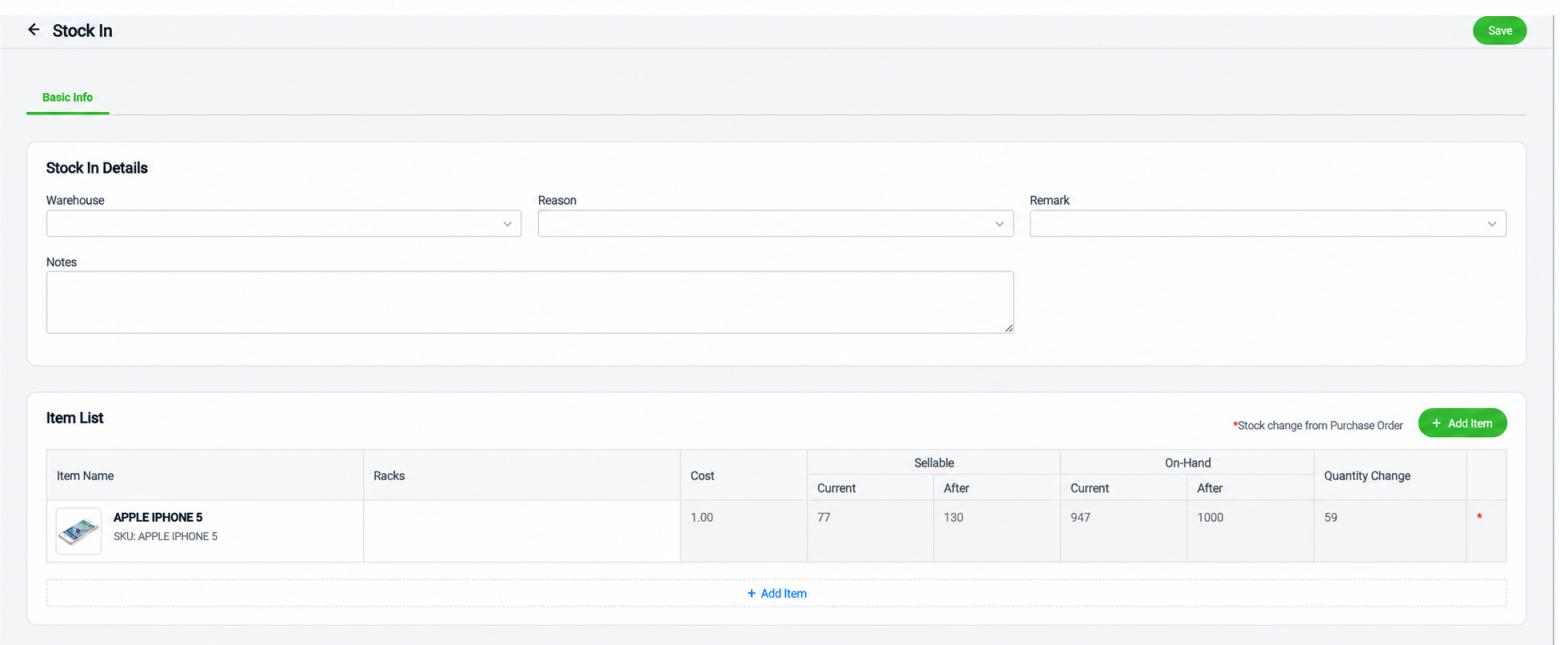
- On the Purchase Order page, click Stock In.
- Check the Warehouse, Reason, items and quantities.
- Click Save and confirm Stock In created appears.
| Option | When to Use |
|---|---|
| Fully Received | All ordered quantities for that item have arrived. |
| Partially Received | Only part arrived; enter actual received quantity. |
D. Check the AutoCount GRN
After Stock In is saved, Unicart+ creates the GRN automatically according to its configured Sync Interval.
- Wait for the service to process Stock In according to its Sync Interval.
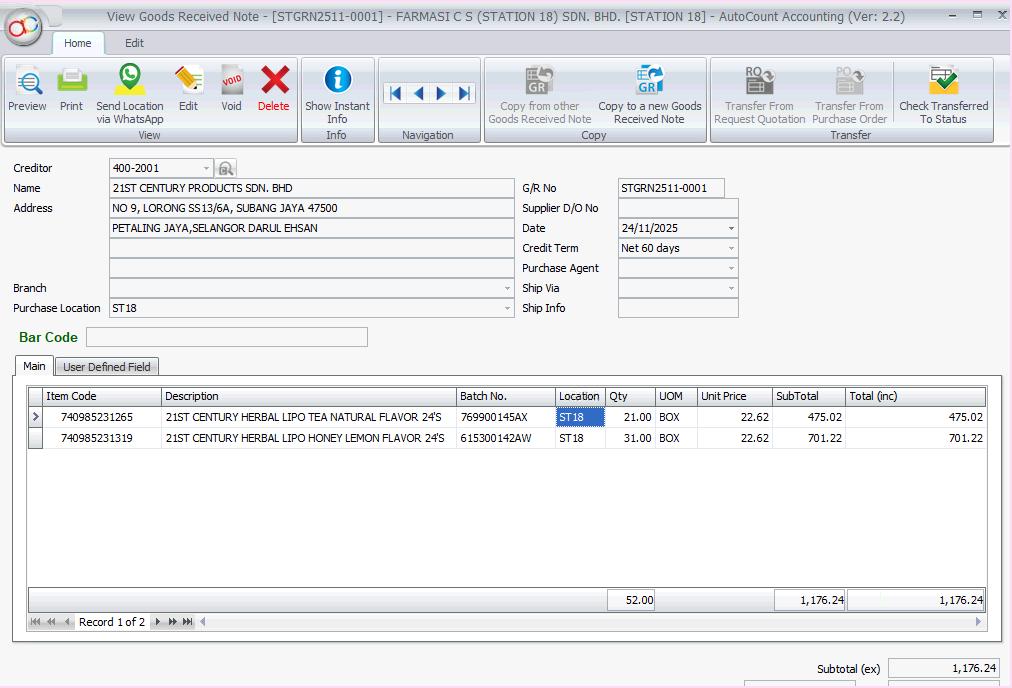
- Go to AutoCount → Purchase → Goods Received Note.
- Check Creditor, Purchase Location, Item Code, UOM, received quantity and PO reference.
Troubleshooting / Common Errors
| Issue | What to Do |
|---|---|
| PO does not appear in SiteGiant | Check Post to Online Location, Supplier Mapping, Online Location and Product Mapping. |
| Vendor cannot be selected | Confirm Vendor exists in SiteGiant, then update Supplier Mapping. |
| GRN is not created | Confirm Stock In was saved, purchase service enabled and Running. Check Sync Interval and Cutoff Date. |
| Wrong warehouse | Check Online Location mapping and Warehouse selected during Stock In. |
| Wrong item, UOM or quantity | Check Product Mapping, actual received quantity and Fully Received / Partially Received selection. |