
Need Help?
Unicart+ / Topic 08 of 19
How to Sync Stock from AutoCount to SiteGiant: Manual or Automatic
Implementation steps, settings and original screenshots from the SiteGiant ERP–AutoCount integration guide.
PDF TOPIC 08
How to Sync Stock from AutoCount to SiteGiant: Manual or Automatic
Stock synchronization works in one direction only: AutoCount → SiteGiant. Complete one Manual Stock Sync first, and enable Automatic Stock Sync only after verifying the manual result.
Stock Sync Options
| Option | Use When | Flow |
|---|---|---|
| Manual Stock Sync | For the first test or when stock is updated only when required | Stock Listing → Inquiry → Check → Confirm |
| Automatic Stock Sync | When selected items should update automatically after AutoCount stock movement | Enable Sync Stock → Install Service → Select Auto Sync Items |
Questions to Ask the Client
- Which AutoCount Location should update each SiteGiant Warehouse?
- Does the client require Manual or Automatic Stock Sync?
- Which stock calculation settings should be used?
Detailed Steps — One-Time Setup
01
Confirm that AutoCount opening stock or stock take is correct.
02
Confirm that each SiteGiant iSKU is mapped to the correct AutoCount Item Code and UOM.
03
Make sure Duplicate iSKU = 0.
04
Go to Unicart+ → General Settings → General and check the required stock settings.
05
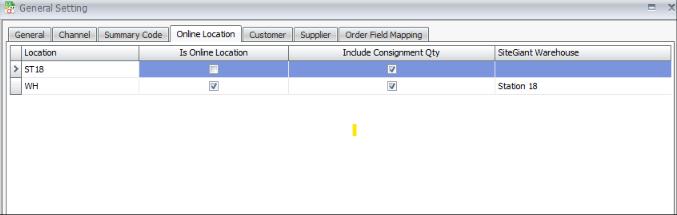
Go to General Settings → Online Location.
06
Select or enable the AutoCount Location as an Online Location.
07
Map it to the correct SiteGiant Warehouse.
08
Click Save.
Stock Calculation Settings
| Setting | Effect |
|---|---|
| Include SO Quantity for Stock Sync | Includes AutoCount Sales Order quantity in the stock calculation. |
| Sync Stock Percentage | Syncs the selected percentage of the calculated AutoCount stock. The default is 100%. |
| Include Other UOM for Stock Sync | Converts other UOM quantities into the Base UOM and adds them to the total quantity. |
| Include Unposted Quantity for Stock Sync | Deducts SiteGiant quantities that have been released but are not yet posted to AutoCount. |
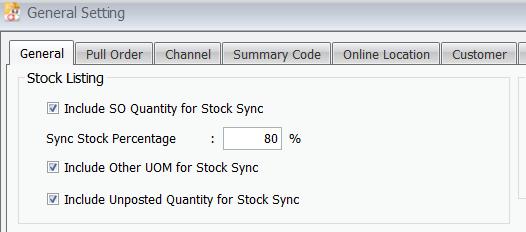
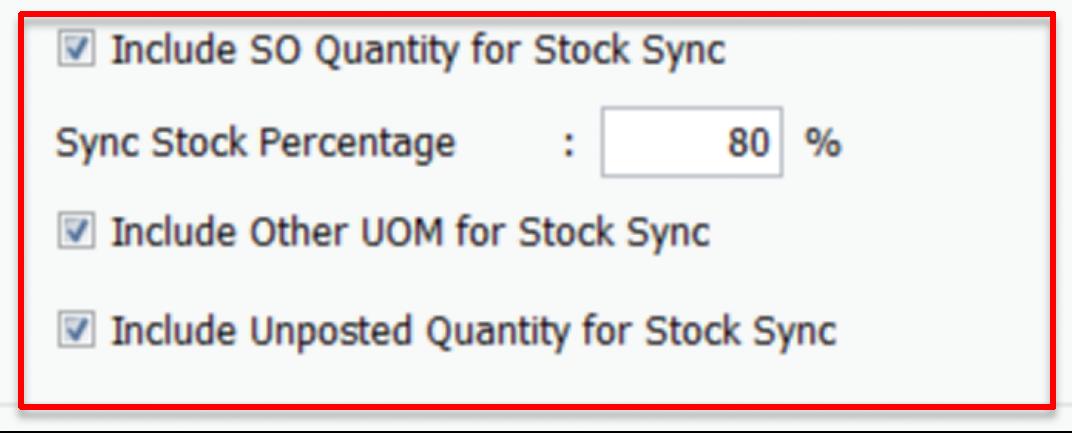
Refer to Topic 09 for the full stock calculation logic.
A. Manual Stock Sync
01
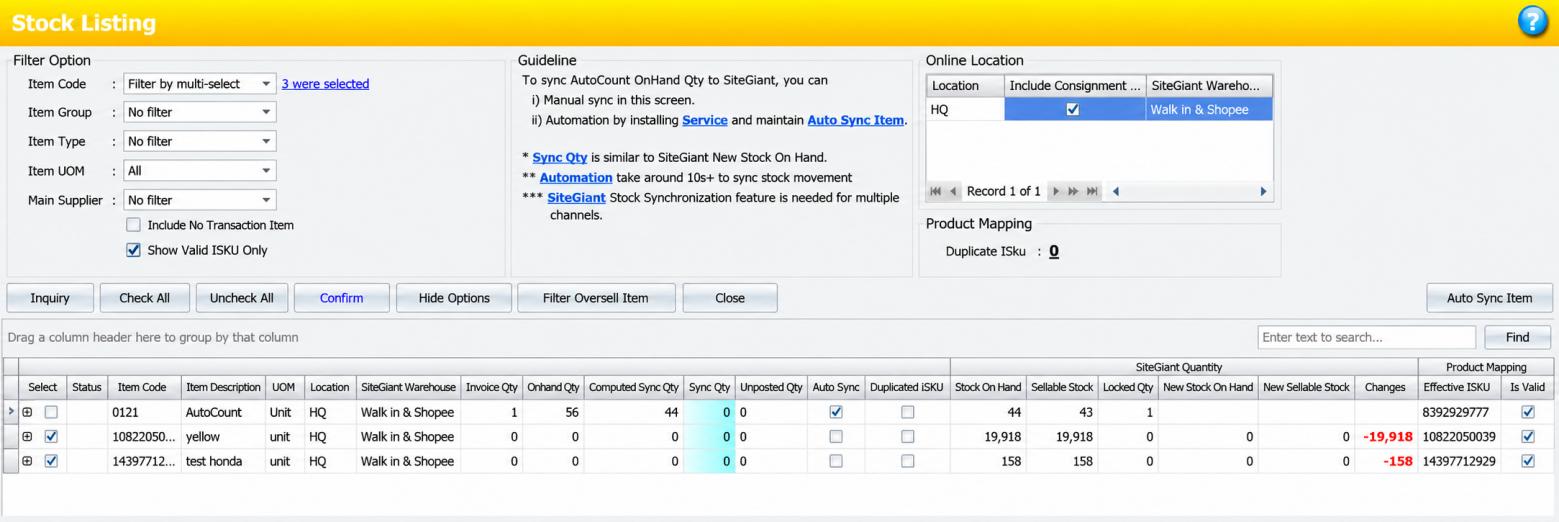
Go to Unicart+ → Stock Listing.
02
Set the required filters.
03
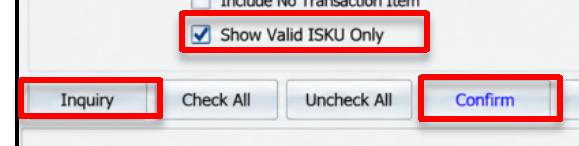
Tick Show Valid iSKU Only.
04
If an item has no stock movement, tick Include No Transaction Item.
05
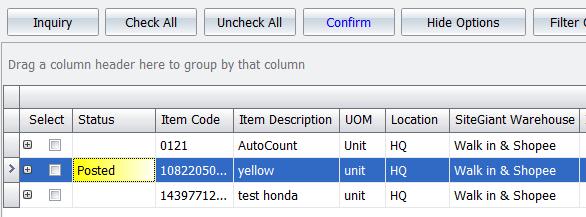
Click Inquiry.
06
Check: AutoCount Location and SiteGiant Warehouse; Item Code, UOM and iSKU; Duplicate iSKU = 0; and Computed Sync Qty.
07
Untick any item that should not be synchronized.
08
Click Confirm.
09
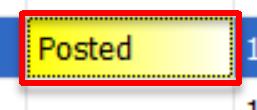
Confirm that Posted Successfully appears.
10
Check the updated quantity in SiteGiant.
B. Automatic Stock Sync
Complete a successful Manual Stock Sync before continuing.
01
Go to Unicart+ → Automation → Service Setting.
02
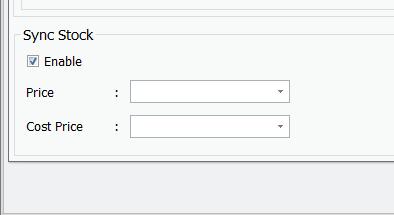
Enable Sync Stock and click Save.
03
Go to Automation → Install Service.
04
Click Install / Update and confirm the service is Running.
05
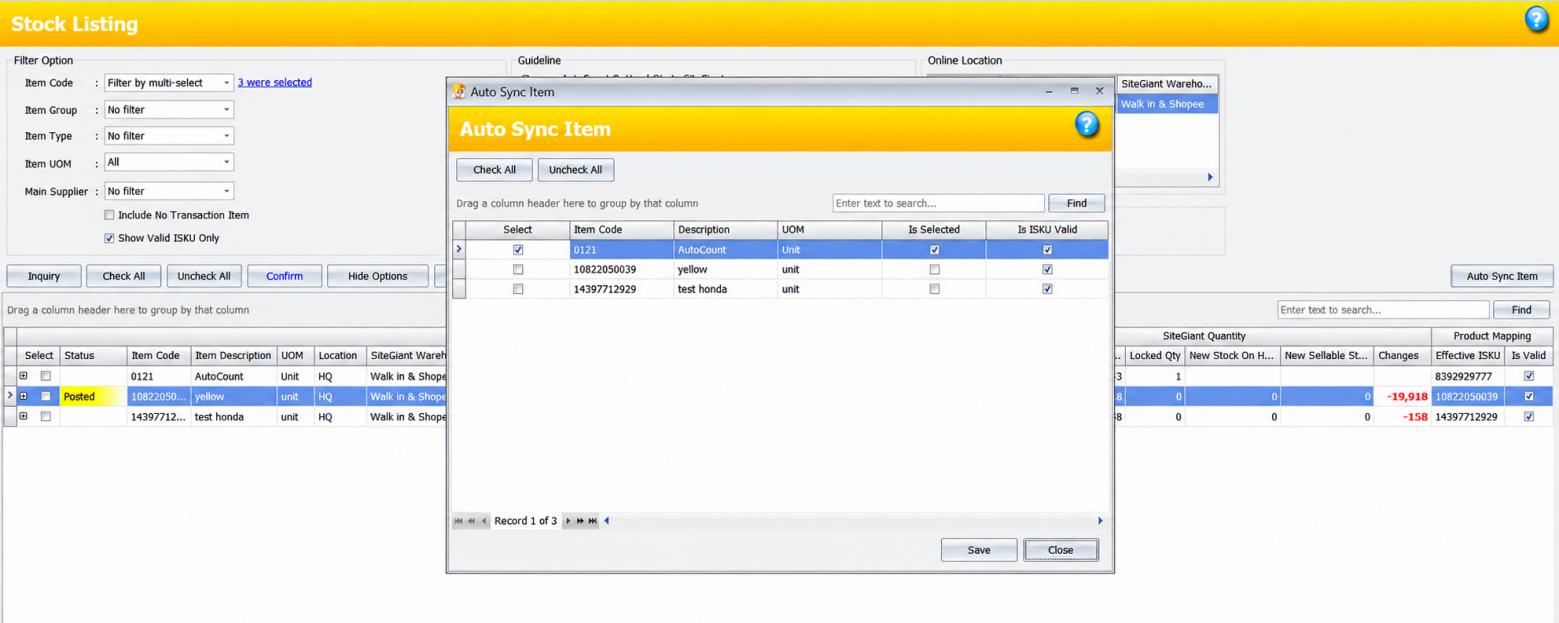
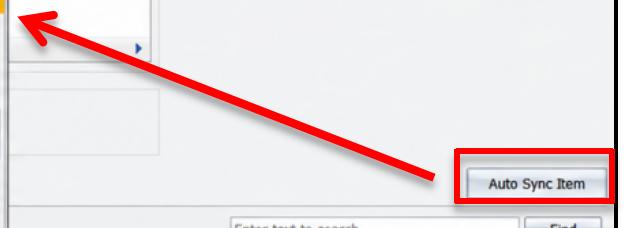
Go to Stock Listing → Auto Sync Item.
06
Select the items that should sync automatically and save.
07
Make one controlled stock movement in AutoCount.
08
Check that SiteGiant receives the updated quantity.
Troubleshooting / Common Errors
| Issue | What to Do |
|---|---|
| Item does not appear in Stock Listing | Check iSKU mapping and filters. Enable Include No Transaction Item if there is no stock movement. |
| Duplicate iSKU is not zero | Do not sync. Correct duplicate mapping and run Inquiry again. |
| Stock quantity is incorrect | Check Location, UOM conversion and calculation settings. Refer to Topic 09. |
| Stock updates the wrong warehouse | Correct General Settings → Online Location mapping. |
| Automatic Stock Sync is not working | Check Sync Stock enabled, service Running, Auto Sync Item selection and AutoCount stock movement. |
| New item does not appear in Stock Listing | Check Product Mapping, rerun Inquiry and tick Include No Transaction Item if the item has no stock transaction. |